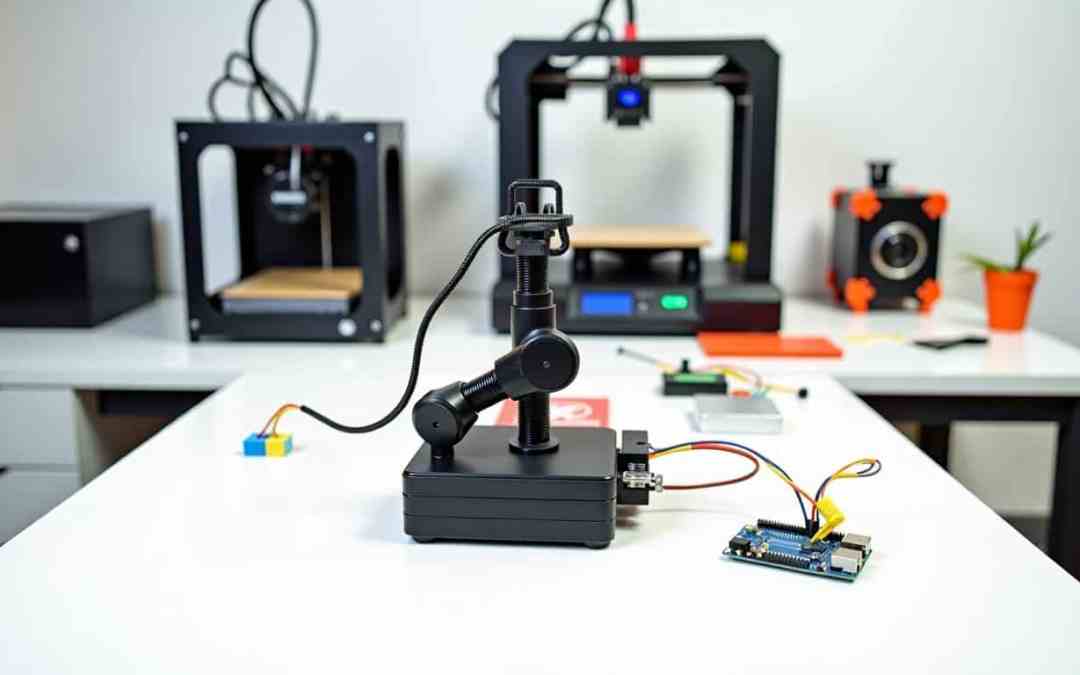
How to Build a 3D Printed Robotic Arm with Arduino: Easy Guide for Beginners
Creating a robotic arm can be an exciting step into the world of robotics, particularly with the integration of 3D printing and Arduino technology. This guide will walk you through the entire process—from design to assembly and programming—empowering you to build a functional 3D printed robotic arm.
Introduction
In this tutorial, you’ll learn how to create a 3D printed robotic arm controlled by an Arduino. Perfect for beginners and hobbyists, this project introduces essential concepts of robotics, 3D printing, and programming while allowing for personalization and creativity. By the end, you’ll have a robotic arm capable of basic movements, ready to tackle more complex challenges!
Materials Needed
- Hardware:
- 3D printer
- Arduino board (Arduino Uno or Nano)
- Servo motors (e.g., MG996R for heavier segments, SG90 for lighter ones)
- Ball bearings
- Screws, bolts, and nuts
- Power supply (optional separate for servos)
- Software:
- 3D modeling software (e.g., SolidWorks, Blender)
- Arduino IDE for coding
Step 1: Design the Robot Arm
- Modeling: Utilize a CAD program to design the arm components ensuring to include:
- Base
- Arm segments
- Gripper mechanism
- Degrees of Freedom: Aim for a design that offers at least five degrees of freedom (waist, shoulder, elbow, wrist roll, and wrist pitch) for versatile movements.
Step 2: 3D Print the Parts
After finalizing your design, send it to your 3D printer. Note that print time varies based on the part complexity and printer settings.
Assembling the Robot Arm
Step 3: Assemble the Arm Segments
Begin with the base and attach the first servo motor using screws. Align and securely fasten each arm segment to the corresponding servo using bolts.
Step 4: Build the Gripper Mechanism
Attach smaller servos to build your gripper, using bolts to secure the mechanism at the last segment of the arm.
Step 5: Add Ball Bearings
Insert ball bearings into the joints of the arm segments to enable smooth rotation, ensuring they fit without causing friction.
Electronic Components and Wiring
Step 6: Prepare the Electronics
Set up your Arduino and connect the servo motors with male headers. Make sure to provide adequate power to each servo, considering a separate power supply if needed.
Step 7: Build the Circuit Board
Create a circuit board to manage connections neatly. Secure connections with solder and ensure proper routing for signals.
Step 8: Connect Everything
Plug in the servo signal wires to the Arduino and any additional components as needed (e.g., buttons, sensors).
Programming the Arduino
Step 9: Write and Upload the Code
Open the Arduino IDE and write code to control servo motors, incorporating necessary libraries. Upload the code and test each servo to ensure proper functionality.
Control and Automation
Step 10: Implement Control Mechanisms
Decide whether to control the robot arm using a smartphone app or physical buttons. Ensure that the method chosen is properly integrated with your Arduino setup.
Tips for Design
- Material Selection: Choose durable 3D printing materials (PLA or ABS) for better performance.
- Servo Selection: Match servo strength to the weight of arm segments to ensure reliable movements.
- Clearance: Maintain clearance between components to avoid obstructions during movement.
Troubleshooting Common Issues
Servo Misalignment
Verify that servos are correctly aligned; misalignment can cause wobbling.
Power Issues
Check that servos receive sufficient power. A dedicated power supply can mitigate voltage drop issues.
Code Errors
Conduct code tests individually before full assembly to troubleshoot any unexpected behavior.
Mechanical Issues
Regularly inspect for loose parts or obstructions, ensuring all connections are secure.
Conclusion
With these instructions, you’re now equipped to build and program a 3D printed robotic arm controlled by Arduino. Don’t hesitate to experiment with your design and programming to enhance functionality. Share your creations with the community, and explore further into robotics!
Happy building! If you have any questions or need additional resources, feel free to reach out or browse through the links provided throughout this guide for deeper insights into each topic.


