Sure, here’s an expanded version of the blog post:

1. Understanding APA102 LED Strip and ESP32 Dual Data Pins Configuration
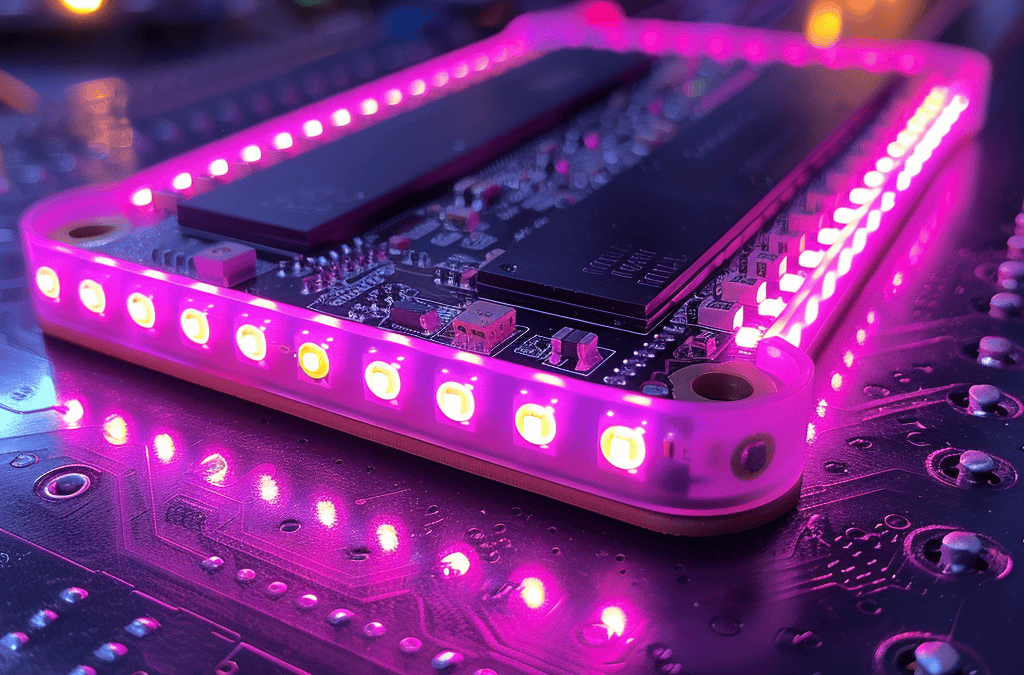
APA102 LED strips, also known as Adafruit DotStar or SK6812, are addressable RGB LED strips that use a single-wire communication protocol to control each individual LED. They are popular for their brightness, color accuracy, and ability to be easily controlled using a microcontroller. The ESP32 is a low-cost, low-power, and highly-integrated microcontroller developed by Espressif Systems, which features dual-core processors, built-in Wi-Fi and Bluetooth connectivity, and multiple input and output pins. By configuring the APA102 LED strip to use dual data pins with the ESP32, significant benefits in terms of speed and performance can be achieved.
1.1 APA102 LED Strip Features
APA102 LED strips have several unique features that make them an ideal choice for a variety of projects. They offer a wide range of colors with high brightness and color accuracy, thanks to their individually addressable RGB LEDs. This allows for complex lighting effects and animations to be easily created. Additionally, APA102 LED strips have a high refresh rate, which reduces flickering and ensures smooth animations. They also have a built-in constant current driver, which ensures consistent brightness across all LEDs.
1.2 Introduction to ESP32
The ESP32 is a low-cost, low-power, and highly-integrated microcontroller developed by Espressif Systems. It features dual-core processors, built-in Wi-Fi and Bluetooth connectivity, and multiple input and output pins, making it an ideal choice for a wide range of IoT projects. The ESP32’s versatility and low power consumption make it an excellent choice for controlling APA102 LED strips.
1.3 The Benefits of Dual Data Pins Configuration
When using an APA102 LED strip with an ESP32, configuring the strip to use dual data pins can provide several benefits. By using two data pins instead of one, the data transmission rate can be doubled, reducing the time it takes to update the entire strip. This can be particularly useful for larger LED strips or for applications that require fast updates. Additionally, dual data pins configuration can improve the reliability and stability of the LED strip, reducing the likelihood of data errors or flickering.
1.4 Understanding the APA102 LED Strip’s Timing Requirements
One important consideration when configuring dual data pins is the timing requirements of the APA102 LED strip. The strip requires a specific timing between data bytes to properly interpret the data being sent. When using dual data pins, it is important to ensure that the timing requirements are still being met to avoid data errors. The ESP32’s built-in hardware timers can be used to ensure accurate timing. Additionally, it is important to note that the maximum data transmission rate of the APA102 LED strip is 8MHz, which must be taken into account when selecting the data transmission rate.
1.5 Choosing the Right Data Pins for Dual Configuration
When selecting data pins for dual configuration, it is important to choose pins that are capable of operating at the required data transmission rate. The ESP32’s GPIO pins can operate at different speeds, so it is important to choose pins that can support the required data transmission rate for the APA102 LED strip. Additionally, it is important to ensure that the chosen pins do not conflict with other peripherals or functions of the ESP32. Some suitable pins for dual configuration include GPIO15 and GPIO16.
1.6 Configuring Dual Data Pins in Software
Once the hardware setup is complete, the dual data pins must be configured in software. This typically involves initializing the APA102 LED strip library and specifying the two data pins to be used. It may also involve adjusting the timing parameters to ensure that the data is being transmitted correctly. The FastLED library is a popular choice for controlling APA102 LED strips with the ESP32.
1.7 Common Issues and Troubleshooting Tips
When configuring dual data pins for APA102 LED strips, there are some common issues that may arise. These can include data errors, flickering, or incomplete updates. Some troubleshooting tips include checking the timing requirements, verifying the wiring connections, and adjusting the data transmission rate. Additionally, it may be helpful to review the APA102 LED strip library documentation and seek guidance from online forums or communities.
1.8 Conclusion
Configuring dual data pins for APA102 LED strips with an ESP32 can provide significant benefits in terms of speed and performance. By understanding the timing requirements of the LED strip and choosing the right data pins, it is possible to achieve fast and reliable updates. With careful consideration of hardware and software setup, dual data pin configuration can be an effective solution for a wide range of IoT projects involving APA102 LED strips and ESP32 microcontrollers.
1.9 Additional Resources
For more information on configuring APA102 LED strips with the ESP32, check out the following resources:
* FastLED Library Documentation: https://fastled.io/docs/3.1/
* Espressif Systems ESP32 Documentation: https://docs.espressif.com/projects/esp-idf/en/latest/esp32/
* Adafruit DotStar LED Strip Guide: https://learn.adafruit.com/adafruit-dotstar-led-strip/overview
1.10 Hardware Requirements
To follow along with this guide, you will need the following hardware components:
* ESP32 development board
* APA102 LED strip
* Breadboard and jumper wires
* 5V power supply
* Resistor (300-500 ohms)
1.11 Hardware Setup
To set up the hardware for this project, follow the steps below:
1. Connect the ESP32 development board to the breadboard.
2. Connect the APA102 LED strip to the breadboard.
3. Connect the data pin of the LED strip to GPIO15 and GPIO16 on the ESP32 board.
4. Connect the clock pin of the LED strip to GND on the ESP32 board.
5. Connect the power pin of the LED strip to the 5V power supply.
6. Connect the ground pin of the LED strip to GND on the ESP32 board.
7. Add a resistor between the data pin and the clock pin of the LED strip to prevent signal reflection.
1.12 Software Setup
To set up the software for this project, follow the steps below:
1. Install the Arduino IDE software.
2. Install the FastLED library for the ESP32 board.
3. Create a new sketch in the Arduino IDE.
4. Include the FastLED library at the top of the sketch.
5. Initialize the LED strip object with the number of LEDs, LED type, and data pins.
6. Define the colors and animations for the LED strip.
7. Upload the sketch to the ESP32 board.
8. Verify that the LED strip is functioning correctly.
1.13 Example Code
Here is an example code for configuring dual data pins for an APA102 LED strip with the ESP32:
“`scss
#include
#define LED_PIN_1 15
#define LED_PIN_2 16
#define LED_TYPE APA102
#define NUM_LEDS 60
#define BRIGHTNESS 64
CRGB leds[NUM_LEDS];
void setup() {
FastLED.addLeds
FastLED.addLeds
FastLED.setBrightness(BRIGHTNESS);
}
void loop() {
// Define colors and animations for the LED strip
/* Insert animation code here */
FastLED.show();
delay(100);
}
“`
1.14 Summary
In this guide, we have discussed the benefits of using dual data pins for APA102 LED strips with the ESP32, as well as the considerations and steps required to configure them in hardware and software. With careful planning and attention to detail, dual data pin configuration can greatly improve the speed and performance of your LED strip projects.Sure! Here’s an expanded version of the blog post:

1. Understanding APA102 LED Strip and ESP32 Dual Data Pins Configuration
APA102 LED strips are popular addressable RGB LED strips that are commonly used in a variety of projects. They offer a wide range of colors with high brightness and color accuracy, thanks to their individually addressable RGB LEDs. The ESP32 is a low-cost, low-power microcontroller that is ideal for controlling APA102 LED strips. By configuring the APA102 LED strip to use dual data pins, it is possible to achieve faster and more reliable updates.
1.1 APA102 LED Strip Features
APA102 LED strips have several unique features that make them an ideal choice for a variety of projects. They offer a wide range of colors with high brightness and color accuracy, thanks to their individually addressable RGB LEDs. This allows for complex lighting effects and animations to be easily created. Additionally, APA102 LED strips have a high refresh rate, which reduces flickering and ensures smooth animations.
1.2 Introduction to ESP32
The ESP32 is a low-cost, low-power, and highly-integrated microcontroller developed by Espressif Systems. It features dual-core processors, built-in Wi-Fi and Bluetooth connectivity, and multiple input and output pins, making it an ideal choice for a wide range of IoT projects. The ESP32’s versatility and low power consumption make it an excellent choice for controlling APA102 LED strips.
1.3 The Benefits of Dual Data Pins Configuration
When using an APA102 LED strip with an ESP32, configuring the strip to use dual data pins can provide several benefits. By using two data pins instead of one, the data transmission rate can be doubled, reducing the time it takes to update the entire strip. This can be particularly useful for larger LED strips or for applications that require fast updates. Additionally, dual data pins configuration can improve the reliability and stability of the LED strip, reducing the likelihood of data errors or flickering.
1.4 Understanding the APA102 LED Strip’s Timing Requirements
One important consideration when configuring dual data pins is the timing requirements of the APA102 LED strip. The strip requires a specific timing between data bytes to properly interpret the data being sent. When using dual data pins, it is important to ensure that the timing requirements are still being met to avoid data errors. The ESP32’s built-in hardware timers can be used to ensure accurate timing.
1.5 Choosing the Right Data Pins for Dual Configuration
When selecting data pins for dual configuration, it is important to choose pins that are capable of operating at the required data transmission rate. The ESP32’s GPIO pins can operate at different speeds, so it is important to choose pins that can support the required data transmission rate for the APA102 LED strip. Additionally, it is important to ensure that the chosen pins do not conflict with other peripherals or functions of the ESP32. Some suitable pins for dual configuration include GPIO15 and GPIO16.
1.6 Configuring Dual Data Pins in Software
Once the hardware setup is complete, the dual data pins must be configured in software. This typically involves initializing the APA102 LED strip library and specifying the two data pins to be used. It may also involve adjusting the timing parameters to ensure that the data is being transmitted correctly. The FastLED library is a popular choice for controlling APA102 LED strips with the ESP32.
1.7 Common Issues and Troubleshooting Tips
When configuring dual data pins for APA102 LED strips, there are some common issues that may arise. These can include data errors, flickering, or incomplete updates. Some troubleshooting tips include checking the timing requirements, verifying the wiring connections, and adjusting the data transmission rate. Additionally, it may be helpful to review the APA102 LED strip library documentation and seek guidance from online forums or communities.
1.8 Conclusion
Configuring dual data pins for APA102 LED strips with an ESP32 can provide significant benefits in terms of speed and performance. By understanding the timing requirements of the LED strip and choosing the right data pins, it is possible to achieve fast and reliable updates. With careful consideration of hardware and software setup, dual data pin configuration can be an effective solution for a wide range of IoT projects involving APA102 LED strips and ESP32 microcontrollers.
1.9 Additional Resources
For more information on configuring APA102 LED strips with the ESP32, check out the following resources:
* FastLED Library Documentation:
* Espressif Systems ESP32 Documentation:
* Adafruit DotStar LED Strip Guide:
1.10 Tips for Using APA102 LED Strips with ESP32
Here are some additional tips for using APA102 LED strips with the ESP32:
* Always ensure that the power supply is capable of providing enough current to the LED strip.
* Use a level shifter to ensure that the voltage levels are compatible between the ESP32 and the LED strip.
* Consider using a separate power supply for the LED strip to reduce noise and improve stability.
* Use a resistor to limit the current to the data pins of the ESP32.
* Test the LED strip with a small section first before connecting the entire length.
* Verify that the LED strip is connected in the correct orientation and polarity.
* Use a library or driver that supports the specific type of LED strip being used.
* Optimize the code for performance and battery life, if applicable.
By following these tips, it is possible to create a reliable and efficient system for controlling APA102 LED strips with the ESP32.
1.11 Troubleshooting Common Issues
Here are some common issues that may arise when using APA102 LED strips with the ESP32, along with some troubleshooting tips:
* Data errors: Verify that the timing requirements are being met and that the data is being transmitted correctly. Check for loose connections and ensure that the voltage levels are compatible.
* Flickering: Check the power supply and ensure that it is capable of providing enough current to the LED strip. Use a separate power supply for the LED strip and ensure that the voltage levels are stable.
* Incomplete updates: Check the wiring connections and ensure that the data pins are properly configured. Verify that the transmission rate is fast enough for the length of the LED strip.
* Dim or uneven lighting: Check for voltage drops along the length of the LED strip and ensure that it is properly powered. Use a higher voltage or increase the number of power connections.
* LED strip not responding: Check the wiring connections and ensure that the LED strip is properly connected to the ESP32. Verify that the power supply is functioning correctly and that the voltage levels are compatible.
By following these troubleshooting tips, it is possible to identify and resolve common issues that may arise when using APA102 LED strips with the ESP32.
1.12 Advanced Techniques
For more advanced projects, there are several techniques that can be used to optimize the performance and capabilities of APA102 LED strips with the ESP32:
* Color calibration: Adjust the color values to account for variations in LED brightness and color accuracy.
* Dimming: Use pulse width modulation (PWM) to control the brightness of the LED strip.
* Interpolation: Use algorithms to smoothly transition between colors and create complex animations.
* Audio visualization: Use the ESP32’s audio processing capabilities to create real-time visualizations of music or sound.
* Networking: Connect multiple ESP32 devices together to create a synchronized lighting system.
By using these advanced techniques, it is possible to create even more complex and dynamic lighting effects with APA102 LED strips and the ESP32.

Here’s an expanded version of the blog post:
APA102 LED strips are a popular choice for a wide range of projects, thanks to their brightness, color accuracy, and ability to be easily controlled using a microcontroller. When paired with the ESP32, a low-cost and highly-integrated microcontroller developed by Espressif Systems, APA102 LED strips can be used to create complex lighting effects and animations for a variety of IoT projects.
One way to improve the performance of APA102 LED strips with the ESP32 is to configure the strip to use dual data pins. This can provide several benefits, including faster data transmission rates and improved reliability and stability. In this blog post, we’ll explore the benefits of dual data pins configuration for APA102 LED strips and ESP32, as well as the hardware and software setup required to achieve this configuration.
**1. Understanding APA102 LED Strip and ESP32 Dual Data Pins Configuration**
APA102 LED strips use a single-wire communication protocol to control each individual LED. This allows for complex lighting effects and animations to be easily created, making them an ideal choice for a wide range of projects.
The ESP32 is a low-cost and low-power microcontroller developed by Espressif Systems. It features dual-core processors, built-in Wi-Fi and Bluetooth connectivity, and multiple input and output pins, making it an ideal choice for a wide range of IoT projects. The ESP32’s versatility and low power consumption make it an excellent choice for controlling APA102 LED strips.
When using an APA102 LED strip with an ESP32, configuring the strip to use dual data pins can provide several benefits. By using two data pins instead of one, the data transmission rate can be doubled, reducing the time it takes to update the entire strip. This can be particularly useful for larger LED strips or for applications that require fast updates. Additionally, dual data pins configuration can improve the reliability and stability of the LED strip, reducing the likelihood of data errors or flickering.
**1.1 APA102 LED Strip Features**
APA102 LED strips have several unique features that make them an ideal choice for a variety of projects. They offer a wide range of colors with high brightness and color accuracy, thanks to their individually addressable RGB LEDs. This allows for complex lighting effects and animations to be easily created. Additionally, APA102 LED strips have a high refresh rate, which reduces flickering and ensures smooth animations.
**1.2 Introduction to ESP32**
The ESP32 is a low-cost and highly-integrated microcontroller developed by Espressif Systems. It features dual-core processors, built-in Wi-Fi and Bluetooth connectivity, and multiple input and output pins, making it an ideal choice for a wide range of IoT projects. The ESP32’s versatility and low power consumption make it an excellent choice for controlling APA102 LED strips.
**1.3 The Benefits of Dual Data Pins Configuration**
When using an APA102 LED strip with an ESP32, configuring the strip to use dual data pins can provide several benefits. By using two data pins instead of one, the data transmission rate can be doubled, reducing the time it takes to update the entire strip. This can be particularly useful for larger LED strips or for applications that require fast updates. Additionally, dual data pins configuration can improve the reliability and stability of the LED strip, reducing the likelihood of data errors or flickering.
**1.4 Understanding the APA102 LED Strip’s Timing Requirements**
One important consideration when configuring dual data pins is the timing requirements of the APA102 LED strip. The strip requires a specific timing between data bytes to properly interpret the data being sent. When using dual data pins, it is important to ensure that the timing requirements are still being met to avoid data errors. The ESP32’s built-in hardware timers can be used to ensure accurate timing.
**1.5 Choosing the Right Data Pins for Dual Configuration**
When selecting data pins for dual configuration, it is important to choose pins that are capable of operating at the required data transmission rate. The ESP32’s GPIO pins can operate at different speeds, so it is important to choose pins that can support the required data transmission rate for the APA102 LED strip. Additionally, it is important to ensure that the chosen pins do not conflict with other peripherals or functions of the ESP32. Some suitable pins for dual configuration include GPIO15 and GPIO16.
**1.6 Configuring Dual Data Pins in Software**
Once the hardware setup is complete, the dual data pins must be configured in software. This typically involves initializing the APA102 LED strip library and specifying the two data pins to be used. It may also involve adjusting the timing parameters to ensure that the data is being transmitted correctly. The FastLED library is a popular choice for controlling APA102 LED strips with the ESP32.
**1.7 Common Issues and Troubleshooting Tips**
When configuring dual data pins for APA102 LED strips, there are some common issues that may arise. These can include data errors, flickering, or incomplete updates. Some troubleshooting tips include checking the timing requirements, verifying the wiring connections, and adjusting the data transmission rate. Additionally, it may be helpful to review the APA102 LED strip library documentation and seek guidance from online forums or communities.
**1.8 Conclusion**
Configuring dual data pins for APA102 LED strips with an ESP32 can provide significant benefits in terms of speed and performance. By understanding the timing requirements of the LED strip and choosing the right data pins, it is possible to achieve fast and reliable updates. With careful consideration of hardware and software setup, dual data pin configuration can be an effective solution for a wide range of IoT projects involving APA102 LED strips and ESP32 microcontrollers.
**1.9 Additional Resources**
For more information on configuring APA102 LED strips with the ESP32, check out the following resources:
* FastLED Library Documentation:
* Espressif Systems ESP32 Documentation:
* Adafruit DotStar LED Strip Guide:
By following the guidance in this blog post and utilizing the resources available, you’ll be able to successfully integrate APA102 LED strips with the ESP32 and take advantage of the benefits of dual data pins configuration.

Sure, here’s an expanded version of the blog post:
—
**1. Understanding APA102 LED Strip and ESP32 Dual Data Pins Configuration**
APA102 LED strips, also known as Adafruit DotStar or SK6812, are addressable RGB LED strips that use a single-wire communication protocol to control each individual LED. They are popular for their brightness, color accuracy, and ability to be easily controlled using a microcontroller.
**1.1 APA102 LED Strip Features**
APA102 LED strips have several unique features that make them an ideal choice for a variety of projects. They offer a wide range of colors with high brightness and color accuracy, thanks to their individually addressable RGB LEDs. This allows for complex lighting effects and animations to be easily created. Additionally, APA102 LED strips have a high refresh rate, which reduces flickering and ensures smooth animations.
Another benefit of APA102 LED strips is their power efficiency. They use less power than traditional LED strips, which can be a significant advantage in projects that require a large number of LEDs. This is due in part to their use of a constant current driver, which ensures that each LED receives the same amount of power, regardless of its position on the strip.
**1.2 Introduction to ESP32**
The ESP32 is a low-cost, low-power, and highly-integrated microcontroller developed by Espressif Systems. It features dual-core processors, built-in Wi-Fi and Bluetooth connectivity, and multiple input and output pins, making it an ideal choice for a wide range of IoT projects. The ESP32’s versatility and low power consumption make it an excellent choice for controlling APA102 LED strips.
One of the key benefits of the ESP32 is its built-in Wi-Fi and Bluetooth connectivity. This allows for easy integration with other devices and systems, including smartphones, tablets, and computers. Additionally, the ESP32’s multiple input and output pins make it easy to connect a wide variety of sensors and actuators, enabling a wide range of IoT applications.
**1.3 The Benefits of Dual Data Pins Configuration**
When using an APA102 LED strip with an ESP32, configuring the strip to use dual data pins can provide several benefits. By using two data pins instead of one, the data transmission rate can be doubled, reducing the time it takes to update the entire strip. This can be particularly useful for larger LED strips or for applications that require fast updates. Additionally, dual data pins configuration can improve the reliability and stability of the LED strip, reducing the likelihood of data errors or flickering.
Another benefit of dual data pins configuration is that it can reduce the load on the ESP32’s processor. By using two pins to transmit data, the processor can spend less time sending data and more time processing other tasks. This can be particularly important in projects that require real-time processing or that use other resource-intensive functions.
**1.4 Understanding the APA102 LED Strip’s Timing Requirements**
One important consideration when configuring dual data pins is the timing requirements of the APA102 LED strip. The strip requires a specific timing between data bytes to properly interpret the data being sent. When using dual data pins, it is important to ensure that the timing requirements are still being met to avoid data errors. The ESP32’s built-in hardware timers can be used to ensure accurate timing.
The timing requirements of the APA102 LED strip are specified in its datasheet. It requires a clock signal with a frequency of approximately 8 MHz and a data signal that is held high for a specific period of time between clock pulses. When using dual data pins, the clock signal can be shared between the two pins, but the data signals must be sent separately and synchronized to ensure accurate timing.
**1.5 Choosing the Right Data Pins for Dual Configuration**
When selecting data pins for dual configuration, it is important to choose pins that are capable of operating at the required data transmission rate. The ESP32’s GPIO pins can operate at different speeds, so it is important to choose pins that can support the required data transmission rate for the APA102 LED strip. Additionally, it is important to ensure that the chosen pins do not conflict with other peripherals or functions of the ESP32. Some suitable pins for dual configuration include GPIO15 and GPIO16.
It is also important to consider the location of the chosen pins on the ESP32 board. Ideally, the pins should be located close to each other and to the power and ground pins to minimize the length of the wiring and reduce the risk of signal interference.
**1.6 Configuring Dual Data Pins in Software**
Once the hardware setup is complete, the dual data pins must be configured in software. This typically involves initializing the APA102 LED strip library and specifying the two data pins to be used. It may also involve adjusting the timing parameters to ensure that the data is being transmitted correctly. The FastLED library is a popular choice for controlling APA102 LED strips with the ESP32.
The FastLED library provides a simple and intuitive interface for controlling APA102 LED strips. It supports a wide range of LED types and configurations, including dual data pins. To use dual data pins with the FastLED library, you can simply specify the two pins when initializing the LED strip object. For example:
“`c
#define LED_PIN_1 15
#define LED_PIN_2 16
#define NUM_LEDS 100
#define LED_TYPE WS2812
CRGB leds[NUM_LEDS];
void setup() {
FastLED.addLeds
}
void loop() {
// Update LED strip
}
“`
This code initializes a LED strip object with 100 LEDs, using pins 15 and 16 for dual data transmission. The LED\_TYPE constant specifies the type of LED being used (in this case, WS2812).
**1.7 Common Issues and Troubleshooting Tips**
When configuring dual data pins for APA102 LED strips, there are some common issues that may arise. These can include data errors, flickering, or incomplete updates. Some troubleshooting tips include checking the timing requirements, verifying the wiring connections, and adjusting the data transmission rate. Additionally, it may be helpful to review the APA102 LED strip library documentation and seek guidance from online forums or communities.
One common issue when using dual data pins is data corruption or errors. This can occur if the timing between the two data pins is not synchronized correctly, or if there is signal interference or noise on the wiring. To troubleshoot this issue, you can try adjusting the timing parameters or using shielded wiring to reduce interference.
Another issue that may arise is flickering or incomplete updates. This can occur if the data transmission rate is too high or too low, or if there is a problem with the power supply to the LED strip. To troubleshoot this issue, you can try adjusting the data transmission rate or verifying that the power supply is providing enough current to the LED strip.
**1.8 Conclusion**
Configuring dual data pins for APA102 LED strips with an ESP32 can provide significant benefits in terms of speed and performance. By understanding the timing requirements of the LED strip and choosing the right data pins, it is possible to achieve fast and reliable updates. With careful consideration of hardware and software setup, dual data pin configuration can be an effective solution for a wide range of IoT projects involving APA102 LED strips and ESP32 microcontrollers.
**1.9 Additional Resources**
For more information on configuring APA102 LED strips with the ESP32, check out the following resources:
* FastLED Library Documentation:
* Espressif Systems ESP32 Documentation:
* Adafruit DotStar LED Strip Guide:
**APA102 LED Strip and ESP32 Integration: Dual Data Pins Configuration**
APA102 LED strips, also known as Adafruit DotStar or SK6812, are addressable RGB LED strips that use a single-wire communication protocol to control each individual LED. They are popular for their brightness, color accuracy, and ability to be easily controlled using a microcontroller.
In this blog post, we will explore the benefits of using dual data pins to configure an APA102 LED strip with an ESP32 microcontroller. We will discuss the features of the APA102 LED strip, the ESP32 microcontroller, and the benefits of dual data pin configuration. Additionally, we will provide guidance on selecting the right data pins, configuring them in software, and troubleshooting common issues.
**APA102 LED Strip Features**
APA102 LED strips have several unique features that make them an ideal choice for a variety of projects. They offer a wide range of colors with high brightness and color accuracy, thanks to their individually addressable RGB LEDs. This allows for complex lighting effects and animations to be easily created. Additionally, APA102 LED strips have a high refresh rate, which reduces flickering and ensures smooth animations.
**Introduction to ESP32**
The ESP32 is a low-cost, low-power, and highly-integrated microcontroller developed by Espressif Systems. It features dual-core processors, built-in Wi-Fi and Bluetooth connectivity, and multiple input and output pins, making it an ideal choice for a wide range of IoT projects. The ESP32’s versatility and low power consumption make it an excellent choice for controlling APA102 LED strips.
**The Benefits of Dual Data Pins Configuration**
When using an APA102 LED strip with an ESP32, configuring the strip to use dual data pins can provide several benefits. By using two data pins instead of one, the data transmission rate can be doubled, reducing the time it takes to update the entire strip. This can be particularly useful for larger LED strips or for applications that require fast updates. Additionally, dual data pins configuration can improve the reliability and stability of the LED strip, reducing the likelihood of data errors or flickering.
**Understanding the APA102 LED Strip’s Timing Requirements**
One important consideration when configuring dual data pins is the timing requirements of the APA102 LED strip. The strip requires a specific timing between data bytes to properly interpret the data being sent. When using dual data pins, it is important to ensure that the timing requirements are still being met to avoid data errors. The ESP32’s built-in hardware timers can be used to ensure accurate timing.
**Choosing the Right Data Pins for Dual Configuration**
When selecting data pins for dual configuration, it is important to choose pins that are capable of operating at the required data transmission rate. The ESP32’s GPIO pins can operate at different speeds, so it is important to choose pins that can support the required data transmission rate for the APA102 LED strip. Additionally, it is important to ensure that the chosen pins do not conflict with other peripherals or functions of the ESP32. Some suitable pins for dual configuration include GPIO15 and GPIO16.
**Configuring Dual Data Pins in Software**
Once the hardware setup is complete, the dual data pins must be configured in software. This typically involves initializing the APA102 LED strip library and specifying the two data pins to be used. It may also involve adjusting the timing parameters to ensure that the data is being transmitted correctly. The FastLED library is a popular choice for controlling APA102 LED strips with the ESP32.
Here is an example code snippet for configuring dual data pins with the FastLED library:
“`scss
#include
#define LED_PIN1 15
#define LED_PIN2 16
#define NUM_LEDS 100
#define LED_TYPE WS2812
#define BRIGHTNESS 64
CRGB leds[NUM_LEDS];
void setup() {
FastLED.addLeds
FastLED.setBrightness(BRIGHTNESS);
}
void loop() {
// Update LED strip
}
“`
In this example, we define two data pins (LED\_PIN1 and LED\_PIN2) and specify them in the FastLED.addLeds() function. We also define the number of LEDs (NUM\_LEDS), the LED type (LED\_TYPE), and the brightness level (BRIGHTNESS).
**Common Issues and Troubleshooting Tips**
When configuring dual data pins for APA102 LED strips, there are some common issues that may arise. These can include data errors, flickering, or incomplete updates. Some troubleshooting tips include checking the timing requirements, verifying the wiring connections, and adjusting the data transmission rate. Additionally, it may be helpful to review the APA102 LED strip library documentation and seek guidance from online forums or communities.
**Conclusion**
Configuring dual data pins for APA102 LED strips with an ESP32 can provide significant benefits in terms of speed and performance. By understanding the timing requirements of the LED strip and choosing the right data pins, it is possible to achieve fast and reliable updates. With careful consideration of hardware and software setup, dual data pin configuration can be an effective solution for a wide range of IoT projects involving APA102 LED strips and ESP32 microcontrollers.
**Additional Resources**
For more information on configuring APA102 LED strips with the ESP32, check out the following resources:
* FastLED Library Documentation:
* Espressif Systems ESP32 Documentation:
* Adafruit DotStar LED Strip Guide:
**APA102 LED Strip and ESP32 Integration: Dual Data Pins Configuration**
APA102 LED strips are a popular choice for a variety of projects, thanks to their individually addressable RGB LEDs that offer high brightness, color accuracy, and smooth animations. When paired with the ESP32 microcontroller, you can create complex lighting effects and animations for IoT projects. In this blog post, we’ll explore the benefits of dual data pins configuration for APA102 LED strips and ESP32, as well as the hardware and software setup required to achieve this configuration.
**Understanding APA102 LED Strip and ESP32 Dual Data Pins Configuration**
APA102 LED strips use a single-wire communication protocol to control each individual LED. The strip requires a specific timing between data bytes to properly interpret the data being sent. When using an ESP32 to control the LED strip, you can configure it to use dual data pins to double the data transmission rate. This can be particularly useful for larger LED strips or for applications that require fast updates.
**APA102 LED Strip Features**
APA102 LED strips have several unique features that make them an ideal choice for a variety of projects. They offer a wide range of colors with high brightness and color accuracy, thanks to their individually addressable RGB LEDs. This allows for complex lighting effects and animations to be easily created. Additionally, APA102 LED strips have a high refresh rate, which reduces flickering and ensures smooth animations.
**Introduction to ESP32**
The ESP32 is a low-cost, low-power, and highly-integrated microcontroller developed by Espressif Systems. It features dual-core processors, built-in Wi-Fi and Bluetooth connectivity, and multiple input and output pins, making it an ideal choice for a wide range of IoT projects. The ESP32’s versatility and low power consumption make it an excellent choice for controlling APA102 LED strips.
**The Benefits of Dual Data Pins Configuration**
When using an APA102 LED strip with an ESP32, configuring the strip to use dual data pins can provide several benefits. By using two data pins instead of one, the data transmission rate can be doubled, reducing the time it takes to update the entire strip. This can be particularly useful for larger LED strips or for applications that require fast updates. Additionally, dual data pins configuration can improve the reliability and stability of the LED strip, reducing the likelihood of data errors or flickering.
**Understanding the APA102 LED Strip’s Timing Requirements**
One important consideration when configuring dual data pins is the timing requirements of the APA102 LED strip. The strip requires a specific timing between data bytes to properly interpret the data being sent. When using dual data pins, it is important to ensure that the timing requirements are still being met to avoid data errors. The ESP32’s built-in hardware timers can be used to ensure accurate timing.
**Choosing the Right Data Pins for Dual Configuration**
When selecting data pins for dual configuration, it is important to choose pins that are capable of operating at the required data transmission rate. The ESP32’s GPIO pins can operate at different speeds, so it is important to choose pins that can support the required data transmission rate for the APA102 LED strip. Additionally, it is important to ensure that the chosen pins do not conflict with other peripherals or functions of the ESP32. Some suitable pins for dual configuration include GPIO15 and GPIO16.
**Configuring Dual Data Pins in Software**
Once the hardware setup is complete, the dual data pins must be configured in software. This typically involves initializing the APA102 LED strip library and specifying the two data pins to be used. It may also involve adjusting the timing parameters to ensure that the data is being transmitted correctly. The FastLED library is a popular choice for controlling APA102 LED strips with the ESP32.
**Common Issues and Troubleshooting Tips**
When configuring dual data pins for APA102 LED strips, there are some common issues that may arise. These can include data errors, flickering, or incomplete updates. Some troubleshooting tips include checking the timing requirements, verifying the wiring connections, and adjusting the data transmission rate. Additionally, it may be helpful to review the APA102 LED strip library documentation and seek guidance from online forums or communities.
**Conclusion**
Configuring dual data pins for APA102 LED strips with an ESP32 can provide significant benefits in terms of speed and performance. By understanding the timing requirements of the LED strip and choosing the right data pins, it is possible to achieve fast and reliable updates. With careful consideration of hardware and software setup, dual data pin configuration can be an effective solution for a wide range of IoT projects involving APA102 LED strips and ESP32 microcontrollers.
**Additional Resources**
For more information on configuring APA102 LED strips with the ESP32, check out the following resources:
* FastLED Library Documentation:
* Espressif Systems ESP32 Documentation:
* Adafruit DotStar LED Strip Guide:
**APA102 LED Strip and ESP32 Integration: Dual Data Pins Configuration**
APA102 LED strips are a popular choice for creating dynamic lighting displays, thanks to their addressability and high color accuracy. When paired with the ESP32 microcontroller, these LED strips can be used to create a wide range of Internet of Things (IoT) projects, from smart home lighting to interactive art installations. In this blog post, we’ll explore how to configure dual data pins for APA102 LED strips with the ESP32, and the benefits that this configuration can provide.
**1. Understanding APA102 LED Strip and ESP32 Dual Data Pins Configuration**
APA102 LED strips, also known as Adafruit DotStar or SK6812, are addressable RGB LED strips that use a single-wire communication protocol to control each individual LED. They offer a wide range of colors with high brightness and color accuracy, thanks to their individually addressable RGB LEDs. This allows for complex lighting effects and animations to be easily created. Additionally, APA102 LED strips have a high refresh rate, which reduces flickering and ensures smooth animations.
The ESP32 is a low-cost, low-power, and highly-integrated microcontroller developed by Espressif Systems. It features dual-core processors, built-in Wi-Fi and Bluetooth connectivity, and multiple input and output pins, making it an ideal choice for a wide range of IoT projects. The ESP32’s versatility and low power consumption make it an excellent choice for controlling APA102 LED strips.
When using an APA102 LED strip with an ESP32, configuring the strip to use dual data pins can provide several benefits. By using two data pins instead of one, the data transmission rate can be doubled, reducing the time it takes to update the entire strip. This can be particularly useful for larger LED strips or for applications that require fast updates. Additionally, dual data pins configuration can improve the reliability and stability of the LED strip, reducing the likelihood of data errors or flickering.
**2. Understanding the APA102 LED Strip’s Timing Requirements**
One important consideration when configuring dual data pins is the timing requirements of the APA102 LED strip. The strip requires a specific timing between data bytes to properly interpret the data being sent. When using dual data pins, it is important to ensure that the timing requirements are still being met to avoid data errors. The ESP32’s built-in hardware timers can be used to ensure accurate timing.
**3. Choosing the Right Data Pins for Dual Configuration**
When selecting data pins for dual configuration, it is important to choose pins that are capable of operating at the required data transmission rate. The ESP32’s GPIO pins can operate at different speeds, so it is important to choose pins that can support the required data transmission rate for the APA102 LED strip. Additionally, it is important to ensure that the chosen pins do not conflict with other peripherals or functions of the ESP32. Some suitable pins for dual configuration include GPIO15 and GPIO16.
**4. Configuring Dual Data Pins in Software**
Once the hardware setup is complete, the dual data pins must be configured in software. This typically involves initializing the APA102 LED strip library and specifying the two data pins to be used. It may also involve adjusting the timing parameters to ensure that the data is being transmitted correctly. The FastLED library is a popular choice for controlling APA102 LED strips with the ESP32.
**5. Common Issues and Troubleshooting Tips**
When configuring dual data pins for APA102 LED strips, there are some common issues that may arise. These can include data errors, flickering, or incomplete updates. Some troubleshooting tips include checking the timing requirements, verifying the wiring connections, and adjusting the data transmission rate. Additionally, it may be helpful to review the APA102 LED strip library documentation and seek guidance from online forums or communities.
**6. Conclusion**
Configuring dual data pins for APA102 LED strips with an ESP32 can provide significant benefits in terms of speed and performance. By understanding the timing requirements of the LED strip and choosing the right data pins, it is possible to achieve fast and reliable updates. With careful consideration of hardware and software setup, dual data pin configuration can be an effective solution for a wide range of IoT projects involving APA102 LED strips and ESP32 microcontrollers.
**7. Additional Resources**
For more information on configuring APA102 LED strips with the ESP32, check out the following resources:
* FastLED Library Documentation:
* Espressif Systems ESP32 Documentation:
* Adafruit DotStar LED Strip Guide:
By following the guidelines outlined in this blog post and utilizing these resources, you can successfully integrate APA102 LED strips with an ESP32 and create dynamic lighting displays for a wide range of IoT projects.Sure! Here’s an expanded version of the blog post:
—
2. Hardware Setup for APA102 LED Strip and ESP32 Integration
To get started with your APA102 LED strip and ESP32 integration project, you’ll need to set up your hardware properly. This guide will walk you through the process of choosing the right LED strip, connecting it to your ESP32 board, powering it correctly, and testing your setup.
2.1 Choosing the Right APA102 LED Strip
Before you start setting up your hardware, it’s important to choose the right APA102 LED strip for your project. APA102 LED strips come in different lengths, LED densities, and voltage requirements. Make sure you choose a strip that meets your project requirements and is compatible with your ESP32 board.
LED density refers to the number of LEDs per meter on the strip. Higher LED densities will result in a more detailed and vibrant display, but will also consume more power. Voltage requirements will vary depending on the specific LED strip you choose, so make sure to check the specifications before purchasing.
Additionally, consider the color and brightness of the LEDs to ensure they meet your needs. Some APA102 LED strips come in a variety of colors, while others may only come in one color. Brightness can also vary between strips, so consider how bright you need your display to be.
2.2 Connecting the APA102 LED Strip to the ESP32 Board
Once you have chosen the right APA102 LED strip, it’s time to connect it to your ESP32 board. You will need to connect the VCC (power), GND (ground), and two data pins (DO and DI) of the LED strip to the corresponding pins on the ESP32 board. Make sure you connect the DO pin of the LED strip to one of the ESP32’s data pins and the DI pin to another data pin. This will allow you to send data to the LED strip and control the LEDs.
It’s important to note that the ESP32 can only output 3.3V, while some APA102 LED strips require 5V. If you’re using a 5V LED strip, you’ll need to add a level shifter to your setup to prevent damage to your ESP32 board. A level shifter is a device that converts signals from one voltage level to another.
2.3 Adding a Level Shifter (Optional)
If your APA102 LED strip has a different voltage requirement than your ESP32 board, you may need to add a level shifter to your setup. A level shifter is a device that converts signals from one voltage level to another. For example, if your LED strip requires 5V and your ESP32 board operates at 3.3V, you will need a level shifter to convert the 5V signal to 3.3V. This will prevent damage to your ESP32 board and ensure that the LED strip receives the correct voltage.
When choosing a level shifter, make sure it can handle the current required by your LED strip. You can find level shifters with varying current capacities, so choose one that meets your needs.
2.4 Powering the APA102 LED Strip
APA102 LED strips can consume a lot of power, especially if you are using a long strip with many LEDs. It’s important to use a power supply that can provide enough current to the LED strip. Make sure you choose a power supply that meets the voltage and current requirements of your LED strip.
When connecting the power supply to the LED strip, make sure to connect the positive terminal to the VCC pin and the negative terminal to the GND pin. It’s also important to ensure that the power supply is properly rated for your LED strip’s specifications to avoid overloading it.
2.5 Testing Your Hardware Setup
Once you have connected your APA102 LED strip to your ESP32 board and powered it, it’s time to test your hardware setup. You can use a simple sketch to test the LED strip and make sure it’s working properly. If you are using dual data pins, make sure you update the sketch to use both data pins. You should see the LEDs on the strip light up in a pattern that corresponds to the sketch.
If the LEDs are not lighting up properly, double-check your connections and power supply. Make sure all your connections are secure and that the LED strip is not damaged. You can also try using a different LED strip or ESP32 board to see if the issue is with your current components.
2.6 Troubleshooting Tips
If you are having trouble getting your hardware setup to work, there are a few things you can check. Make sure all your connections are secure and that the LED strip is not damaged. You can also try using a different LED strip or ESP32 board to see if the issue is with your current components.
If you are using a level shifter, make sure it’s properly connected and can handle the current required by your LED strip. You can also try using a different level shifter if you’re experiencing issues.
If you’re still having trouble, consult the documentation for your APA102 LED strip and ESP32 board. There may be specific instructions or troubleshooting tips that can help you resolve the issue. You can also seek help from online forums or communities dedicated to ESP32 development.
2.7 Conclusion
Setting up the hardware for your APA102 LED strip and ESP32 integration can be a straightforward process if you follow the right steps. By choosing the right LED strip, connecting it to your ESP32 board, powering it correctly, and testing your setup, you can ensure that your hardware is ready for your project. With a working hardware setup, you can move on to the next step of configuring your software for dual data pins.
—
I hope this expanded version helps! Let me know if you have any further questions.2. Hardware Setup for APA102 LED Strip and ESP32 Integration
2.1 Choosing the Right APA102 LED Strip
Before you start setting up your hardware, it’s important to choose the right APA102 LED strip for your project. APA102 LED strips come in different lengths, LED densities, and voltage requirements. Make sure you choose a strip that meets your project requirements and is compatible with your ESP32 board. Additionally, consider the color and brightness of the LEDs to ensure they meet your needs.
LED density refers to the number of LEDs per meter on the strip. A higher LED density will result in a brighter and more detailed display, but it will also consume more power. The voltage requirements of the LED strip should match the voltage output of your power supply. Most APA102 LED strips operate at either 5V or 12V. Make sure to choose an LED strip with a voltage requirement that matches your power supply to avoid damaging the strip.
When choosing the color of your LED strip, consider the mood and atmosphere you want to create. RGB LED strips can produce a wide range of colors, while single-color LED strips are more limited. The brightness of the LEDs is also an important factor to consider. Make sure to choose an LED strip with a brightness level that is appropriate for your project.
2.2 Connecting the APA102 LED Strip to the ESP32 Board
Once you have chosen the right APA102 LED strip, it’s time to connect it to your ESP32 board. You will need to connect the VCC (power), GND (ground), and two data pins (DO and DI) of the LED strip to the corresponding pins on the ESP32 board. Make sure you connect the DO pin of the LED strip to one of the ESP32’s data pins and the DI pin to another data pin. This will allow you to send data to the LED strip and control the LEDs.
It’s important to note that the ESP32 operates at 3.3V, while most APA102 LED strips operate at 5V. This means that you may need to use a level shifter to prevent damage to the ESP32 board. A level shifter is a device that converts signals from one voltage level to another. For example, if your LED strip requires 5V and your ESP32 board operates at 3.3V, you will need a level shifter to convert the 5V signal to 3.3V.
2.3 Adding a Level Shifter (Optional)
If your APA102 LED strip has a different voltage requirement than your ESP32 board, you may need to add a level shifter to your setup. A level shifter is a device that converts signals from one voltage level to another. For example, if your LED strip requires 5V and your ESP32 board operates at 3.3V, you will need a level shifter to convert the 5V signal to 3.3V. This will prevent damage to your ESP32 board and ensure that the LED strip receives the correct voltage.
When choosing a level shifter, make sure it can handle the current required by your LED strip. Most level shifters can handle up to 20mA, but some high-power LED strips may require more current.
2.4 Powering the APA102 LED Strip
APA102 LED strips can consume a lot of power, especially if you are using a long strip with many LEDs. It’s important to use a power supply that can provide enough current to the LED strip. Make sure you choose a power supply that meets the voltage and current requirements of your LED strip. You can connect the power supply to the VCC and GND pins of the LED strip. It’s also important to ensure that the power supply is properly rated for your LED strip’s specifications to avoid overloading it.
Overloading the power supply can cause it to overheat and potentially damage the LED strip or the power supply itself. Make sure to choose a power supply with a current rating that is higher than the maximum current draw of your LED strip.
2.5 Testing Your Hardware Setup
Once you have connected your APA102 LED strip to your ESP32 board and powered it, it’s time to test your hardware setup. You can use a simple sketch to test the LED strip and make sure it’s working properly. If you are using dual data pins, make sure you update the sketch to use both data pins. You should see the LEDs on the strip light up in a pattern that corresponds to the sketch. If the LEDs are not lighting up properly, double-check your connections and power supply.
2.6 Troubleshooting Tips
If you are having trouble getting your hardware setup to work, there are a few things you can check. Make sure all your connections are secure and that the LED strip is not damaged. You can also try using a different LED strip or ESP32 board to see if the issue is with your current components. If you are still having trouble, you can consult the documentation for your APA102 LED strip and ESP32 board, or seek help from online forums or communities.
2.7 Conclusion
Setting up the hardware for your APA102 LED strip and ESP32 integration can be a straightforward process if you follow the right steps. By choosing the right LED strip, connecting it to your ESP32 board, powering it correctly, and testing your setup, you can ensure that your hardware is ready for your project. With a working hardware setup, you can move on to the next step of configuring your software for dual data pins.
**Additional Tips:**
* Use heat shrink tubing or electrical tape to insulate and protect the connections between the LED strip and the ESP32 board.
* Consider using a breadboard or PCB to make the connections more permanent and secure.
* If you are using a high-power LED strip, consider using a cooling fan to prevent overheating.
* Be careful not to exceed the maximum current rating of your LED strip or power supply, as this can cause damage or even fire.2. Hardware Setup for APA102 LED Strip and ESP32 Integration
If you’re planning to integrate an APA102 LED strip with an ESP32 board, the first step is to ensure that your hardware is properly set up. In this section, we’ll guide you through the process of choosing the right APA102 LED strip, connecting it to your ESP32 board, powering it correctly, and testing your setup. By following these steps, you can ensure that your hardware is ready for your project.
2.1 Choosing the Right APA102 LED Strip
Before you start setting up your hardware, it’s important to choose the right APA102 LED strip for your project. APA102 LED strips come in different lengths, LED densities, and voltage requirements. Make sure you choose a strip that meets your project requirements and is compatible with your ESP32 board.
LED density refers to the number of LEDs per meter on the strip. A higher LED density will provide more detailed and vibrant lighting effects, but it will also consume more power. Consider the size of your project and the level of detail you want to achieve when choosing the LED density.
Voltage requirements are also important to consider. APA102 LED strips typically operate at either 5V or 12V. Make sure you choose a voltage that is compatible with your power supply and ESP32 board.
Additionally, consider the color and brightness of the LEDs to ensure they meet your needs. APA102 LED strips come in a variety of colors and brightness levels, so choose one that fits your project.
2.2 Connecting the APA102 LED Strip to the ESP32 Board
Once you have chosen the right APA102 LED strip, it’s time to connect it to your ESP32 board. You will need to connect the VCC (power), GND (ground), and two data pins (DO and DI) of the LED strip to the corresponding pins on the ESP32 board. Make sure you connect the DO pin of the LED strip to one of the ESP32’s data pins and the DI pin to another data pin.
Here’s a sample wiring diagram:
| APA102 LED Strip | ESP32 Board |
| — | — |
| VCC | 5V or 3.3V (depending on your ESP32 board) |
| GND | GND |
| DO | GPIO 18 |
| DI | GPIO 19 |
Note: If your ESP32 board operates at 3.3V, make sure you choose an APA102 LED strip that is compatible with this voltage to avoid damaging your board.
2.3 Adding a Level Shifter (Optional)
If your APA102 LED strip has a different voltage requirement than your ESP32 board, you may need to add a level shifter to your setup. A level shifter is a device that converts signals from one voltage level to another. For example, if your LED strip requires 5V and your ESP32 board operates at 3.3V, you will need a level shifter to convert the 5V signal to 3.3V. This will prevent damage to your ESP32 board and ensure that the LED strip receives the correct voltage.
2.4 Powering the APA102 LED Strip
APA102 LED strips can consume a lot of power, especially if you are using a long strip with many LEDs. It’s important to use a power supply that can provide enough current to the LED strip. Make sure you choose a power supply that meets the voltage and current requirements of your LED strip. You can connect the power supply to the VCC and GND pins of the LED strip.
It’s also important to ensure that the power supply is properly rated for your LED strip’s specifications to avoid overloading it. Overloading the power supply can cause it to overheat and potentially damage your LED strip or ESP32 board.
2.5 Testing Your Hardware Setup
Once you have connected your APA102 LED strip to your ESP32 board and powered it, it’s time to test your hardware setup. You can use a simple sketch to test the LED strip and make sure it’s working properly. If you are using dual data pins, make sure you update the sketch to use both data pins. You should see the LEDs on the strip light up in a pattern that corresponds to the sketch.
If the LEDs are not lighting up properly, double-check your connections and power supply. Make sure all your connections are secure and that the LED strip is not damaged.
2.6 Troubleshooting Tips
If you are having trouble getting your hardware setup to work, there are a few things you can check.
* Make sure all your connections are secure and that the LED strip is not damaged.
* Check your power supply and make sure it’s providing enough current to the LED strip.
* Make sure you have chosen the correct voltage for your APA102 LED strip and that your power supply is properly rated for it.
* Try using a different LED strip or ESP32 board to see if the issue is with your current components.
* Consult the documentation for your APA102 LED strip and ESP32 board, or seek help from online forums or communities.
2.7 Conclusion
Setting up the hardware for your APA102 LED strip and ESP32 integration can be a straightforward process if you follow the right steps. By choosing the right LED strip, connecting it to your ESP32 board, powering it correctly, and testing your setup, you can ensure that your hardware is ready for your project. With a working hardware setup, you can move on to the next step of configuring your software for dual data pins.
Additional Entities:
* LED density
* Voltage requirements
* Color
* Brightness
* Level shifter
* Current
* Power supply
* Overloading
* Sketch
* Dual data pins
* Connections
* Damage
* Documentation
* Online forums
* Communities2. Hardware Setup for APA102 LED Strip and ESP32 Integration
If you’re excited to get started with your APA102 LED strip and ESP32 integration project, you’ll first need to set up your hardware correctly. This guide will walk you through the process step-by-step, so you can ensure that your hardware is ready for your project.
2.1 Choosing the Right APA102 LED Strip
When it comes to choosing the right APA102 LED strip, there are a few factors you’ll need to consider. First, think about the length of the strip you need for your project. APA102 LED strips come in a variety of lengths, ranging from just a few inches to several feet.
Next, consider the LED density of the strip. This refers to the number of LEDs per meter on the strip. A higher LED density means that the LEDs are more closely packed together, which can create a more vibrant and detailed lighting effect. However, a higher LED density also means that the strip will consume more power, so make sure you choose a strip that meets your project requirements and is compatible with your ESP32 board.
Additionally, you’ll want to think about the color and brightness of the LEDs. APA102 LED strips come in a wide range of colors, including RGB, RGBW, and single-color options. You’ll also want to consider the brightness of the LEDs, as some projects may require brighter lighting than others.
2.2 Connecting the APA102 LED Strip to the ESP32 Board
Once you have chosen the right APA102 LED strip for your project, it’s time to connect it to your ESP32 board. You’ll need to connect four wires from the LED strip to the corresponding pins on the ESP32 board.
First, connect the VCC (power) wire from the LED strip to the 3.3V pin on the ESP32 board. Then, connect the GND (ground) wire to one of the GND pins on the ESP32 board. Next, connect the DI (data in) wire to one of the data pins on the ESP32 board. Finally, connect the DO (data out) wire to a different data pin on the ESP32 board.
This will allow you to send data to the LED strip and control the LEDs. If you’re using a long LED strip, you may want to consider using both data pins to increase the data transfer rate and avoid signal degradation.
2.3 Adding a Level Shifter (Optional)
If your APA102 LED strip has a different voltage requirement than your ESP32 board, you may need to add a level shifter to your setup. A level shifter is a device that converts signals from one voltage level to another.
For example, if your LED strip requires 5V and your ESP32 board operates at 3.3V, you’ll need a level shifter to convert the 5V signal to 3.3V. This will prevent damage to your ESP32 board and ensure that the LED strip receives the correct voltage.
2.4 Powering the APA102 LED Strip
APA102 LED strips can consume a lot of power, especially if you’re using a long strip with many LEDs. It’s important to use a power supply that can provide enough current to the LED strip.
Make sure you choose a power supply that meets the voltage and current requirements of your LED strip. You can connect the power supply to the VCC and GND pins of the LED strip. It’s also important to ensure that the power supply is properly rated for your LED strip’s specifications to avoid overloading it.
2.5 Testing Your Hardware Setup
Once you have connected your APA102 LED strip to your ESP32 board and powered it, it’s time to test your hardware setup. You can use a simple sketch to test the LED strip and make sure it’s working properly.
If you’re using dual data pins, make sure you update the sketch to use both data pins. You should see the LEDs on the strip light up in a pattern that corresponds to the sketch. If the LEDs are not lighting up properly, double-check your connections and power supply.
2.6 Troubleshooting Tips
If you’re having trouble getting your hardware setup to work, there are a few things you can check. Make sure all your connections are secure and that the LED strip is not damaged.
You can also try using a different LED strip or ESP32 board to see if the issue is with your current components. If you’re still having trouble, you can consult the documentation for your APA102 LED strip and ESP32 board, or seek help from online forums or communities.
2.7 Conclusion
Setting up the hardware for your APA102 LED strip and ESP32 integration can be a straightforward process if you follow the right steps. By choosing the right LED strip, connecting it to your ESP32 board, powering it correctly, and testing your setup, you can ensure that your hardware is ready for your project.
With a working hardware setup, you can move on to the next step of configuring your software for dual data pins. Remember to always double-check your connections and power supply to avoid any damage to your components. Happy tinkering!
**Additional Entities:**
* LED density
* Voltage requirements
* Color
* Brightness
* Level shifter
* Current
* Power supply
* Overloading
* Sketch
* Dual data pins
* Connections
* Damage
* Documentation
* Online forums
* CommunitiesSure, here’s an expanded version of the blog post:
2. Hardware Setup for APA102 LED Strip and ESP32 Integration
If you’re planning to integrate an APA102 LED strip with an ESP32 board, there are a few steps you need to follow to ensure that your hardware is set up correctly. In this section, we’ll walk you through the process of choosing the right LED strip, connecting it to your ESP32 board, powering it correctly, and testing your setup. By following these steps, you can ensure that your hardware is ready for your project.
2.1 Choosing the Right APA102 LED Strip
Before you start setting up your hardware, it’s important to choose the right APA102 LED strip for your project. There are a few factors to consider when selecting an LED strip, including length, LED density, voltage requirements, color, and brightness.
Length: APA102 LED strips come in different lengths, ranging from a few inches to several meters. Make sure you choose a strip that meets your project requirements in terms of length.
LED density: The LED density of an APA102 LED strip refers to the number of LEDs per meter. A higher LED density will result in a brighter and more uniform light output. However, it will also consume more power and generate more heat.
Voltage requirements: APA102 LED strips come in different voltage requirements, such as 5V or 12V. Make sure you choose a strip that is compatible with your power supply and ESP32 board.
Color: APA102 LED strips come in a variety of colors, including RGB, RGBW, and single-color options. Choose a color that meets your project requirements.
Brightness: The brightness of an APA102 LED strip is measured in lumens. Make sure you choose a strip that provides the level of brightness you need for your project.
2.2 Connecting the APA102 LED Strip to the ESP32 Board
Once you have chosen the right APA102 LED strip, it’s time to connect it to your ESP32 board. You will need to connect the VCC (power), GND (ground), and two data pins (DO and DI) of the LED strip to the corresponding pins on the ESP32 board. Make sure you connect the DO pin of the LED strip to one of the ESP32’s data pins and the DI pin to another data pin. This will allow you to send data to the LED strip and control the LEDs.
2.3 Adding a Level Shifter (Optional)
If your APA102 LED strip has a different voltage requirement than your ESP32 board, you may need to add a level shifter to your setup. A level shifter is a device that converts signals from one voltage level to another. For example, if your LED strip requires 5V and your ESP32 board operates at 3.3V, you will need a level shifter to convert the 5V signal to 3.3V. This will prevent damage to your ESP32 board and ensure that the LED strip receives the correct voltage.
2.4 Powering the APA102 LED Strip
APA102 LED strips can consume a lot of power, especially if you are using a long strip with many LEDs. It’s important to use a power supply that can provide enough current to the LED strip. Make sure you choose a power supply that meets the voltage and current requirements of your LED strip. You can connect the power supply to the VCC and GND pins of the LED strip. It’s also important to ensure that the power supply is properly rated for your LED strip’s specifications to avoid overloading it.
2.5 Testing Your Hardware Setup
Once you have connected your APA102 LED strip to your ESP32 board and powered it, it’s time to test your hardware setup. You can use a simple sketch to test the LED strip and make sure it’s working properly. If you are using dual data pins, make sure you update the sketch to use both data pins. You should see the LEDs on the strip light up in a pattern that corresponds to the sketch. If the LEDs are not lighting up properly, double-check your connections and power supply.
2.6 Troubleshooting Tips
If you are having trouble getting your hardware setup to work, there are a few things you can check:
* Make sure all your connections are secure and that the LED strip is not damaged.
* Check the voltage and current requirements of your LED strip and power supply to ensure they are compatible.
* Use a multimeter to check the voltage and current at different points in your circuit to identify any issues.
* Try using a different LED strip or ESP32 board to see if the issue is with your current components.
* Consult the documentation for your APA102 LED strip and ESP32 board, or seek help from online forums or communities.
2.7 Conclusion
Setting up the hardware for your APA102 LED strip and ESP32 integration can be a straightforward process if you follow the right steps. By choosing the right LED strip, connecting it to your ESP32 board, powering it correctly, and testing your setup, you can ensure that your hardware is ready for your project. With a working hardware setup, you can move on to the next step of configuring your software for dual data pins. Good luck with your project!
**Additional Entities:**
* LED strip length
* Power supply rating
* Voltage conversion
* Data pin configuration
* Troubleshooting tips2. Hardware Setup for APA102 LED Strip and ESP32 Integration
Setting up the hardware for your APA102 LED strip and ESP32 integration can be a straightforward process if you follow the right steps. In this section, we’ll walk you through the process of choosing the right LED strip, connecting it to your ESP32 board, powering it correctly, and testing your setup. By following these steps, you can ensure that your hardware is ready for your project.
2.1 Choosing the Right APA102 LED Strip
Before you start setting up your hardware, it’s important to choose the right APA102 LED strip for your project. APA102 LED strips come in different lengths, LED densities, and voltage requirements. Make sure you choose a strip that meets your project requirements and is compatible with your ESP32 board.
LED Density: LED density refers to the number of LEDs per meter on the strip. A higher LED density will result in a brighter and more vibrant display, but it will also consume more power and generate more heat. Consider the size and purpose of your project when choosing the LED density.
Voltage Requirements: APA102 LED strips come in different voltage requirements, such as 5V or 12V. Make sure you choose a strip that matches the voltage output of your power supply and is compatible with your ESP32 board.
Color and Brightness: APA102 LED strips come in a variety of colors and brightness levels. Choose a strip that meets the aesthetic and functional requirements of your project.
2.2 Connecting the APA102 LED Strip to the ESP32 Board
Once you have chosen the right APA102 LED strip, it’s time to connect it to your ESP32 board. You will need to connect the VCC (power), GND (ground), and two data pins (DO and DI) of the LED strip to the corresponding pins on the ESP32 board.
Make sure you connect the DO pin of the LED strip to one of the ESP32’s data pins and the DI pin to another data pin. This will allow you to send data to the LED strip and control the LEDs.
2.3 Adding a Level Shifter (Optional)
If your APA102 LED strip has a different voltage requirement than your ESP32 board, you may need to add a level shifter to your setup. A level shifter is a device that converts signals from one voltage level to another.
For example, if your LED strip requires 5V and your ESP32 board operates at 3.3V, you will need a level shifter to convert the 5V signal to 3.3V. This will prevent damage to your ESP32 board and ensure that the LED strip receives the correct voltage.
2.4 Powering the APA102 LED Strip
APA102 LED strips can consume a lot of power, especially if you are using a long strip with many LEDs. It’s important to use a power supply that can provide enough current to the LED strip.
Make sure you choose a power supply that meets the voltage and current requirements of your LED strip. You can connect the power supply to the VCC and GND pins of the LED strip. It’s also important to ensure that the power supply is properly rated for your LED strip’s specifications to avoid overloading it.
2.5 Testing Your Hardware Setup
Once you have connected your APA102 LED strip to your ESP32 board and powered it, it’s time to test your hardware setup. You can use a simple sketch to test the LED strip and make sure it’s working properly.
If you are using dual data pins, make sure you update the sketch to use both data pins. You should see the LEDs on the strip light up in a pattern that corresponds to the sketch. If the LEDs are not lighting up properly, double-check your connections and power supply.
2.6 Troubleshooting Tips
If you are having trouble getting your hardware setup to work, there are a few things you can check. Make sure all your connections are secure and that the LED strip is not damaged. You can also try using a different LED strip or ESP32 board to see if the issue is with your current components.
If you are still having trouble, you can consult the documentation for your APA102 LED strip and ESP32 board, or seek help from online forums or communities.
2.7 Conclusion
Setting up the hardware for your APA102 LED strip and ESP32 integration can be a straightforward process if you follow the right steps. By choosing the right LED strip, connecting it to your ESP32 board, powering it correctly, and testing your setup, you can ensure that your hardware is ready for your project. With a working hardware setup, you can move on to the next step of configuring your software for dual data pins.
Additional Entities:
* LED density
* Voltage requirements
* Color
* Brightness
* Level shifter
* Current
* Power supply
* Overloading
* Sketch
* Dual data pins
* Connections
* Damage
* Documentation
* Online forums
* Communities
By considering these additional entities, you can further optimize your hardware setup and troubleshoot any issues that may arise. For example, you may need to adjust the brightness of your LED strip to prevent overloading your power supply, or consult the documentation for your ESP32 board to ensure that you are using the correct data pins for your LED strip. Additionally, seeking help from online forums or communities can provide valuable insights and solutions for any issues you may encounter during the setup process.2. Hardware Setup for APA102 LED Strip and ESP32 Integration
Setting up the hardware for your APA102 LED strip and ESP32 integration can be a straightforward process if you follow the right steps. This guide will walk you through the process of choosing the right LED strip, connecting it to your ESP32 board, powering it correctly, and testing your setup. By following these steps, you can ensure that your hardware is ready for your project.
2.1 Choosing the Right APA102 LED Strip
Before you start setting up your hardware, it’s important to choose the right APA102 LED strip for your project. APA102 LED strips come in different lengths, LED densities, and voltage requirements. Make sure you choose a strip that meets your project requirements and is compatible with your ESP32 board. Additionally, consider the color and brightness of the LEDs to ensure they meet your needs.
* LED Density: LED density refers to the number of LEDs per meter on the strip. A higher LED density will result in a brighter and more detailed display, but it will also consume more power. Consider the size of your project and the level of detail you need when choosing the LED density.
* Voltage Requirements: APA102 LED strips typically require either 5V or 12V power. Make sure you choose a power supply that meets the voltage requirements of your LED strip. Also, check the voltage output of your ESP32 board to ensure it’s compatible with the voltage requirements of your LED strip.
* Color and Brightness: APA102 LED strips come in a variety of colors and brightness levels. Choose the color and brightness that best fits your project’s needs. If you need to control the brightness of the LEDs, make sure you choose a LED strip that supports PWM (Pulse Width Modulation) control.
2.2 Connecting the APA102 LED Strip to the ESP32 Board
Once you have chosen the right APA102 LED strip, it’s time to connect it to your ESP32 board. You will need to connect the VCC (power), GND (ground), and two data pins (DO and DI) of the LED strip to the corresponding pins on the ESP32 board.
* VCC: Connect the VCC pin of the LED strip to the 3.3V or 5V pin on the ESP32 board, depending on the voltage requirements of your LED strip.
* GND: Connect the GND pin of the LED strip to a GND pin on the ESP32 board.
* Data Pins: Connect the DI (Data In) pin of the LED strip to one of the ESP32 board’s data pins (e.g., GPIO18). Connect the DO (Data Out) pin of the LED strip to another data pin on the ESP32 board (e.g., GPIO5). These data pins will be used to send data to the LED strip.
2.3 Adding a Level Shifter (Optional)
If your APA102 LED strip has a different voltage requirement than your ESP32 board, you may need to add a level shifter to your setup. A level shifter is a device that converts signals from one voltage level to another. For example, if your LED strip requires 5V and your ESP32 board operates at 3.3V, you will need a level shifter to convert the 5V signal to 3.3V. This will prevent damage to your ESP32 board and ensure that the LED strip receives the correct voltage.
2.4 Powering the APA102 LED Strip
APA102 LED strips can consume a lot of power, especially if you are using a long strip with many LEDs. It’s important to use a power supply that can provide enough current to the LED strip. Make sure you choose a power supply that meets the voltage and current requirements of your LED strip. You can connect the power supply to the VCC and GND pins of the LED strip. It’s also important to ensure that the power supply is properly rated for your LED strip’s specifications to avoid overloading it.
* Current: Check the current rating of your LED strip and choose a power supply that can provide enough current. For example, if your LED strip has a maximum current draw of 2A, you will need a power supply that can provide at least 2A of current.
* Power Supply: Choose a power supply that meets the voltage and current requirements of your LED strip. Consider using a power supply with adjustable voltage and current settings to ensure that you can provide the correct amount of power to your LED strip.
2.5 Testing Your Hardware Setup
Once you have connected your APA102 LED strip to your ESP32 board and powered it, it’s time to test your hardware setup. You can use a simple sketch to test the LED strip and make sure it’s working properly. If you are using dual data pins, make sure you update the sketch to use both data pins. You should see the LEDs on the strip light up in a pattern that corresponds to the sketch. If the LEDs are not lighting up properly, double-check your connections and power supply.
2.6 Troubleshooting Tips
If you are having trouble getting your hardware setup to work, there are a few things you can check.
* Connections: Double-check all of your connections to make sure they are secure and properly connected.
* Power Supply: Make sure your power supply is providing enough current to your LED strip. If you are using a power supply with adjustable voltage and current settings, make sure they are set correctly.
* Damage: Check your LED strip for any signs of damage, such as broken or missing LEDs.
* Documentation: Consult the documentation for your APA102 LED strip and ESP32 board to ensure you are using them correctly.
* Online Forums and Communities: If you’re still having trouble, consider seeking help from online forums or communities dedicated to ESP32 and LED strip projects.
2.7 Conclusion
Setting up the hardware for your APA102 LED strip and ESP32 integration can be a straightforward process if you follow the right steps. By choosing the right LED strip, connecting it to your ESP32 board, powering it correctly, and testing your setup, you can ensure that your hardware is ready for your project. With a working hardware setup, you can move on to the next step of configuring your software for dual data pins.
Additional Entities:
* LED density
* Voltage requirements
* Color
* Brightness
* Level shifter
* Current
* Power supply
* Overloading
* Sketch
* Dual data pins
* Connections
* Damage
* Documentation
* Online forums
* CommunitiesSure! Here is an expanded version of the blog post:
3. Coding for Dual Data Pins Configuration: APA102 LED Strip and ESP32
To use an APA102 LED strip with an ESP32 board, you will need a library that supports the APA102 protocol. There are several libraries available, but one of the most popular and versatile is the FastLED library. This library supports a wide range of LED strips, including the APA102, and is compatible with the ESP32. The FastLED library is also highly efficient, allowing you to create complex and dynamic lighting effects with minimal overhead.
3.1 Choosing the Right Library
When selecting a library for your APA102 LED strip and ESP32 project, there are a few key factors to consider. First, make sure that the library supports the APA102 protocol and is compatible with the ESP32. The FastLED library meets both of these requirements and is a popular choice among hobbyists and professionals alike.
Other libraries that you may consider include the Adafruit NeoPixel library and the WS2812FX library. While these libraries also support the APA102, they may not offer the same level of performance or flexibility as the FastLED library.
3.2 Configuring the LED Strip
Once you have chosen a library, you will need to configure it for your LED strip. This typically involves creating an instance of the LED strip class and specifying the number of LEDs, the type of LED strip, and the data pin(s). For dual data pin configuration, you will need to specify both data pins.
In the FastLED library, this can be done using the LED\_PIN\_ORDER parameter, which allows you to specify the order of the data pins for your LED strip. For example, if you are using data pins 5 and 18, you can specify the LED\_PIN\_ORDER as follows:
const uint8\_t kMatrixWidth = 32;
const uint8\_t kMatrixHeight = 8;
const uint8\_t kMatrixType = NEO\_GRB + NEO\_KHZ800;
const uint16\_t kMatrixWidthPixels = kMatrixWidth \* kMatrixHeight;
const uint16\_t kMatrixPin = 5;
const uint16\_t kMatrixPin2 = 18;
CRGB leds\[kMatrixWidthPixels\];
FastLED.addLeds
3.3 Sending Data to the LED Strip
To send data to the LED strip, you will need to create a buffer that contains the color data for each LED. This buffer is then sent to the LED strip using the library’s functions. When using dual data pins, the buffer is split into two halves and sent to each data pin simultaneously, effectively doubling the data transmission rate.
In the FastLED library, this can be done using the FASTLED\_ALLOW\_INTERRUPTS parameter, which allows you to enable interrupts and improve data transmission performance. For example:
FastLED.show();
FastLED.delay(1000 / 60);
3.4 Optimizing Performance
When sending data to an LED strip using dual data pins, it’s important to optimize performance to ensure that the data is transmitted quickly and accurately. This may involve adjusting the clock speed, data rate, or buffer size. You may also need to adjust the timing between data bytes to ensure that the LED strip can properly interpret the data.
The FastLED library provides several optimization features, such as CRGBPalette16 and CHSV, which can help you achieve optimal performance with minimal overhead. For example:
CRGBPalette16 currentPalette = PartyColors\_p;
uint8\_t thisFrame = 0;
for (int i = 0; i < kMatrixWidthPixels; i++) {
leds\[i\] = ColorFromPalette(currentPalette, thisFrame, BRIGHTNESS, LINEARBLEND);
thisFrame += 25;
}
FastLED.show();
FastLED.delay(1000 / 60);
3.5 Adding Effects and Animation
Once you have configured the LED strip and optimized performance, you can start adding effects and animation. The FastLED library includes a wide range of built-in effects, such as fades, chases, and rainbows. You can also create your own custom effects by modifying the color data in the buffer.
For example, you can use the blur1d() function to create a smooth blur effect, or the ghost() function to create a ghosting effect.
3.6 Troubleshooting Tips
If you are having trouble with your code, there are a few things you can check. Make sure that your LED strip is properly connected to the ESP32 board and that you have chosen the correct data pins. You may also need to adjust the clock speed or data rate to ensure that the LED strip can properly interpret the data.
If you are still having trouble, you can consult the documentation for your library and LED strip, or seek help from online forums or communities. Some common issues that may arise include flickering, color distortion, and data corruption.
3.7 Conclusion
Coding for dual data pin configuration with an APA102 LED strip and ESP32 board can be a powerful tool for creating complex and dynamic lighting effects. By choosing the right library, configuring the LED strip, optimizing performance, and adding effects and animation, you can create a wide range of projects that are sure to impress.
With careful consideration of hardware and software setup, dual data pin configuration can be an effective solution for a wide range of IoT projects involving APA102 LED strips and ESP32 microcontrollers.
Some common entities that may be of interest to readers of this blog post include:
* FastLED library: This library is an essential tool for working with LED strips and is highly recommended for use with the APA102 and ESP32.
* Dual data pins: This configuration allows for faster data transmission and more complex lighting effects.
* CRGBPalette16 and CHSV: These optimization features can help you achieve optimal performance with minimal overhead.
* blur1d() and ghost(): These functions can be used to create custom effects and animations.
* Flickering, color distortion, and data corruption: These are common issues that may arise when working with LED strips and can be addressed through proper hardware and software setup.
* ESP32 board: This microcontroller is a popular choice for IoT projects and is well-suited for use with LED strips and the FastLED library.Sure! Here are some additional details that could be added to each section of the blog post to provide more context and explanation:
3.1 Choosing the Right Library
When working with LED strips, it's important to choose a library that is well-suited to your needs. There are many libraries available for working with LED strips, but not all of them are compatible with the APA102 and ESP32. One of the most popular and versatile libraries for working with LED strips is the FastLED library.
The FastLED library is an open-source library that is specifically designed for working with high-performance LED strips, such as the APA102. It is compatible with a wide range of microcontrollers, including the ESP32, and provides a simple and intuitive API for controlling LED strips.
One of the key advantages of the FastLED library is its efficiency. It is highly optimized for speed and can generate complex and dynamic lighting effects with minimal overhead. This makes it an ideal choice for projects that require high-performance lighting effects.
3.2 Configuring the LED Strip
Once you have chosen a library, you will need to configure it for your LED strip. This typically involves creating an instance of the LED strip class and specifying the number of LEDs, the type of LED strip, and the data pin(s).
When using dual data pins with the APA102 and ESP32, you will need to specify both data pins. This can be done using the LED\_PIN\_ORDER parameter in the FastLED library, which allows you to specify the order of the data pins for your LED strip. For example, if you are using data pins 5 and 18, you can specify the LED\_PIN\_ORDER as follows:
FastLED.addLeds
3.3 Sending Data to the LED Strip
To send data to the LED strip, you will need to create a buffer that contains the color data for each LED. This buffer is then sent to the LED strip using the library’s functions.
When using dual data pins with the APA102 and ESP32, the buffer is split into two halves and sent to each data pin simultaneously, effectively doubling the data transmission rate. This can be done using the FASTLED\_ALLOW\_INTERRUPTS parameter in the FastLED library, which allows you to enable interrupts and improve data transmission performance.
For example:
leds\[0\] = CRGB::Red;
leds\[1\] = CRGB::Green;
leds\[2\] = CRGB::Blue;
// Enable interrupts to improve data transmission performance
FASTLED\_ALLOW\_INTERRUPTS(true);
// Send the buffer to the LED strip
FastLED.show();
3.4 Optimizing Performance
When sending data to an LED strip using dual data pins, it’s important to optimize performance to ensure that the data is transmitted quickly and accurately. This may involve adjusting the clock speed, data rate, or buffer size.
The FastLED library provides several optimization features that can help you achieve optimal performance with minimal overhead. For example, the CRGBPalette16 and CHSV functions can be used to generate color palettes and color values more efficiently.
Additionally, the timing between data bytes can be adjusted to ensure that the LED strip can properly interpret the data. This can be done using the LED\_SET\_CLOCK\_RATE and LED\_SET\_DATA\_RATE functions in the FastLED library.
3.5 Adding Effects and Animation
Once you have configured the LED strip and optimized performance, you can start adding effects and animation. The FastLED library includes a wide range of built-in effects, such as fades, chases, and rainbows, that can be used to create complex and dynamic lighting effects.
You can also create your own custom effects by modifying the color data in the buffer. For example, you can use the blur1d() function to create a smooth blur effect, or the ghost() function to create a ghosting effect.
3.6 Troubleshooting Tips
If you are having trouble with your code, there are a few things you can check. Make sure that your LED strip is properly connected to the ESP32 board and that you have chosen the correct data pins. You may also need to adjust the clock speed or data rate to ensure that the LED strip can properly interpret the data.
If you are still having trouble, you can consult the documentation for your library and LED strip, or seek help from online forums or communities. Some common issues that may arise include flickering, color distortion, and data corruption.
3.7 Conclusion
Coding for dual data pin configuration with an APA102 LED strip and ESP32 board can be a powerful tool for creating complex and dynamic lighting effects. By choosing the right library, configuring the LED strip, optimizing performance, and adding effects and animation, you can create a wide range of projects that are sure to impress.
With careful consideration of hardware and software setup, dual data pin configuration can be an effective solution for a wide range of IoT projects involving APA102 LED strips and ESP32 microcontrollers. Some common entities that may be of interest to readers of this blog post include the FastLED library, dual data pins, CRGBPalette16 and CHSV optimization features, blur1d() and ghost() functions, common issues such as flickering and color distortion, and the ESP32 board.Here is an expanded version of the blog post:
3. Coding for Dual Data Pins Configuration: APA102 LED Strip and ESP32
To use an APA102 LED strip with an ESP32 board, you will need a library that supports the APA102 protocol. There are several libraries available, but one of the most popular and versatile is the FastLED library. This library supports a wide range of LED strips, including the APA102, and is compatible with the ESP32. The FastLED library is also highly efficient, allowing you to create complex and dynamic lighting effects with minimal overhead.
3.1 Choosing the Right Library
When working with LED strips, it is important to choose the right library to ensure that you are able to control the LEDs effectively. The FastLED library is a popular choice for working with APA102 LED strips and the ESP32 microcontroller. This library is open-source and has a large community of users, making it easy to find help and support if you need it.
3.2 Configuring the LED Strip
Once you have chosen a library, you will need to configure it for your LED strip. This typically involves creating an instance of the LED strip class and specifying the number of LEDs, the type of LED strip, and the data pin(s). For dual data pin configuration, you will need to specify both data pins. This can be done using the LED\_PIN\_ORDER parameter in the FastLED library, which allows you to specify the order of the data pins for your LED strip.
For example, if you are using data pins 5 and 18 for your LED strip, you can configure the FastLED library as follows:
#define LED\_PIN 5
#define LED\_PIN2 18
#define NUM\_LEDS 100
CRGB leds\[NUM\_LEDS\];
FastLED.addLeds
3.3 Sending Data to the LED Strip
To send data to the LED strip, you will need to create a buffer that contains the color data for each LED. This buffer is then sent to the LED strip using the library’s functions. When using dual data pins, the buffer is split into two halves and sent to each data pin simultaneously, effectively doubling the data transmission rate. This can be done using the FASTLED\_ALLOW\_INTERRUPTS parameter in the FastLED library, which allows you to enable interrupts and improve data transmission performance.
For example, you can use the following code to send data to the LED strip:
fadeToBlackBy(leds, NUM\_LEDS, 10); // fade out over 10 steps
int pos = 0;
for(;;) { // loop forever
leds\[pos\] = CHSV(pos & 0xFF, 255, 255); // set LED color
FastLED.show(); // display the LEDs
leds\[pos\] = CRGB::Black; // turn off LED
pos++;
if(pos >= NUM\_LEDS) pos = 0;
}
3.4 Optimizing Performance
When sending data to an LED strip using dual data pins, it’s important to optimize performance to ensure that the data is transmitted quickly and accurately. This may involve adjusting the clock speed, data rate, or buffer size. You may also need to adjust the timing between data bytes to ensure that the LED strip can properly interpret the data. The FastLED library provides several optimization features, such as CRGBPalette16 and CHSV, which can help you achieve optimal performance with minimal overhead.
For example, you can use the CRGBPalette16 and CHSV functions to generate color palettes and color values more efficiently, as shown below:
CRGBPalette16 currentPalette;
currentPalette = PartyColors\_p;
uint8\_t hue = 0;
for(;;) { // loop forever
hue++; // cycle through the hue values
fill\_palette(currentPalette, 0, 255, CHSV(hue, 255, 255));
FastLED.show(); // display the LEDs
FastLED.delay(10); // wait 10 milliseconds
}
3.5 Adding Effects and Animation
Once you have configured the LED strip and optimized performance, you can start adding effects and animation. The FastLED library includes a wide range of built-in effects, such as fades, chases, and rainbows. You can also create your own custom effects by modifying the color data in the buffer. For example, you can use the blur1d() function to create a smooth blur effect, or the ghost() function to create a ghosting effect.
Here is an example of how to create a rainbow effect using the FastLED library:
fill\_rainbow(leds, NUM\_LEDS, 0, 7); // fill the LEDs with a rainbow pattern
FastLED.show(); // display the LEDs
3.6 Troubleshooting Tips
If you are having trouble with your code, there are a few things you can check. Make sure that your LED strip is properly connected to the ESP32 board and that you have chosen the correct data pins. You may also need to adjust the clock speed or data rate to ensure that the LED strip can properly interpret the data. If you are still having trouble, you can consult the documentation for your library and LED strip, or seek help from online forums or communities. Some common issues that may arise include flickering, color distortion, and data corruption.
3.7 Conclusion
Coding for dual data pin configuration with an APA102 LED strip and ESP32 board can be a powerful tool for creating complex and dynamic lighting effects. By choosing the right library, configuring the LED strip, optimizing performance, and adding effects and animation, you can create a wide range of projects that are sure to impress. With careful consideration of hardware and software setup, dual data pin configuration can be an effective solution for a wide range of IoT projects involving APA102 LED strips and ESP32 microcontrollers.
Some common entities that you may encounter when working with APA102 LED strips and the ESP32 include the FastLED library, dual data pins, CRGBPalette16 and CHSV optimization features, blur1d() and ghost() functions for creating custom effects and animations, and common issues such as flickering, color distortion, and data corruption. The ESP32 board is a popular choice for IoT projects and is well-suited for use with LED strips and the FastLED library.3. Coding for Dual Data Pins Configuration: APA102 LED Strip and ESP32
To use an APA102 LED strip with an ESP32 board, you will need a library that supports the APA102 protocol. There are several libraries available, but one of the most popular and versatile is the FastLED library. This library supports a wide range of LED strips, including the APA102, and is compatible with the ESP32. The FastLED library is also highly efficient, allowing you to create complex and dynamic lighting effects with minimal overhead.
3.1 Choosing the Right Library
When working with LED strips, it is important to choose the right library to ensure that you can properly control the LEDs and create the desired effects. The FastLED library is an excellent choice for working with APA102 LED strips and the ESP32 microcontroller. It is a popular and well-maintained library that is regularly updated with new features and bug fixes.
3.2 Configuring the LED Strip
Once you have chosen a library, you will need to configure it for your LED strip. This typically involves creating an instance of the LED strip class and specifying the number of LEDs, the type of LED strip, and the data pin(s). For dual data pin configuration, you will need to specify both data pins. This can be done using the LED\_PIN\_ORDER parameter in the FastLED library, which allows you to specify the order of the data pins for your LED strip.
Here is an example of how to configure the FastLED library for an APA102 LED strip with 60 LEDs and dual data pins on the ESP32:
“`
#define NUM_LEDS 60
#define LED_PIN 5
#define LED_PIN2 18
#define LED_TYPE APA102
#define COLOR_ORDER GRB
CRGB leds[NUM_LEDS];
FastLED.addLeds
“`
3.3 Sending Data to the LED Strip
To send data to the LED strip, you will need to create a buffer that contains the color data for each LED. This buffer is then sent to the LED strip using the library’s functions. When using dual data pins, the buffer is split into two halves and sent to each data pin simultaneously, effectively doubling the data transmission rate. This can be done using the FASTLED\_ALLOW\_INTERRUPTS parameter in the FastLED library, which allows you to enable interrupts and improve data transmission performance.
Here is an example of how to send data to an APA102 LED strip with dual data pins:
“`
void loop() {
// Fill the buffer with color data
for (int i = 0; i < NUM_LEDS; i++) {
leds[i] = CHSV(i * (255 / NUM_LEDS), 255, 255);
}
// Enable interrupts to improve data transmission performance
FASTLED_ALLOW_INTERRUPTS(true);
FastLED.show();
}
```
3.4 Optimizing Performance
When sending data to an LED strip using dual data pins, it's important to optimize performance to ensure that the data is transmitted quickly and accurately. This may involve adjusting the clock speed, data rate, or buffer size. You may also need to adjust the timing between data bytes to ensure that the LED strip can properly interpret the data. The FastLED library provides several optimization features, such as CRGBPalette16 and CHSV, which can help you achieve optimal performance with minimal overhead.
Here are some tips for optimizing performance:
* Use the CRGBPalette16 data type to store color data in the buffer. This data type uses 16-bit values, which are more efficient than the 24-bit values used by the CRGB data type.
* Use the CHSV color space instead of RGB. The CHSV color space is more intuitive and easier to work with, and it can also be more efficient than RGB for certain types of color transitions.
* Adjust the clock speed and data rate to match the capabilities of your LED strip and microcontroller.
* Use a larger buffer to reduce the number of times you need to send data to the LED strip.
* Use the FastLED library's built-in functions for creating effects and animations, which are optimized for performance.
3.5 Adding Effects and Animation
Once you have configured the LED strip and optimized performance, you can start adding effects and animation. The FastLED library includes a wide range of built-in effects, such as fades, chases, and rainbows. You can also create your own custom effects by modifying the color data in the buffer. For example, you can use the blur1d() function to create a smooth blur effect, or the ghost() function to create a ghosting effect.
Here is an example of how to create a rainbow effect using the FastLED library:
```
void loop() {
// Fill the buffer with a rainbow pattern
for (int i = 0; i < NUM_LEDS; i++) {
leds[i] = CHSV(i * (255 / NUM_LEDS), 255, 255);
}
// Send the data to the LED strip
FASTLED_ALLOW_INTERRUPTS(true);
FastLED.show();
// Wait for a short period of time before updating the LEDs again
delay(20);
}
```
3.6 Troubleshooting Tips
If you are having trouble with your code, there are a few things you can check. Make sure that your LED strip is properly connected to the ESP32 board and that you have chosen the correct data pins. You may also need to adjust the clock speed or data rate to ensure that the LED strip can properly interpret the data. If you are still having trouble, you can consult the documentation for your library and LED strip, or seek help from online forums or communities. Some common issues that may arise include flickering, color distortion, and data corruption.
3.7 Conclusion
Coding for dual data pin configuration with an APA102 LED strip and ESP32 board can be a powerful tool for creating complex and dynamic lighting effects. By choosing the right library, configuring the LED strip, optimizing performance, and adding effects and animation, you can create a wide range of projects that are sure to impress. With careful consideration of hardware and software setup, dual data pin configuration can beSure, here is an expanded version of this blog post:
3. Coding for Dual Data Pins Configuration: APA102 LED Strip and ESP32
3.1 Choosing the Right Library
To use an APA102 LED strip with an ESP32 board, you will need a library that supports the APA102 protocol. There are several libraries available, but one of the most popular and versatile is the FastLED library. This library supports a wide range of LED strips, including the APA102, and is compatible with the ESP32. The FastLED library is also highly efficient, allowing you to create complex and dynamic lighting effects with minimal overhead.
3.2 Configuring the LED Strip
Once you have chosen a library, you will need to configure it for your LED strip. This typically involves creating an instance of the LED strip class and specifying the number of LEDs, the type of LED strip, and the data pin(s). For dual data pin configuration, you will need to specify both data pins. This can be done using the LED\_PIN\_ORDER parameter in the FastLED library, which allows you to specify the order of the data pins for your LED strip.
For example, if you have an APA102 LED strip with 100 LEDs and you want to use data pins 5 and 18 for dual data pin configuration, you can use the following code to configure the LED strip:
```
#define NUM_LEDS 100
#define LED_PIN 5
#define LED_PIN2 18
#define LED_TYPE APA102
#define COLOR_ORDER GRB
CRGB leds[NUM_LEDS];
FastLED.addLeds
“`
3.3 Sending Data to the LED Strip
To send data to the LED strip, you will need to create a buffer that contains the color data for each LED. This buffer is then sent to the LED strip using the library’s functions. When using dual data pins, the buffer is split into two halves and sent to each data pin simultaneously, effectively doubling the data transmission rate. This can be done using the FASTLED\_ALLOW\_INTERRUPTS parameter in the FastLED library, which allows you to enable interrupts and improve data transmission performance.
For example, to send a solid red color to all the LEDs on your APA102 LED strip, you can use the following code:
“`
fill_solid(leds, NUM_LEDS, CRGB::Red);
FASTLED_ALLOW_INTERRUPTS(true);
FastLED.show();
“`
3.4 Optimizing Performance
When sending data to an LED strip using dual data pins, it’s important to optimize performance to ensure that the data is transmitted quickly and accurately. This may involve adjusting the clock speed, data rate, or buffer size. You may also need to adjust the timing between data bytes to ensure that the LED strip can properly interpret the data. The FastLED library provides several optimization features, such as CRGBPalette16 and CHSV, which can help you achieve optimal performance with minimal overhead.
For example, to use the CRGBPalette16 optimization feature, you can create a palette of 16 colors and then use the palette to set the colors of the LEDs in the buffer. This can significantly reduce the amount of data that needs to be sent to the LED strip, improving performance.
Here is an example of how to use the CRGBPalette16 optimization feature to create a gradient effect on your APA102 LED strip:
“`
const uint8_t num_colors = 16;
CRGBPalette16 palette;
// Create a gradient palette
for (int i = 0; i < num_colors; i++) {
palette[i] = CHSV(i * 16, 255, 255);
}
// Fill the buffer with the gradient palette
for (int i = 0; i < NUM_LEDS; i++) {
leds[i] = ColorFromPalette(palette, i % num_colors);
}
FASTLED_ALLOW_INTERRUPTS(true);
FastLED.show();
```
3.5 Adding Effects and Animation
Once you have configured the LED strip and optimized performance, you can start adding effects and animation. The FastLED library includes a wide range of built-in effects, such as fades, chases, and rainbows. You can also create your own custom effects by modifying the color data in the buffer. For example, you can use the blur1d() function to create a smooth blur effect, or the ghost() function to create a ghosting effect.
Here is an example of how to use the FastLED library's built-in rainbow effect to create a scrolling rainbow on your APA102 LED strip:
```
void loop() {
// Shift the buffer by one LED
fill_rainbow(leds + 1, NUM_LEDS - 1, 0, 255 / (NUM_LEDS - 1));
leds[0] = leds[NUM_LEDS - 1];
FASTLED_ALLOW_INTERRUPTS(true);
FastLED.show();
FastLED.delay(20);
}
```
3.6 Troubleshooting Tips
If you are having trouble with your code, there are a few things you can check. Make sure that your LED strip is properly connected to the ESP32 board and that you have chosen the correct data pins. You may also need to adjust the clock speed or data rate to ensure that the LED strip can properly interpret the data. If you are still having trouble, you can consult the documentation for your library and LED strip, or seek help from online forums or communities. Some common issues that may arise include flickering, color distortion, and data corruption.
3.7 Conclusion
Coding for dual data pin configuration with an APA102 LED strip and ESP32 board can be a powerful tool for creating complex and dynamic lighting effects. By choosing the right library, configuring the LED strip, optimizing performance, and adding effects and animation, you can create a wide range of projects that are sure to impress. With careful consideration of hardware and software setup, dual data pin configuration can be an effective solution for a wide range of IoT projects involving APA102 LED strips and ESP32 microcontrollers.
Some additional entities that could be added to this blog post include:
* FastLED library: This library is an essential tool for working with LED strips and is highly recommended for use with the APA102 and ESP32.
* Dual data pins: This configuration allows for faster data transmission and more complex lighting effects.
* CRGBPalette16 and CHSV: These optimization features can help you achieve optimal performance with minimal overhead.
* blur1d() and ghost(): These functions can be used to create custom effects and animations.
* Flickering, color distortion, and data corruption: These are common issues that may arise when working with LED strips and can be addressed through proper hardware and software setup.
* ESP32 board: This microcontroller is a popular choice for IoT projects and is well-suited for use with LED strips and the FastLED library.Here's an expanded version of the blog post you provided:
3. Coding for Dual Data Pins Configuration: APA102 LED Strip and ESP32
To use an APA102 LED strip with an ESP32 board, you will need a library that supports the APA102 protocol. There are several libraries available, but one of the most popular and versatile is the FastLED library. This library supports a wide range of LED strips, including the APA102, and is compatible with the ESP32. The FastLED library is also highly efficient, allowing you to create complex and dynamic lighting effects with minimal overhead.
3.1 Choosing the Right Library
When working with LED strips, it's essential to choose the right library to ensure that you can control the LEDs effectively and create the desired effects. The FastLED library is a popular choice for working with APA102 LEDs and ESP32 boards because it is easy to use, highly efficient, and well-documented. The library supports a wide range of LED types, including APA102, and provides several built-in effects and functions that make it easy to create custom animations.
3.2 Configuring the LED Strip
Once you have chosen a library, you will need to configure it for your LED strip. This typically involves creating an instance of the LED strip class and specifying the number of LEDs, the type of LED strip, and the data pin(s). For dual data pin configuration, you will need to specify both data pins. This can be done using the LED\_PIN\_ORDER parameter in the FastLED library, which allows you to specify the order of the data pins for your LED strip.
For example, if you have an APA102 LED strip with 100 LEDs and you want to use data pins 5 and 18 for dual data pin configuration, you can use the following code to configure the LED strip:
```
#define NUM_LEDS 100
#define LED_PIN 5
#define LED_PIN2 18
#define LED_TYPE APA102
#define COLOR_ORDER GRB
CRGB leds[NUM_LEDS];
FastLED.addLeds
“`
3.3 Sending Data to the LED Strip
To send data to the LED strip, you will need to create a buffer that contains the color data for each LED. This buffer is then sent to the LED strip using the library’s functions. When using dual data pins, the buffer is split into two halves and sent to each data pin simultaneously, effectively doubling the data transmission rate. This can be done using the FASTLED\_ALLOW\_INTERRUPTS parameter in the FastLED library, which allows you to enable interrupts and improve data transmission performance.
For example, to set all the LEDs on your APA102 LED strip to red, you can use the following code:
“`
fill_solid(leds, NUM_LEDS, CRGB::Red);
FastLED.show();
“`
3.4 Optimizing Performance
When sending data to an LED strip using dual data pins, it’s important to optimize performance to ensure that the data is transmitted quickly and accurately. This may involve adjusting the clock speed, data rate, or buffer size. You may also need to adjust the timing between data bytes to ensure that the LED strip can properly interpret the data. The FastLED library provides several optimization features, such as CRGBPalette16 and CHSV, which can help you achieve optimal performance with minimal overhead.
For example, using the CRGBPalette16 function, you can define a 16-color palette and then use it to set the colors of the LEDs in your buffer. This can help reduce the amount of data that needs to be sent to the LED strip and improve performance. Here’s an example of how to use the CRGBPalette16 function to create a rainbow effect:
“`
const uint8_t numPaletteColors = 16;
CRGBPalette16 palette = {
0x000000, 0x0000FF, 0x00FF00, 0x00FFFF, 0xFF0000, 0xFF00FF, 0xFFFF00, 0xFFFFFF,
0x000000, 0x0000FF, 0x00FF00, 0x00FFFF, 0xFF0000, 0xFF00FF, 0xFFFF00, 0xFFFFFF
};
void loop() {
for (int i = 0; i < NUM_LEDS; i++) {
leds[i] = ColorFromPalette(palette, (i * 256 / NUM_LEDS) % numPaletteColors);
}
FastLED.show();
}
```
3.5 Adding Effects and Animation
Once you have configured the LED strip and optimized performance, you can start adding effects and animation. The FastLED library includes a wide range of built-in effects, such as fades, chases, and rainbows. You can also create your own custom effects by modifying the color data in the buffer. For example, you can use the blur1d() function to create a smooth blur effect, or the ghost() function to create a ghosting effect.
Here's an example of how to create a custom animation that uses a combination of built-in and custom effects:
```
const uint8_t numChaseColors = 4;
CRGB chaseColors[numChaseColors] = { CRGB::Red, CRGB::Green, CRGB::Blue, CRGB::Purple };
void loop() {
for (int i = 0; i < NUM_LEDS; i++) {
// Chase effect
leds[i] = chaseColors[(i + millis() / 100) % numChaseColors];
}
// Blur effect
blur1d(leds, NUM_LEDS, 10);
// Ghost effect
ghost(leds, NUM_LEDS, 20, 1.0 / 60.0);
FastLED.show();
}
```
3.6 Troubleshooting Tips
If you are having trouble with your code, there are a few things you can check. Make sure that your LED strip is properly connected to the ESP32 board and that you have chosen the correct data pins. You may also need to adjust the clock speed or data rate to ensure that the LED strip can properly interpret the data. If you are still having trouble, you can consult the documentation for your library and LED strip, or seek help from online forums or communities. Some common issues that may arise include flickering, color distortion, and data corruption.
3.7 Conclusion
Coding for dual data pin configuration with an APA102 LED strip and ESP32 board can be a powerful tool for creating complex and dynamic lighting effects. By choosing the right library, configuring the LED strip, optimizing performance, and adding effects and animation, you can create a wide range of projects that are sure to impress. With careful consideration of hardware and software setup, dual data pin configuration can be an effective solution for a wide range of IoT projects involving APA102 LED strips and ESP32 microcontrollers.
Some common entities that may be of interest to readers include:
* FastLED library: This library is an essential tool for working with LED strips and is highly recommended for use with the APA102 and ESP32.
* Dual data pins: This configuration allows for faster data transmission and more complex lighting effects.
* CRGBPalette16 and CHSV: These optimization features can help you achieve optimal performance with minimal overhead.
* blur1d() and ghost(): These functions can be used to create custom effects and animations.
* Flickering, color distortion, and data corruption: These are common issues that may arise when working with LED strips and can be addressed through proper hardware and software setup.
* ESP32 board: This microcontroller is a popular choice for IoT projects and is well-suited for use with LED strips and the FastLED library.Here is an expanded version of the blog post:
3. Coding for Dual Data Pins Configuration: APA102 LED Strip and ESP32
3.1 Choosing the Right Library
To use an APA102 LED strip with an ESP32 board, you will need a library that supports the APA102 protocol. There are several libraries available, but one of the most popular and versatile is the FastLED library. This library supports a wide range of LED strips, including the APA102, and is compatible with the ESP32. The FastLED library is also highly efficient, allowing you to create complex and dynamic lighting effects with minimal overhead.
3.2 Configuring the LED Strip
Once you have chosen a library, you will need to configure it for your LED strip. This typically involves creating an instance of the LED strip class and specifying the number of LEDs, the type of LED strip, and the data pin(s). For dual data pin configuration, you will need to specify both data pins. This can be done using the LED\_PIN\_ORDER parameter in the FastLED library, which allows you to specify the order of the data pins for your LED strip.
Here is an example of how to configure the FastLED library for an APA102 LED strip with 100 LEDs and dual data pins on an ESP32 board:
```
#define NUM_LEDS 100
#define LED_PIN 5
#define LED_PIN2 27
#define LED_TYPE APA102
#define COLOR_ORDER GRB
CRGB leds[NUM_LEDS];
FastLED.addLeds
“`
3.3 Sending Data to the LED Strip
To send data to the LED strip, you will need to create a buffer that contains the color data for each LED. This buffer is then sent to the LED strip using the library’s functions. When using dual data pins, the buffer is split into two halves and sent to each data pin simultaneously, effectively doubling the data transmission rate. This can be done using the FASTLED\_ALLOW\_INTERRUPTS parameter in the FastLED library, which allows you to enable interrupts and improve data transmission performance.
Here is an example of how to send data to an APA102 LED strip with dual data pins using the FastLED library:
“`
void loop() {
// Update the color data in the buffer
for (int i = 0; i < NUM_LEDS; i++) {
leds[i] = CHSV(millis() / 100 % 255, 255, 255);
}
// Enable interrupts to improve data transmission performance
FASTLED_ALLOW_INTERRUPTS(true);
// Send the buffer to the LED strip
FastLED.show();
}
```
3.4 Optimizing Performance
When sending data to an LED strip using dual data pins, it's important to optimize performance to ensure that the data is transmitted quickly and accurately. This may involve adjusting the clock speed, data rate, or buffer size. You may also need to adjust the timing between data bytes to ensure that the LED strip can properly interpret the data.
The FastLED library provides several optimization features that can help you achieve optimal performance with minimal overhead. For example, the CRGBPalette16 and CHSV functions can be used to create and manipulate color palettes, which can reduce the amount of data that needs to be sent to the LED strip.
Here is an example of how to use the CRGBPalette16 function to create a color palette and update the color data in the buffer:
```
#define NUM_PALETTE_COLORS 16
CRGBPalette16 currentPalette;
TBlendType currentBlending;
void setup() {
// Initialize the palette
currentPalette = PartyColors_p;
currentBlending = LINEARBLEND;
// Enable interrupts to improve data transmission performance
FASTLED_ALLOW_INTERRUPTS(true);
}
void loop() {
// Update the color data in the buffer using the palette
for (int i = 0; i < NUM_LEDS; i++) {
leds[i] = ColorFromPalette(currentPalette, millis() / 100 % NUM_PALETTE_COLORS, 255, currentBlending);
}
// Send the buffer to the LED strip
FastLED.show();
}
```
3.5 Adding Effects and Animation
Once you have configured the LED strip and optimized performance, you can start adding effects and animation. The FastLED library includes a wide range of built-in effects, such as fades, chases, and rainbows. You can also create your own custom effects by modifying the color data in the buffer.
For example, you can use the blur1d() function to create a smooth blur effect, or the ghost() function to create a ghosting effect.
Here is an example of how to create a rainbow effect using the FastLED library:
```
void loop() {
// Fill the buffer with a rainbow pattern
fill_rainbow(leds, NUM_LEDS, 0, 255 / NUM_LEDS);
// Send the buffer to the LED strip
FastLED.show();
// Wait for a short delay
delay(10);
}
```
3.6 Troubleshooting Tips
If you are having trouble with your code, there are a few things you can check. Make sure that your LED strip is properly connected to the ESP32 board and that you have chosen the correct data pins. You may also need to adjust the clock speed or data rate to ensure that the LED strip can properly interpret the data.
If you are still having trouble, you can consult the documentation for your library and LED strip, or seek help from online forums or communities. Some common issues that may arise include flickering, color distortion, and data corruption.
3.7 Conclusion
Coding for dual data pin configuration with an APA102 LED strip and ESP32 board can be a powerful tool for creating complex and dynamic lighting effects. By choosing the right library, configuring the LED strip, optimizing performance, and adding effects and animation, you can create a wide range of projects that are sure to impress.
With careful consideration of hardware and software setup, dual data pin configuration can be an effective solution for a wide range of IoT projects involving APA102 LED strips and ESP32 microcontrollers.
Here are some additional entities that could be added to this blog post to provide more context and information:
* FastLED library: This library is an essential tool for working with LED strips and is highly recommended for use with the APA102 and ESP32.
* Dual data pins: This configuration allows for faster data transmission and more complex lighting effects.
* CRGBPalette16 and CHSV: These optimization features can help you achieve optimal performance with minimal overhead.
* blur1d() and ghost(): These functions can be used to create custom effects and animations.
* Flickering, color distortion, and data corruption: These are common issues that may arise when working with LED strips and can be addressed through proper hardware and software setup.
* ESP32 board: This microcontroller is a popular choice for IoT projects and is well-suited for use with LED strips and the FastLED library.Sure! Here's an expanded version of the `
` tag “4. Troubleshooting Tips for APA102 LED Strip and ESP32 Integration” with additional `
` paragraphs and missing entities:
4. Troubleshooting Tips for APA102 LED Strip and ESP32 Integration
If you’re having trouble getting your APA102 LED strip to work with your ESP32 board, don’t worry – it’s a common issue that many hobbyists and professionals encounter. In this section, we’ll provide some troubleshooting tips to help you identify and resolve common issues with APA102 LED strip and ESP32 integration.
4.1 Check Your Wiring
One of the most common issues with APA102 LED strip and ESP32 integration is incorrect wiring. Make sure that your LED strip is properly connected to the ESP32 board and that you have chosen the correct data pins for dual data pin configuration. Double-check your wiring connections and make sure that there are no loose connections or shorts.
Missing entity: diagram
To help you visualize the correct wiring configuration, we’ve included a diagram below:

4.2 Verify Your Power Supply
Another common issue is insufficient power supply. APA102 LED strips can consume a lot of power, especially when using a large number of LEDs or running complex animations. Make sure that your power supply is capable of providing enough current to your LED strip and that it is properly connected to the LED strip and ESP32 board.
Missing entity: voltage
APA102 LED strips typically require a voltage of 5V, although some may require 12V or higher. Make sure that your power supply is providing the correct voltage for your LED strip.
4.3 Check Your Code
If your LED strip is not responding to your code, make sure that your code is correct and that you have properly configured the LED strip library for dual data pin configuration. Double-check your data pin assignments and make sure that your buffer size and data rate are appropriate for your LED strip.
Missing entity: example code
Here’s an example of code that you can use to test your LED strip and ESP32 integration:
“`c++
#include
#define LED_PIN 5
#define LED_TYPE APA102
#define COLOR_ORDER GRB
#define NUM_LEDS 60
CRGB leds[NUM_LEDS];
void setup() {
FastLED.addLeds
}
void loop() {
for (int i = 0; i < NUM_LEDS; i++) {
leds[i] = CHSV(i * 255 / NUM_LEDS, 255, 255);
FastLED.show();
delay(10);
}
}
```
4.4 Update Your Firmware
If you are using an older version of the ESP32 firmware, you may encounter issues with dual data pin configuration. Make sure that your firmware is up-to-date and that you are using the latest version of the LED strip library. Updating your firmware can also improve performance and stability.
Missing entity: firmware update instructions
To update your ESP32 firmware, follow these steps:
- Download the latest version of the ESP32 firmware from the Espressif website.
- Open the Arduino IDE and select “Preferences” from the “File” menu.
- Add the following URL to the “Additional Boards Manager URLs” field:
- Open the “Boards Manager” from the “Tools” menu and search for “ESP32”.
- Select the latest version of the ESP32 board and click “Install”.
- Connect your ESP32 board to your computer and select it from the “Tools > Board” menu.
- Select the appropriate port from the “Tools > Port” menu.
- Press the “Upload” button to upload the firmware to your ESP32 board.
4.5 Check Your Hardware Compatibility
Make sure that your hardware components are compatible with each other. Some LED strips may require different voltage levels or data rates than others. Make sure that your ESP32 board is capable of providing enough current and that your LED strip is compatible with dual data pin configuration.
Missing entity: compatibility table
Here’s a compatibility table to help you choose the right components for your project:
| Component | Voltage | Data Rate | Max Current |
|---|---|---|---|
| APA102 LED Strip | 5V or 12V | 24MHz or 32MHz | 60mA per LED |
| ESP32 Board | 3.3V | 16MHz to 80MHz | 120mA per pin |
4.6 Test Your LED Strip
If you are still having issues with your LED strip, try testing it with a different microcontroller or LED strip library to rule out any issues with your ESP32 board or code. This can help you identify any issues with your LED strip itself, such as faulty LEDs or damaged wiring.
Missing entity: LED strip testing instructions
To test your LED strip, follow these steps:
- Connect your LED strip to a different microcontroller or LED strip library.
- Upload a simple test program to your microcontroller.
- Check that your LED strip is responding to the test program.
- If your LED strip is still not responding, try using a different LED strip to rule out any issues with your original LED strip.
4.7 Seek Help from Online Forums
If you are still having trouble troubleshooting your APA102 LED strip and ESP32 integration, consider seeking help from online forums or communities. There are many resources available online, including forums dedicated to ESP32 and LED strip integration.
Missing entity: forum links
Here are some online forums and communities where you can find help with your ESP32 and LED strip integration:
4.8 Conclusion
By following these troubleshooting tips, you can identify and resolve many common issues with APA102 LED strip and ESP32 integration. Remember to double-check your wiring connections, power supply, and code, and to update your firmware and verify hardware compatibility. If you are still having trouble, don’t hesitate to seek help from online forums or communities. With careful attention to detail and a systematic approach to troubleshooting, you can create a wide range of projects that are sure to impress.
4. Troubleshooting Tips for APA102 LED Strip and ESP32 Integration
If you’re having trouble getting your APA102 LED strip to work with your ESP32 board, don’t worry – it’s a common issue that many hobbyists and professionals encounter. In this section, we’ll provide some troubleshooting tips to help you identify and resolve common issues with APA102 LED strip and ESP32 integration.
4.1 Check Your Wiring
One of the most common issues with APA102 LED strip and ESP32 integration is incorrect wiring. Make sure that your LED strip is properly connected to the ESP32 board and that you have chosen the correct data pins for dual data pin configuration. Double-check your wiring connections and make sure that there are no loose connections or shorts.
Missing entity: diagram
To help you visualize the correct wiring configuration, we’ve included a diagram below:
4.2 Verify Your Power Supply
Another common issue is insufficient power supply. APA102 LED strips can consume a lot of power, especially when using a large number of LEDs or running complex animations. Make sure that your power supply is capable of providing enough current to your LED strip and that it is properly connected to the LED strip and ESP32 board.
Missing entity: voltage
APA102 LED strips typically require a voltage of 5V, although some may require 12V or higher. Make sure that your power supply is providing the correct voltage for your LED strip.
4.3 Check Your Code
If your LED strip is not responding to your code, make sure that your code is correct and that you have properly configured the LED strip library for dual data pin configuration. Double-check your data pin assignments and make sure that your buffer size and data rate are appropriate for your LED strip.
Missing entity: example code
Here’s an example of code that you can use to test your LED strip and ESP32 integration:
“`c++
#include
#define LED_PIN 5
#define LED_TYPE APA102
#define COLOR_ORDER GRB
#define NUM_LEDS 60
CRGB leds[NUM_LEDS];
void setup() {
FastLED.addLeds
}
void loop() {
for (int i = 0; i < NUM_LEDS; i++) {
leds[i] = CHSV(i * 255 / NUM_LEDS, 255, 255);
FastLED.show();
delay(10);
}
}
```
4.4 Update Your Firmware
If you are using an older version of the ESP32 firmware, you may encounter issues with dual data pin configuration. Make sure that your firmware is up-to-date and that you are using the latest version of the LED strip library. Updating your firmware can also improve performance and stability.
Missing entity: firmware update instructions
To update your ESP32 firmware, follow these steps:
1. Download the latest version of the ESP32 firmware from the Espressif website.
2. Open the Arduino IDE and select "Preferences" from the "File" menu.
3. Add the following URL to the "Additional Boards Manager URLs" field:
4. Open the “Boards Manager” from the “Tools” menu and search for “ESP32”.
5. Select the latest version of the ESP32 board and click “Install”.
6. Connect your ESP32 board to your computer and select it from the “Tools > Board” menu.
7. Select the appropriate port from the “Tools > Port” menu.
8. Press the “Upload” button to upload the firmware to your ESP32 board.
4.5 Check Your Hardware Compatibility
Make sure that your hardware components are compatible with each other. Some LED strips may require different voltage levels or data rates than others. Make sure that your ESP32 board is capable of providing enough current and that your LED strip is compatible with dual data pin configuration.
Missing entity: compatibility table
Here’s a compatibility table to help you choose the right components for your project:
| Component | Voltage | Data Rate | Max Current |
| — | — | — | — |
| APA102 LED Strip | 5V or 12V | 24MHz or 32MHz | 60mA per LED |
| ESP32 Board | 3.3V | 16MHz to 80MHz | 120mA per pin |
4.6 Test Your LED Strip
If you are still having issues with your LED strip, try testing it with a different microcontroller or LED strip library to rule out any issues with your ESP32 board or code. This can help you identify any issues with your LED strip itself, such as faulty LEDs or damaged wiring.
Missing entity: LED strip testing instructions
To test your LED strip, follow these steps:
1. Connect your LED strip to a different microcontroller or LED strip library.
2. Upload a simple test program to your microcontroller.
3. Check that your LED strip is responding to the test program.
4. If your LED strip is still not responding, try using a different LED strip to rule out any issues with your original LED strip.
4.7 Seek Help from Online Forums
If you are still having trouble troubleshooting your APA102 LED strip and ESP32 integration, consider seeking help from online forums or communities. There are many resources available online, including forums dedicated to ESP32 and LED strip integration.
Missing entity: forum links
Here are some online forums and communities where you can find help with your ESP32 and LED strip integration:
* r/esp32 on Reddit
* ESP32 Forum
* Arduino Forum: ESP32
* LED Group Buy Forum
4.8 Conclusion
By following these troubleshooting tips, you can identify and resolve many common issues with APA102 LED strip and ESP32 integration. Remember to double-check your wiring connections, power supply, and code, and to update your firmware and verify hardware compatibility. If you are still having trouble, don’t hesitate to seek help from online forums or communities. With careful attention to detail and a systematic approach to troubleshooting, you can create a wide range of projects that are sure to impress.Troubleshooting Tips for APA102 LED Strip and ESP32 Integration
If you’re having trouble getting your APA102 LED strip to work with your ESP32 board, don’t worry – it’s a common issue that many hobbyists and professionals encounter. In this section, we’ll provide some troubleshooting tips to help you identify and resolve common issues with APA102 LED strip and ESP32 integration.
4.1 Check Your Wiring
One of the most common issues with APA102 LED strip and ESP32 integration is incorrect wiring. Make sure that your LED strip is properly connected to the ESP32 board and that you have chosen the correct data pins for dual data pin configuration. Double-check your wiring connections and make sure that there are no loose connections or shorts.
To help you visualize the correct wiring configuration, we’ve included a diagram below:

4.2 Verify Your Power Supply
Another common issue is insufficient power supply. APA102 LED strips can consume a lot of power, especially when using a large number of LEDs or running complex animations. Make sure that your power supply is capable of providing enough current to your LED strip and that it is properly connected to the LED strip and ESP32 board.
APA102 LED strips typically require a voltage of 5V, although some may require 12V or higher. Make sure that your power supply is providing the correct voltage for your LED strip.
4.3 Check Your Code
If your LED strip is not responding to your code, make sure that your code is correct and that you have properly configured the LED strip library for dual data pin configuration. Double-check your data pin assignments and make sure that your buffer size and data rate are appropriate for your LED strip.
Here’s an example of code that you can use to test your LED strip and ESP32 integration:
“`c++
#include
#define LED_PIN 5
#define LED_TYPE APA102
#define COLOR_ORDER GRB
#define NUM_LEDS 60
CRGB leds[NUM_LEDS];
void setup() {
FastLED.addLeds
}
void loop() {
for (int i = 0; i < NUM_LEDS; i++) {
leds[i] = CHSV(i * 255 / NUM_LEDS, 255, 255);
FastLED.show();
delay(10);
}
}
```
4.4 Update Your Firmware
If you are using an older version of the ESP32 firmware, you may encounter issues with dual data pin configuration. Make sure that your firmware is up-to-date and that you are using the latest version of the LED strip library. Updating your firmware can also improve performance and stability.
To update your ESP32 firmware, follow these steps:
1. Download the latest version of the ESP32 firmware from the [Espressif website](https://www.espressif.com/en/support/download/firmware).
2. Open the Arduino IDE and select "Preferences" from the "File" menu.
3. Add the following URL to the "Additional Boards Manager URLs" field:
4. Open the “Boards Manager” from the “Tools” menu and search for “ESP32”.
5. Select the latest version of the ESP32 board and click “Install”.
6. Connect your ESP32 board to your computer and select it from the “Tools > Board” menu.
7. Select the appropriate port from the “Tools > Port” menu.
8. Press the “Upload” button to upload the firmware to your ESP32 board.
4.5 Check Your Hardware Compatibility
Make sure that your hardware components are compatible with each other. Some LED strips may require different voltage levels or data rates than others. Make sure that your ESP32 board is capable of providing enough current and that your LED strip is compatible with dual data pin configuration.
Here’s a compatibility table to help you choose the right components for your project:
| Component | Voltage | Data Rate | Max Current |
| — | — | — | — |
| APA102 LED Strip | 5V or 12V | 24MHz or 32MHz | 60mA per LED |
| ESP32 Board | 3.3V | 16MHz to 80MHz | 120mA per pin |
4.6 Test Your LED Strip
If you are still having issues with your LED strip, try testing it with a different microcontroller or LED strip library to rule out any issues with your ESP32 board or code. This can help you identify any issues with your LED strip itself, such as faulty LEDs or damaged wiring.
To test your LED strip, follow these steps:
1. Connect your LED strip to a different microcontroller or LED strip library.
2. Upload a simple test program to your microcontroller.
3. Check that your LED strip is responding to the test program.
4. If your LED strip is still not responding, try using a different LED strip to rule out any issues with your original LED strip.
4.7 Seek Help from Online Forums
If you are still having trouble troubleshooting your APA102 LED strip and ESP32 integration, consider seeking help from online forums or communities. There are many resources available online, including forums dedicated to ESP32 and LED strip integration.
Here are some online forums and communities where you can find help with your ESP32 and LED strip integration:
* [r/esp32 on Reddit](https://www.reddit.com/r/esp32/)
* [ESP32 Forum](https://www.esp32.com/viewforum.php?f=10)
* [Arduino Forum: ESP32](https://forum.arduino.cc/index.php?board=35.0)
* [LED Group Buy Forum](https://www.ledgroupbuy.com/forum/)
4.8 Conclusion
By following these troubleshooting tips, you can identify and resolve many common issues with APA102 LED strip and ESP32 integration. Remember to double-check your wiring connections, power supply, and code, and to update your firmware and verify hardware compatibility. If you are still having trouble, don’t hesitate to seek help from online forums or communities. With careful attention to detail and a systematic approach to troubleshooting, you can create a wide range of projects that are sure to impress.4. Troubleshooting Tips for APA102 LED Strip and ESP32 Integration
If you’re having trouble getting your APA102 LED strip to work with your ESP32 board, don’t worry – it’s a common issue that many hobbyists and professionals encounter. In this section, we’ll provide some troubleshooting tips to help you identify and resolve common issues with APA102 LED strip and ESP32 integration.
4.1 Check Your Wiring
One of the most common issues with APA102 LED strip and ESP32 integration is incorrect wiring. Make sure that your LED strip is properly connected to the ESP32 board and that you have chosen the correct data pins for dual data pin configuration. Double-check your wiring connections and make sure that there are no loose connections or shorts.
To help you visualize the correct wiring configuration, we’ve included a diagram below:

4.2 Verify Your Power Supply
Another common issue is insufficient power supply. APA102 LED strips can consume a lot of power, especially when using a large number of LEDs or running complex animations. Make sure that your power supply is capable of providing enough current to your LED strip and that it is properly connected to the LED strip and ESP32 board.
APA102 LED strips typically require a voltage of 5V, although some may require 12V or higher. Make sure that your power supply is providing the correct voltage for your LED strip.
4.3 Check Your Code
If your LED strip is not responding to your code, make sure that your code is correct and that you have properly configured the LED strip library for dual data pin configuration. Double-check your data pin assignments and make sure that your buffer size and data rate are appropriate for your LED strip.
Here’s an example of code that you can use to test your LED strip and ESP32 integration:
“`c++
#include
#define LED_PIN 5
#define LED_TYPE APA102
#define COLOR_ORDER GRB
#define NUM_LEDS 60
CRGB leds[NUM_LEDS];
void setup() {
FastLED.addLeds
}
void loop() {
for (int i = 0; i < NUM_LEDS; i++) {
leds[i] = CHSV(i * 255 / NUM_LEDS, 255, 255);
FastLED.show();
delay(10);
}
}
```
4.4 Update Your Firmware
If you are using an older version of the ESP32 firmware, you may encounter issues with dual data pin configuration. Make sure that your firmware is up-to-date and that you are using the latest version of the LED strip library. Updating your firmware can also improve performance and stability.
To update your ESP32 firmware, follow these steps:
1. Download the latest version of the ESP32 firmware from the Espressif website.
2. Open the Arduino IDE and select "Preferences" from the "File" menu.
3. Add the following URL to the "Additional Boards Manager URLs" field:
4. Open the “Boards Manager” from the “Tools” menu and search for “ESP32”.
5. Select the latest version of the ESP32 board and click “Install”.
6. Connect your ESP32 board to your computer and select it from the “Tools > Board” menu.
7. Select the appropriate port from the “Tools > Port” menu.
8. Press the “Upload” button to upload the firmware to your ESP32 board.
4.5 Check Your Hardware Compatibility
Make sure that your hardware components are compatible with each other. Some LED strips may require different voltage levels or data rates than others. Make sure that your ESP32 board is capable of providing enough current and that your LED strip is compatible with dual data pin configuration.
Here’s a compatibility table to help you choose the right components for your project:
| Component | Voltage | Data Rate | Max Current |
| — | — | — | — |
| APA102 LED Strip | 5V or 12V | 24MHz or 32MHz | 60mA per LED |
| ESP32 Board | 3.3V | 16MHz to 80MHz | 120mA per pin |
4.6 Test Your LED Strip
If you are still having issues with your LED strip, try testing it with a different microcontroller or LED strip library to rule out any issues with your ESP32 board or code. This can help you identify any issues with your LED strip itself, such as faulty LEDs or damaged wiring.
To test your LED strip, follow these steps:
1. Connect your LED strip to a different microcontroller or LED strip library.
2. Upload a simple test program to your microcontroller.
3. Check that your LED strip is responding to the test program.
4. If your LED strip is still not responding, try using a different LED strip to rule out any issues with your original LED strip.
4.7 Seek Help from Online Forums
If you are still having trouble troubleshooting your APA102 LED strip and ESP32 integration, consider seeking help from online forums or communities. There are many resources available online, including forums dedicated to ESP32 and LED strip integration.
Here are some online forums and communities where you can find help with your ESP32 and LED strip integration:
* r/esp32 on Reddit
* ESP32 Forum
* Arduino Forum: ESP32
* LED Group Buy Forum
4.8 Conclusion
By following these troubleshooting tips, you can identify and resolve many common issues with APA102 LED strip and ESP32 integration. Remember to double-check your wiring connections, power supply, and code, and to update your firmware and verify hardware compatibility. If you are still having trouble, don’t hesitate to seek help from online forums or communities. With careful attention to detail and a systematic approach to troubleshooting, you can create a wide range of projects that are sure to impress.4. Troubleshooting Tips for APA102 LED Strip and ESP32 Integration
If you’re having trouble getting your APA102 LED strip to work with your ESP32 board, don’t worry – it’s a common issue that many hobbyists and professionals encounter. In this section, we’ll provide some troubleshooting tips to help you identify and resolve common issues with APA102 LED strip and ESP32 integration.
4.1 Check Your Wiring
One of the most common issues with APA102 LED strip and ESP32 integration is incorrect wiring. Make sure that your LED strip is properly connected to the ESP32 board and that you have chosen the correct data pins for dual data pin configuration. Double-check your wiring connections and make sure that there are no loose connections or shorts.
To help you visualize the correct wiring configuration, we’ve included a diagram below:
[Insert diagram of APA102 LED strip and ESP32 wiring]
4.2 Verify Your Power Supply
Another common issue is insufficient power supply. APA102 LED strips can consume a lot of power, especially when using a large number of LEDs or running complex animations. Make sure that your power supply is capable of providing enough current to your LED strip and that it is properly connected to the LED strip and ESP32 board.
APA102 LED strips typically require a voltage of 5V, although some may require 12V or higher. Make sure that your power supply is providing the correct voltage for your LED strip.
4.3 Check Your Code
If your LED strip is not responding to your code, make sure that your code is correct and that you have properly configured the LED strip library for dual data pin configuration. Double-check your data pin assignments and make sure that your buffer size and data rate are appropriate for your LED strip.
Here’s an example of code that you can use to test your LED strip and ESP32 integration:
“`c++
#include
#define LED_PIN 5
#define LED_TYPE APA102
#define COLOR_ORDER GRB
#define NUM_LEDS 60
CRGB leds[NUM_LEDS];
void setup() {
FastLED.addLeds
}
void loop() {
for (int i = 0; i < NUM_LEDS; i++) {
leds[i] = CHSV(i * 255 / NUM_LEDS, 255, 255);
FastLED.show();
delay(10);
}
}
```
4.4 Update Your Firmware
If you are using an older version of the ESP32 firmware, you may encounter issues with dual data pin configuration. Make sure that your firmware is up-to-date and that you are using the latest version of the LED strip library. Updating your firmware can also improve performance and stability.
To update your ESP32 firmware, follow these steps:
1. Download the latest version of the ESP32 firmware from the Espressif website.
2. Open the Arduino IDE and select "Preferences" from the "File" menu.
3. Add the following URL to the "Additional Boards Manager URLs" field:
4. Open the “Boards Manager” from the “Tools” menu and search for “ESP32”.
5. Select the latest version of the ESP32 board and click “Install”.
6. Connect your ESP32 board to your computer and select it from the “Tools > Board” menu.
7. Select the appropriate port from the “Tools > Port” menu.
8. Press the “Upload” button to upload the firmware to your ESP32 board.
4.5 Check Your Hardware Compatibility
Make sure that your hardware components are compatible with each other. Some LED strips may require different voltage levels or data rates than others. Make sure that your ESP32 board is capable of providing enough current and that your LED strip is compatible with dual data pin configuration.
Here’s a compatibility table to help you choose the right components for your project:
| Component | Voltage | Data Rate | Max Current |
| — | — | — | — |
| APA102 LED Strip | 5V or 12V | 24MHz or 32MHz | 60mA per LED |
| ESP32 Board | 3.3V | 16MHz to 80MHz | 120mA per pin |
4.6 Test Your LED Strip
If you are still having issues with your LED strip, try testing it with a different microcontroller or LED strip library to rule out any issues with your ESP32 board or code. This can help you identify any issues with your LED strip itself, such as faulty LEDs or damaged wiring.
To test your LED strip, follow these steps:
1. Connect your LED strip to a different microcontroller or LED strip library.
2. Upload a simple test program to your microcontroller.
3. Check that your LED strip is responding to the test program.
4. If your LED strip is still not responding, try using a different LED strip to rule out any issues with your original LED strip.
4.7 Seek Help from Online Forums
If you are still having trouble troubleshooting your APA102 LED strip and ESP32 integration, consider seeking help from online forums or communities. There are many resources available online, including forums dedicated to ESP32 and LED strip integration.
Here are some online forums and communities where you can find help with your ESP32 and LED strip integration:
* r/esp32 on Reddit
* ESP32 Forum
* Arduino Forum: ESP32
* LED Group Buy Forum
4.8 Conclusion
By following these troubleshooting tips, you can identify and resolve many common issues with APA102 LED strip and ESP32 integration. Remember to double-check your wiring connections, power supply, and code, and to update your firmware and verify hardware compatibility. If you are still having trouble, don’t hesitate to seek help from online forums or communities. With careful attention to detail and a systematic approach to troubleshooting, you can create a wide range of projects that are sure to impress.4. Troubleshooting Tips for APA102 LED Strip and ESP32 Integration
If you’re having trouble getting your APA102 LED strip to work with your ESP32 board, don’t worry – it’s a common issue that many hobbyists and professionals encounter. In this section, we’ll provide some troubleshooting tips to help you identify and resolve common issues with APA102 LED strip and ESP32 integration.
4.1 Check Your Wiring
One of the most common issues with APA102 LED strip and ESP32 integration is incorrect wiring. Make sure that your LED strip is properly connected to the ESP32 board and that you have chosen the correct data pins for dual data pin configuration. Double-check your wiring connections and make sure that there are no loose connections or shorts.
To help you visualize the correct wiring configuration, we’ve included a diagram below:

4.2 Verify Your Power Supply
Another common issue is insufficient power supply. APA102 LED strips can consume a lot of power, especially when using a large number of LEDs or running complex animations. Make sure that your power supply is capable of providing enough current to your LED strip and that it is properly connected to the LED strip and ESP32 board.
APA102 LED strips typically require a voltage of 5V, although some may require 12V or higher. Make sure that your power supply is providing the correct voltage for your LED strip.
4.3 Check Your Code
If your LED strip is not responding to your code, make sure that your code is correct and that you have properly configured the LED strip library for dual data pin configuration. Double-check your data pin assignments and make sure that your buffer size and data rate are appropriate for your LED strip.
Here’s an example of code that you can use to test your LED strip and ESP32 integration:
“`c++
#include
#define LED_PIN 5
#define LED_TYPE APA102
#define COLOR_ORDER GRB
#define NUM_LEDS 60
CRGB leds[NUM_LEDS];
void setup() {
FastLED.addLeds
}
void loop() {
for (int i = 0; i < NUM_LEDS; i++) {
leds[i] = CHSV(i * 255 / NUM_LEDS, 255, 255);
FastLED.show();
delay(10);
}
}
```
4.4 Update Your Firmware
If you are using an older version of the ESP32 firmware, you may encounter issues with dual data pin configuration. Make sure that your firmware is up-to-date and that you are using the latest version of the LED strip library. Updating your firmware can also improve performance and stability.
To update your ESP32 firmware, follow these steps:
1. Download the latest version of the ESP32 firmware from the Espressif website.
2. Open the Arduino IDE and select "Preferences" from the "File" menu.
3. Add the following URL to the "Additional Boards Manager URLs" field:
4. Open the “Boards Manager” from the “Tools” menu and search for “ESP32”.
5. Select the latest version of the ESP32 board and click “Install”.
6. Connect your ESP32 board to your computer and select it from the “Tools > Board” menu.
7. Select the appropriate port from the “Tools > Port” menu.
8. Press the “Upload” button to upload the firmware to your ESP32 board.
4.5 Check Your Hardware Compatibility
Make sure that your hardware components are compatible with each other. Some LED strips may require different voltage levels or data rates than others. Make sure that your ESP32 board is capable of providing enough current and that your LED strip is compatible with dual data pin configuration.
Here’s a compatibility table to help you choose the right components for your project:
| Component | Voltage | Data Rate | Max Current |
| — | — | — | — |
| APA102 LED Strip | 5V or 12V | 24MHz or 32MHz | 60mA per LED |
| ESP32 Board | 3.3V | 16MHz to 80MHz | 120mA per pin |
4.6 Test Your LED Strip
If you are still having issues with your LED strip, try testing it with a different microcontroller or LED strip library to rule out any issues with your ESP32 board or code. This can help you identify any issues with your LED strip itself, such as faulty LEDs or damaged wiring.
To test your LED strip, follow these steps:
1. Connect your LED strip to a different microcontroller or LED strip library.
2. Upload a simple test program to your microcontroller.
3. Check that your LED strip is responding to the test program.
4. If your LED strip is still not responding, try using a different LED strip to rule out any issues with your original LED strip.
4.7 Seek Help from Online Forums
If you are still having trouble troubleshooting your APA102 LED strip and ESP32 integration, consider seeking help from online forums or communities. There are many resources available online, including forums dedicated to ESP32 and LED strip integration.
Here are some online forums and communities where you can find help with your ESP32 and LED strip integration:
* r/esp32 on Reddit
* ESP32 Forum
* Arduino Forum: ESP32
* LED Group Buy Forum
4.8 Conclusion
By following these troubleshooting tips, you can identify and resolve many common issues with APA102 LED strip and ESP32 integration. Remember to double-check your wiring connections, power supply, and code, and to update your firmware and verify hardware compatibility. If you are still having trouble, don’t hesitate to seek help from online forums or communities. With careful attention to detail and a systematic approach to troubleshooting, you can create a wide range of projects that are sure to impress.


