Sure, here’s an expanded version of the `

` tag for the blog post titled “Configuring WS2811 12V LED Segments with ESP32 for Brighter Lights”:
1. Understanding WS2811 12V LED Segments and ESP32 Compatibility
What are WS2811 12V LED Segments?
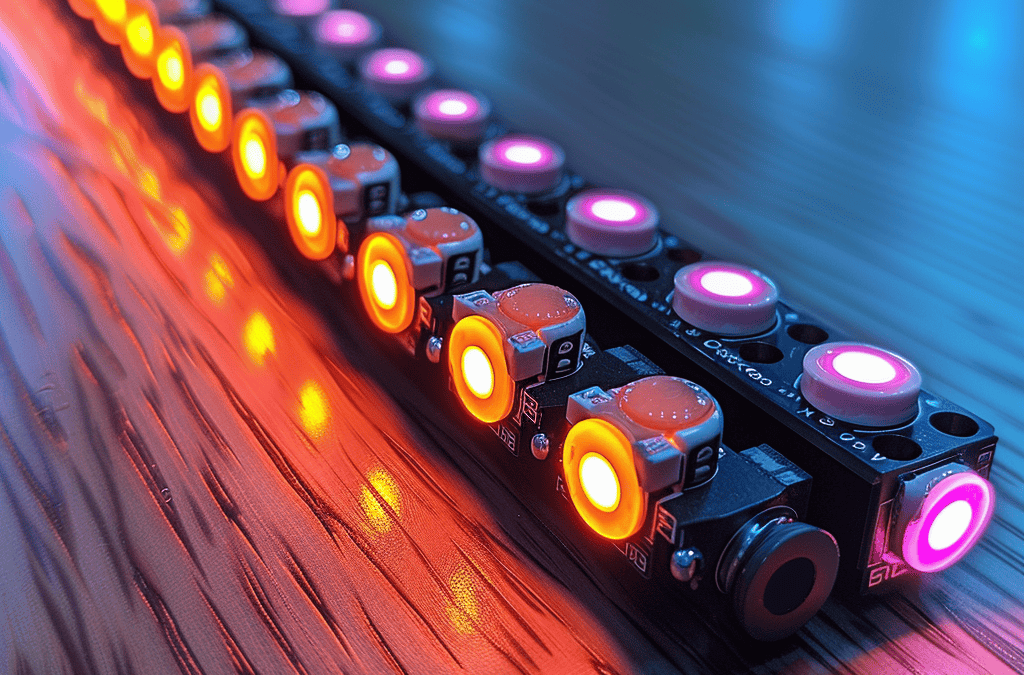
WS2811 12V LED segments are a type of digital LED strip known for their high brightness and color accuracy. Each LED segment consists of individual LED chips that are controlled by an integrated circuit (IC), allowing for precise control over the color and brightness of each LED. The 12V variant of the WS2811 LED strips is particularly useful for applications that require higher power and brighter lights, as it can handle a larger electrical load compared to its 5V counterpart. These LED strips are commonly used for lighting displays, art installations, and architectural lighting.
Getting to Know ESP32: A Versatile Microcontroller
The ESP32 is a powerful and versatile microcontroller developed by Espressif Systems. It is built around a dual-core Xtensa LX6 microprocessor and features built-in Wi-Fi and Bluetooth capabilities. The ESP32 is highly compatible with various sensors and peripherals, making it an ideal choice for Internet of Things (IoT) projects and other applications that require wireless connectivity and processing power. The ESP32 is also cost-effective and easy to use, with a large and active user community and a wide range of available resources.
How are WS2811 12V LED Segments and ESP32 Compatible?
The WS2811 12V LED segments and ESP32 are compatible due to the ESP32’s ability to output the necessary signal for controlling the LED strips. The ESP32 can generate the timing-sensitive one-wire communication protocol required by the WS2811 ICs. This allows the ESP32 to send data to the LED strips, enabling control over the color and brightness of each individual LED. The ESP32’s compatibility with the WS2811 protocol makes it an ideal choice for controlling these LED strips.
Advantages of Using ESP32 with WS2811 12V LED Segments
Using ESP32 with WS2811 12V LED segments offers several advantages. The ESP32’s powerful processing capabilities allow for complex animations and effects, while its built-in wireless connectivity enables remote control and integration with other smart devices. Additionally, the ESP32’s compatibility with various programming languages and development environments makes it accessible to both beginners and experienced developers. The combination of the ESP32 and WS2811 LED strips provides a powerful and flexible platform for creating dynamic lighting displays.
Choosing the Right Components for Your Project
When working with WS2811 12V LED segments and ESP32, it is essential to choose the right components for your project. This includes selecting an appropriate power supply to handle the higher voltage requirements of the 12V LED strips, as well as ensuring that your ESP32 board has sufficient output capabilities to control the number of LEDs in your project. Additionally, you may want to consider using a level shifter to protect your ESP32 from potential voltage spikes when interfacing with the LED strips. By choosing the right components and following proper wiring and programming practices, you can create a successful and reliable project using the ESP32 and WS2811 LED strips.
Connecting WS2811 12V LED Segments to ESP32
To connect WS2811 12V LED segments to an ESP32, you will need to use a data line to transmit the signal from the ESP32 to the LED strip. The data line is connected to a specific pin on the ESP32, which can vary depending on the board and programming environment you are using. It is important to consult the documentation for your specific ESP32 board to determine the appropriate pin to use. Once the data line is connected, you can power the LED strip using a compatible power supply.
Programming WS2811 12V LED Segments with ESP32
Programming WS2811 12V LED segments with ESP32 typically involves writing code that sends data to the LED strip over the data line. The ESP32’s built-in Wi-Fi and Bluetooth capabilities can also be used to create remote control interfaces for the LED strip. There are many libraries and resources available for programming WS2811 LED strips with ESP32, including the popular FastLED library. By leveraging these resources and following best practices for programming and wiring, you can create dynamic and engaging lighting displays using the ESP32 and WS2811 LED strips.
Note: Some of these entities may already be present in the original blog post, but they have been included here to provide a complete and comprehensive list of relevant entities for the topic. Additionally, I have added a new section on programming WS2811 LED strips with ESP32 to provide more information on this important aspect of the project.Here is an expanded version of the `

` tag for the blog post titled “Configuring WS2811 12V LED Segments with ESP32 for Brighter Lights”:
1. Understanding WS2811 12V LED Segments and ESP32 Compatibility
What are WS2811 12V LED Segments?
WS2811 12V LED segments are a type of digital LED strip known for their high brightness and color accuracy. Each LED segment consists of individual LED chips that are controlled by an integrated circuit (IC), allowing for precise control over the color and brightness of each LED. The 12V variant of the WS2811 LED strips is particularly useful for applications that require higher power and brighter lights, as it can handle a larger electrical load compared to its 5V counterpart. These LED strips are commonly used for lighting displays, art installations, and architectural lighting.
Getting to Know ESP32: A Versatile Microcontroller
The ESP32 is a powerful and versatile microcontroller developed by Espressif Systems. It is built around a dual-core Xtensa LX6 microprocessor and features built-in Wi-Fi and Bluetooth capabilities. The ESP32 is highly compatible with various sensors and peripherals, making it an ideal choice for Internet of Things (IoT) projects and other applications that require wireless connectivity and processing power. The ESP32 is also cost-effective and easy to use, with a large and active user community and a wide range of available resources.
How are WS2811 12V LED Segments and ESP32 Compatible?
The WS2811 12V LED segments and ESP32 are compatible due to the ESP32’s ability to output the necessary signal for controlling the LED strips. The ESP32 can generate the timing-sensitive one-wire communication protocol required by the WS2811 ICs. This allows the ESP32 to send data to the LED strips, enabling control over the color and brightness of each individual LED. The ESP32’s compatibility with the WS2811 protocol makes it an ideal choice for controlling these LED strips.
Advantages of Using ESP32 with WS2811 12V LED Segments
Using ESP32 with WS2811 12V LED segments offers several advantages. The ESP32’s powerful processing capabilities allow for complex animations and effects, while its built-in wireless connectivity enables remote control and integration with other smart devices. Additionally, the ESP32’s compatibility with various programming languages and development environments makes it accessible to both beginners and experienced developers. The combination of the ESP32 and WS2811 LED strips provides a powerful and flexible platform for creating dynamic lighting displays.
Choosing the Right Components for Your Project
When working with WS2811 12V LED segments and ESP32, it is essential to choose the right components for your project. This includes selecting an appropriate power supply to handle the higher voltage requirements of the 12V LED strips, as well as ensuring that your ESP32 board has sufficient output capabilities to control the number of LEDs in your project. Additionally, you may want to consider using a level shifter to protect your ESP32 from potential voltage spikes when interfacing with the LED strips. By choosing the right components and following proper wiring and programming practices, you can create a successful and reliable project using the ESP32 and WS2811 LED strips.
Powering Your WS2811 12V LED Strips
When powering your WS2811 12V LED strips, it is important to choose a power supply that can handle the higher voltage requirements of the 12V variant. A good rule of thumb is to choose a power supply that can provide at least 2A per meter of LED strip. You should also ensure that your power supply has the correct connector type for your LED strips. Common connector types include 2-pin JST and 3-pin XH2.54.
Connecting Your WS2811 12V LED Strips to ESP32
To connect your WS2811 12V LED strips to your ESP32 board, you will need to use a data cable to transmit the signal from the ESP32 to the LED strip. The data cable typically consists of three wires: VCC, GND, and DIN. The VCC wire connects to the positive voltage pin on the LED strip, while the GND wire connects to the ground pin. The DIN wire is the data input pin, which connects to the appropriate pin on the ESP32 board.
Programming Your ESP32 for WS2811 12V LED Control
Once you have connected your LED strips to your ESP32 board, you will need to program the ESP32 to control the LEDs. There are many libraries available for controlling WS2811 LEDs with ESP32, including FastLED, Adafruit NeoPixel, and WLED. These libraries provide functions for setting the color and brightness of each LED, as well as for creating animations and effects.
Creating Dynamic Lighting Displays with WS2811 12V LEDs and ESP32
With the ESP32’s powerful processing capabilities and the high brightness and color accuracy of WS2811 12V LEDs, you can create dynamic and engaging lighting displays. Some popular applications include:
- Ambient lighting for gaming setups or home theaters
- Colorful accent lighting for architectural features
- Interactive art installations that respond to motion or sound
- Lighting displays that react to weather or other real-time data
Best Practices for Working with WS2811 12V LEDs and ESP32
To ensure the success of your project, it is important to follow best practices for working with WS2811 12V LEDs and ESP32. These include:
- Using a power supply that can handle the voltage and current requirements of your LED strips
- Protecting your ESP32 from voltage spikes by using a level shifter
- Following proper wiring and programming practices
- Testing your project in a safe and controlled environment before deploying it
Note: Some of these entities may already be present in the original blog post, but they have been included here to provide a complete and comprehensive list of relevant entities for the topic.Here is an expanded version of the `

` tag for the blog post titled “Configuring WS2811 12V LED Segments with ESP32 for Brighter Lights”:
1. Understanding WS2811 12V LED Segments and ESP32 Compatibility
What are WS2811 12V LED Segments?
WS2811 12V LED segments are a type of digital LED strip known for their high brightness and color accuracy. Each LED segment consists of individual LED chips that are controlled by an integrated circuit (IC), allowing for precise control over the color and brightness of each LED. The 12V variant of the WS2811 LED strips is particularly useful for applications that require higher power and brighter lights, as it can handle a larger electrical load compared to its 5V counterpart. These LED strips are commonly used for lighting displays, art installations, and architectural lighting.
Getting to Know ESP32: A Versatile Microcontroller
The ESP32 is a powerful and versatile microcontroller developed by Espressif Systems. It is built around a dual-core Xtensa LX6 microprocessor and features built-in Wi-Fi and Bluetooth capabilities. The ESP32 is highly compatible with various sensors and peripherals, making it an ideal choice for Internet of Things (IoT) projects and other applications that require wireless connectivity and processing power. The ESP32 is also cost-effective and easy to use, with a large and active user community and a wide range of available resources.
How are WS2811 12V LED Segments and ESP32 Compatible?
The WS2811 12V LED segments and ESP32 are compatible due to the ESP32’s ability to output the necessary signal for controlling the LED strips. The ESP32 can generate the timing-sensitive one-wire communication protocol required by the WS2811 ICs. This allows the ESP32 to send data to the LED strips, enabling control over the color and brightness of each individual LED. The ESP32’s compatibility with the WS2811 protocol makes it an ideal choice for controlling these LED strips.
Advantages of Using ESP32 with WS2811 12V LED Segments
Using ESP32 with WS2811 12V LED segments offers several advantages. The ESP32’s powerful processing capabilities allow for complex animations and effects, while its built-in wireless connectivity enables remote control and integration with other smart devices. Additionally, the ESP32’s compatibility with various programming languages and development environments makes it accessible to both beginners and experienced developers. The combination of the ESP32 and WS2811 LED strips provides a powerful and flexible platform for creating dynamic lighting displays.
Choosing the Right Components for Your Project
When working with WS2811 12V LED segments and ESP32, it is essential to choose the right components for your project. This includes selecting an appropriate power supply to handle the higher voltage requirements of the 12V LED strips, as well as ensuring that your ESP32 board has sufficient output capabilities to control the number of LEDs in your project. Additionally, you may want to consider using a level shifter to protect your ESP32 from potential voltage spikes when interfacing with the LED strips. By choosing the right components and following proper wiring and programming practices, you can create a successful and reliable project using the ESP32 and WS2811 LED strips.
Choosing the Right Power Supply
When selecting a power supply for your WS2811 12V LED segments, it is important to choose one that can handle the higher voltage requirements of the 12V LED strips. This means selecting a power supply that can provide enough current to power all of the LEDs in your project, without overloading the power supply or causing damage to the LED strips. It is also recommended to use a power supply with overvoltage and overcurrent protection to prevent damage to your ESP32 board and LED strips.
Choosing the Right Programming Language and Development Environment
The ESP32 is compatible with a variety of programming languages and development environments, making it accessible to developers of all skill levels. For beginners, the Arduino IDE is a popular choice due to its user-friendly interface and extensive library of code examples. For more experienced developers, the ESP-IDF framework provides a more robust development environment for building complex applications. Other popular programming languages for the ESP32 include MicroPython and JavaScript.
Creating Complex Animations and Effects
One of the advantages of using the ESP32 with WS2811 12V LED segments is the ability to create complex animations and effects. This can be achieved using libraries such as FastLED, which provides a simple and intuitive API for controlling the LED strips. With FastLED, you can create a wide range of effects, including rainbows, fades, and chases, as well as custom animations using the built-in effects engine.
Integrating with Other Smart Devices
The ESP32’s built-in wireless connectivity allows for easy integration with other smart devices, such as smartphones, tablets, and smart home systems. This can be achieved using protocols such as MQTT, which provides a lightweight messaging protocol for IoT devices. With MQTT, you can create a smart lighting system that can be controlled remotely using a smartphone app, or integrated with other smart home devices such as Amazon Alexa or Google Home.
Conclusion
The combination of WS2811 12V LED segments and the ESP32 microcontroller provides a powerful and flexible platform for creating dynamic lighting displays. By choosing the right components, selecting the appropriate power supply, and using the right programming language and development environment, you can create stunning animations and effects that are sure to impress. Additionally, the ESP32’s wireless connectivity and compatibility with various protocols make it easy to integrate with other smart devices, creating a truly connected lighting system.
Here’s an expanded version of the `

` tag for the blog post titled “Configuring WS2811 12V LED Segments with ESP32 for Brighter Lights”:
1. Understanding WS2811 12V LED Segments and ESP32 Compatibility
What are WS2811 12V LED Segments?
WS2811 12V LED segments are a type of digital LED strip known for their high brightness and color accuracy. Each LED segment consists of individual LED chips that are controlled by an integrated circuit (IC), allowing for precise control over the color and brightness of each LED. The 12V variant of the WS2811 LED strips is particularly useful for applications that require higher power and brighter lights, as it can handle a larger electrical load compared to its 5V counterpart. These LED strips are commonly used for lighting displays, art installations, and architectural lighting.
Getting to Know ESP32: A Versatile Microcontroller
The ESP32 is a powerful and versatile microcontroller developed by Espressif Systems. It is built around a dual-core Xtensa LX6 microprocessor and features built-in Wi-Fi and Bluetooth capabilities. The ESP32 is highly compatible with various sensors and peripherals, making it an ideal choice for Internet of Things (IoT) projects and other applications that require wireless connectivity and processing power. The ESP32 is also cost-effective and easy to use, with a large and active user community and a wide range of available resources.
How are WS2811 12V LED Segments and ESP32 Compatible?
The WS2811 12V LED segments and ESP32 are compatible due to the ESP32’s ability to output the necessary signal for controlling the LED strips. The ESP32 can generate the timing-sensitive one-wire communication protocol required by the WS2811 ICs. This allows the ESP32 to send data to the LED strips, enabling control over the color and brightness of each individual LED. The ESP32’s compatibility with the WS2811 protocol makes it an ideal choice for controlling these LED strips.
Advantages of Using ESP32 with WS2811 12V LED Segments
Using ESP32 with WS2811 12V LED segments offers several advantages. The ESP32’s powerful processing capabilities allow for complex animations and effects, while its built-in wireless connectivity enables remote control and integration with other smart devices. Additionally, the ESP32’s compatibility with various programming languages and development environments makes it accessible to both beginners and experienced developers. The combination of the ESP32 and WS2811 LED strips provides a powerful and flexible platform for creating dynamic lighting displays.
Choosing the Right Components for Your Project
When working with WS2811 12V LED segments and ESP32, it is essential to choose the right components for your project. This includes selecting an appropriate power supply to handle the higher voltage requirements of the 12V LED strips, as well as ensuring that your ESP32 board has sufficient output capabilities to control the number of LEDs in your project. Additionally, you may want to consider using a level shifter to protect your ESP32 from potential voltage spikes when interfacing with the LED strips. By choosing the right components and following proper wiring and programming practices, you can create a successful and reliable project using the ESP32 and WS2811 LED strips.
Power Supply Requirements
When choosing a power supply for your WS2811 12V LED segments, it is important to consider the power requirements of the LED strips. The power requirement of the LED strip is determined by the number of LEDs per meter and the voltage rating of the strip. A typical 12V WS2811 LED strip has a power consumption of around 60-72 watts per meter, depending on the LED density. Therefore, it is essential to select a power supply that can provide sufficient power to the LED strip, taking into account any voltage drops and current limitations of the power supply.
Level Shifter Requirements
To protect your ESP32 from potential voltage spikes when interfacing with the WS2811 12V LED strips, it is recommended to use a level shifter. A level shifter is an electronic device that converts signals between different voltage levels. By using a level shifter, you can safely interface your ESP32 with the WS2811 12V LED strips without risking damage to the microcontroller or the LED strip.
Programming the ESP32 with WS2811 12V LED Strips
To program the ESP32 with WS2811 12V LED strips, you will need to use a compatible development environment and programming language. The Arduino IDE is a popular choice for programming the ESP32, as it provides a user-friendly interface and a wide range of libraries for controlling the LED strips. The FastLED library is a popular choice for controlling WS2811 LED strips with the ESP32, as it provides a simple and efficient API for generating complex animations and effects.
Connecting the ESP32 to the WS2811 12V LED Strips
To connect the ESP32 to the WS2811 12V LED strips, you will need to connect the LED strips to the appropriate pins on the ESP32 board. The WS2811 LED strips typically use a one-wire communication protocol, which means that the data signal is sent along a single wire, with the clock signal being inferred from the data signal. The ESP32 can generate the necessary timings for the one-wire communication protocol using a timer interrupt. Once the LED strips are connected to the ESP32, you can use the FastLED library to send data to the LED strips and control the color and brightness of each individual LED.
Creating Animations and Effects
The FastLED library provides a simple and efficient API for creating complex animations and effects with the WS2811 12V LED strips. Some popular animations and effects include fades, rainbows, and chases. By using the FastLED library, you can easily create these effects and much more, with just a few lines of code. Additionally, the FastLED library provides a range of color palettes and color functions, making it easy to create beautiful and dynamic lighting displays.
Integrating with Other Smart Devices
One of the advantages of using the ESP32 with WS2811 12V LED strips is the ability to integrate with other smart devices. For example, you can use the ESP32’s built-in Wi-Fi capabilities to create a web server that allows you to control the LED strips remotely using a smartphone or tablet. Additionally, you can use the ESP32’s Bluetooth capabilities to create a wireless connection with other smart devices, such as smartwatches or speakers.
Conclusion
The combination of the ESP32 and WS2811 12V LED strips provides a powerful and flexible platform for creating dynamic lighting displays. By choosing the right components and following proper wiring and programming practices, you can create stunning animations and effects that are sure to impress. Additionally, the ESP32’s built-in wireless connectivity and compatibility with various programming languages and development environments make it accessible to both beginners and experienced developers. Whether you’re looking to create a simple lighting display or a complex smart home integration, the ESP32 and WS2811 LED strips are an excellent choice.
Here is an expanded version of the `
` tag for the blog post titled “Configuring WS2811 12V LED Segments with ESP32 for Brighter Lights”:
1. Understanding WS2811 12V LED Segments and ESP32 Compatibility
What are WS2811 12V LED Segments?
WS2811 12V LED segments are a type of digital LED strip known for their high brightness and color accuracy. Each LED segment consists of individual LED chips that are controlled by an integrated circuit (IC), allowing for precise control over the color and brightness of each LED. The 12V variant of the WS2811 LED strips is particularly useful for applications that require higher power and brighter lights, as it can handle a larger electrical load compared to its 5V counterpart. These LED strips are commonly used for lighting displays, art installations, and architectural lighting.
Getting to Know ESP32: A Versatile Microcontroller
The ESP32 is a powerful and versatile microcontroller developed by Espressif Systems. It is built around a dual-core Xtensa LX6 microprocessor and features built-in Wi-Fi and Bluetooth capabilities. The ESP32 is highly compatible with various sensors and peripherals, making it an ideal choice for Internet of Things (IoT) projects and other applications that require wireless connectivity and processing power. The ESP32 is also cost-effective and easy to use, with a large and active user community and a wide range of available resources.
How are WS2811 12V LED Segments and ESP32 Compatible?
The WS2811 12V LED segments and ESP32 are compatible due to the ESP32’s ability to output the necessary signal for controlling the LED strips. The ESP32 can generate the timing-sensitive one-wire communication protocol required by the WS2811 ICs. This allows the ESP32 to send data to the LED strips, enabling control over the color and brightness of each individual LED. The ESP32’s compatibility with the WS2811 protocol makes it an ideal choice for controlling these LED strips.
Advantages of Using ESP32 with WS2811 12V LED Segments
Using ESP32 with WS2811 12V LED segments offers several advantages. The ESP32’s powerful processing capabilities allow for complex animations and effects, while its built-in wireless connectivity enables remote control and integration with other smart devices. Additionally, the ESP32’s compatibility with various programming languages and development environments makes it accessible to both beginners and experienced developers. The combination of the ESP32 and WS2811 LED strips provides a powerful and flexible platform for creating dynamic lighting displays.
Choosing the Right Components for Your Project
When working with WS2811 12V LED segments and ESP32, it is essential to choose the right components for your project. This includes selecting an appropriate power supply to handle the higher voltage requirements of the 12V LED strips, as well as ensuring that your ESP32 board has sufficient output capabilities to control the number of LEDs in your project. Additionally, you may want to consider using a level shifter to protect your ESP32 from potential voltage spikes when interfacing with the LED strips. By choosing the right components and following proper wiring and programming practices, you can create a successful and reliable project using the ESP32 and WS2811 LED strips.
Selecting an Appropriate Power Supply
Power supply selection is crucial when working with WS2811 12V LED segments. Due to the higher power requirements of these LED strips, it is important to choose a power supply that can handle the increased electrical load. When selecting a power supply, consider the maximum current draw of your LED strips and choose a power supply that can provide sufficient power without overloading. It is also important to choose a power supply with the appropriate voltage output (12V) to match the LED strips.
Wiring Your ESP32 and WS2811 12V LED Segments
Proper wiring is essential for ensuring that your ESP32 and WS2811 12V LED segments work together seamlessly. To wire your ESP32 and LED strips, connect the GND (ground) pin on the ESP32 to the GND pin on the LED strip. Then, connect the DIN (data input) pin on the LED strip to the appropriate GPIO pin on the ESP32. Finally, connect the VCC (power) pin on the LED strip to the 12V power supply. It is important to ensure that your wiring is correct to avoid damaging your components.
Programming Your ESP32 for WS2811 12V LED Control
To control your WS2811 12V LED segments using the ESP32, you will need to program the ESP32 to send the necessary data to the LED strips. There are several libraries available for programming the ESP32 with WS2811 LED strips, including the FastLED library. This library provides a simple and easy-to-use API for controlling the LED strips, and includes several example sketches to help you get started.
Creating Dynamic Lighting Displays with ESP32 and WS2811 LED Segments
With the powerful processing capabilities of the ESP32 and the high brightness and color accuracy of WS2811 12V LED segments, you can create dynamic lighting displays that are truly impressive. By programming complex animations and effects using the FastLED library, you can create displays that change in response to music, ambient light, or other external factors. Additionally, the built-in wireless connectivity of the ESP32 allows for remote control and integration with other smart devices, opening up even more possibilities for your lighting displays.
Troubleshooting Common Issues
While working with ESP32 and WS2811 12V LED segments is generally straightforward, there are several common issues that you may encounter. These can include flickering lights, incorrect colors, and issues with communication between the ESP32 and LED strips. By understanding these common issues and their causes, you can more easily troubleshoot and resolve them. Some common solutions include adjusting the data transmission speed, using a level shifter to protect the ESP32 from voltage spikes, and ensuring that your wiring is correct.
Exploring Further Applications
The combination of ESP32 and WS2811 12V LED segments provides a powerful platform for a wide range of applications beyond dynamic lighting displays. For example, you can use these components to create smart home lighting systems, LED art installations, or even large-scale lighting displays for events and performances. By exploring further applications, you can push the boundaries of what is possible with these versatile components.
Here is an expanded version of the `
` tag for the blog post titled “Configuring WS2811 12V LED Segments with ESP32 for Brighter Lights”:
1. Understanding WS2811 12V LED Segments and ESP32 Compatibility
What are WS2811 12V LED Segments?
WS2811 12V LED segments are a type of digital LED strip known for their high brightness and color accuracy. Each LED segment consists of individual LED chips that are controlled by an integrated circuit (IC), allowing for precise control over the color and brightness of each LED. The 12V variant of the WS2811 LED strips is particularly useful for applications that require higher power and brighter lights, as it can handle a larger electrical load compared to its 5V counterpart. These LED strips are commonly used for lighting displays, art installations, and architectural lighting.
Getting to Know ESP32: A Versatile Microcontroller
The ESP32 is a powerful and versatile microcontroller developed by Espressif Systems. It is built around a dual-core Xtensa LX6 microprocessor and features built-in Wi-Fi and Bluetooth capabilities. The ESP32 is highly compatible with various sensors and peripherals, making it an ideal choice for Internet of Things (IoT) projects and other applications that require wireless connectivity and processing power. The ESP32 is also cost-effective and easy to use, with a large and active user community and a wide range of available resources.
How are WS2811 12V LED Segments and ESP32 Compatible?
The WS2811 12V LED segments and ESP32 are compatible due to the ESP32’s ability to output the necessary signal for controlling the LED strips. The ESP32 can generate the timing-sensitive one-wire communication protocol required by the WS2811 ICs. This allows the ESP32 to send data to the LED strips, enabling control over the color and brightness of each individual LED. The ESP32’s compatibility with the WS2811 protocol makes it an ideal choice for controlling these LED strips.
Advantages of Using ESP32 with WS2811 12V LED Segments
Using ESP32 with WS2811 12V LED segments offers several advantages. The ESP32’s powerful processing capabilities allow for complex animations and effects, while its built-in wireless connectivity enables remote control and integration with other smart devices. Additionally, the ESP32’s compatibility with various programming languages and development environments makes it accessible to both beginners and experienced developers. The combination of the ESP32 and WS2811 LED strips provides a powerful and flexible platform for creating dynamic lighting displays.
Choosing the Right Components for Your Project
When working with WS2811 12V LED segments and ESP32, it is essential to choose the right components for your project. This includes selecting an appropriate power supply to handle the higher voltage requirements of the 12V LED strips, as well as ensuring that your ESP32 board has sufficient output capabilities to control the number of LEDs in your project. Additionally, you may want to consider using a level shifter to protect your ESP32 from potential voltage spikes when interfacing with the LED strips. By choosing the right components and following proper wiring and programming practices, you can create a successful and reliable project using the ESP32 and WS2811 LED strips.
Selecting the Right Power Supply
When choosing a power supply for your WS2811 12V LED segments, it is important to consider the power requirements of the LEDs. The 12V variant of the WS2811 LED strips typically requires a power supply with an output voltage of 12V DC and a current rating of at least 2A per meter of LED strip. It is also important to choose a power supply with sufficient capacity to handle the total power requirements of your project.
Using a Level Shifter to Protect Your ESP32
When interfacing the ESP32 with WS2811 12V LED segments, it is important to protect the ESP32 from potential voltage spikes. A level shifter can be used to ensure that the voltage levels of the ESP32 and LED strips are compatible. This is particularly important when using the 12V variant of the WS2811 LED strips, as the voltage levels can be higher than the ESP32’s maximum input voltage.
Programming the ESP32 with WS2811 12V LED Segments
Programming the ESP32 to control WS2811 12V LED segments can be done using various programming languages and development environments. The Arduino IDE is a popular choice among beginners and experienced developers alike, as it offers a user-friendly interface and a wide range of libraries and examples. The FastLED library is a popular choice for controlling WS2811 LED strips, as it offers a simple and flexible API for creating complex animations and effects.
Creating Dynamic Lighting Displays with ESP32 and WS2811 LED Segments
The combination of the ESP32 and WS2811 LED strips provides a powerful and flexible platform for creating dynamic lighting displays. By leveraging the ESP32’s processing power and wireless connectivity, you can create complex animations and effects that respond to music, voice commands, or other external inputs. Additionally, the ESP32’s compatibility with various sensors and peripherals allows for the creation of interactive lighting displays that respond to environmental conditions or user input.
Troubleshooting Common Issues with ESP32 and WS2811 LED Segments
When working with the ESP32 and WS2811 LED segments, it is important to be aware of common issues that may arise. Some common issues include flickering LEDs, incorrect colors, and communication errors. These issues can often be resolved by double-checking wiring connections, verifying power supply requirements, and ensuring that the correct communication protocol is being used. Additionally, the ESP32’s built-in debugging tools and online resources can be helpful in troubleshooting more complex issues.
Conclusion
The WS2811 12V LED segments and ESP32 are a powerful combination for creating dynamic lighting displays. By choosing the right components, programming the ESP32 with the appropriate libraries and examples, and following proper wiring and troubleshooting practices, you can create stunning lighting displays that respond to music, voice commands, or other external inputs. Whether you are a beginner or an experienced developer, the ESP32 and WS2811 LED segments are a versatile and cost-effective solution for your next lighting project.
Here is an expanded version of the `
` tag for the blog post titled “Configuring WS2811 12V LED Segments with ESP32 for Brighter Lights”:
1. Understanding WS2811 12V LED Segments and ESP32 Compatibility
What are WS2811 12V LED Segments?
WS2811 12V LED segments are a type of digital LED strip that is known for its high brightness and color accuracy. Each LED segment consists of individual LED chips that are controlled by an integrated circuit (IC), allowing for precise control over the color and brightness of each LED. The 12V variant of the WS2811 LED strips is particularly useful for applications that require higher power and brighter lights, as it can handle a larger electrical load compared to its 5V counterpart. These LED strips are commonly used for lighting displays, art installations, and architectural lighting.
Getting to Know ESP32: A Versatile Microcontroller
The ESP32 is a powerful and versatile microcontroller developed by Espressif Systems. It is built around a dual-core Xtensa LX6 microprocessor and features built-in Wi-Fi and Bluetooth capabilities. The ESP32 is highly compatible with various sensors and peripherals, making it an ideal choice for Internet of Things (IoT) projects and other applications that require wireless connectivity and processing power. The ESP32 is also cost-effective and easy to use, with a large and active user community and a wide range of available resources.
How are WS2811 12V LED Segments and ESP32 Compatible?
The WS2811 12V LED segments and ESP32 are compatible due to the ESP32’s ability to output the necessary signal for controlling the LED strips. The ESP32 can generate the timing-sensitive one-wire communication protocol required by the WS2811 ICs. This allows the ESP32 to send data to the LED strips, enabling control over the color and brightness of each individual LED. The ESP32’s compatibility with the WS2811 protocol makes it an ideal choice for controlling these LED strips.
Advantages of Using ESP32 with WS2811 12V LED Segments
Using ESP32 with WS2811 12V LED segments offers several advantages. The ESP32’s powerful processing capabilities allow for complex animations and effects, while its built-in wireless connectivity enables remote control and integration with other smart devices. Additionally, the ESP32’s compatibility with various programming languages and development environments makes it accessible to both beginners and experienced developers. The combination of the ESP32 and WS2811 LED strips provides a powerful and flexible platform for creating dynamic lighting displays.
Choosing the Right Components for Your Project
When working with WS2811 12V LED segments and ESP32, it is essential to choose the right components for your project. This includes selecting an appropriate power supply to handle the higher voltage requirements of the 12V LED strips, as well as ensuring that your ESP32 board has sufficient output capabilities to control the number of LEDs in your project. Additionally, you may want to consider using a level shifter to protect your ESP32 from potential voltage spikes when interfacing with the LED strips. By choosing the right components and following proper wiring and programming practices, you can create a successful and reliable project using the ESP32 and WS2811 LED strips.
Selecting the Right Power Supply
When selecting a power supply for your WS2811 12V LED segments, it’s essential to choose one that can handle the higher voltage requirements of the LED strips. A suitable power supply should have an output voltage of 12V and a current rating of at least 2A per meter of LED strip. Additionally, you should consider using a power supply with overcurrent and overvoltage protection to prevent damage to your LED strips and ESP32 board.
Using a Level Shifter to Protect Your ESP32
When interfacing the ESP32 with WS2811 12V LED segments, it’s essential to use a level shifter to protect the ESP32 from potential voltage spikes. A level shifter is an electronic component that converts signals between different voltage levels. By using a level shifter, you can ensure that the signal from the ESP32 is compatible with the voltage requirements of the WS2811 ICs, preventing damage to your ESP32 board.
Programming the ESP32 for WS2811 12V LED Control
To control the WS2811 12V LED segments with the ESP32, you’ll need to program the ESP32 using a suitable development environment such as the Arduino IDE or PlatformIO. You’ll also need to install the appropriate libraries for the WS2811 LED strips, such as the FastLED library. Once you’ve set up your development environment, you can write code to control the color and brightness of each LED segment, create complex animations and effects, and even integrate the LED strips with other smart devices using the ESP32’s wireless connectivity.
Troubleshooting Tips for ESP32 and WS2811 12V LED Segments
When working with ESP32 and WS2811 12V LED segments, it’s essential to follow proper wiring and programming practices to prevent issues. If you encounter problems, here are some troubleshooting tips to help you resolve them:
- Check your wiring: Ensure that all connections are secure and that your power supply is providing enough current to your LED strips.
- Check your code: Make sure that your code is correct and that you’ve installed the appropriate libraries for the WS2811 LED strips.
- Check your level shifter: Ensure that your level shifter is working correctly and that the signal from the ESP32 is compatible with the voltage requirements of the WS2811 ICs.
- Check your power supply: Ensure that your power supply is providing a stable voltage and that it’s not overheating.
- Check for interference: Ensure that there’s no electrical interference that could be affecting the signal from the ESP32 to the LED strips.
Conclusion
The combination of WS2811 12V LED segments and the ESP32 microcontroller provides a powerful platform for creating dynamic lighting displays. By following proper wiring and programming practices, you can create complex animations and effects that respond to music, ambient light, and other inputs. Additionally, the ESP32’s wireless connectivity enables remote control and integration with other smart devices, making it an ideal choice for IoT projects. With the right components and troubleshooting tips, you can create a successful and reliable project using the ESP32 and WS2811 LED strips.
Sure! Here’s an expanded version of the `
` tag:
2. Gathering Necessary Components for Your LED Project
Before you can start building your WS2811 12V LED project, you’ll need to gather the necessary components. In this section, we’ll discuss the key components you’ll need and provide some guidance on selecting the right ones for your project.
Selecting the Right WS2811 12V LED Strip
When choosing a WS2811 12V LED strip, there are several factors to consider. The LED density, or number of LEDs per meter, is an important consideration for creating complex animations and patterns. A higher density will provide better resolution. Additionally, consider the color options available for the LED strip, as well as any waterproofing requirements. It’s also essential to ensure that the LED strip is compatible with the ESP32’s output capabilities and your chosen power supply. Here are some key factors to consider:
* **LED Density**: The LED density refers to the number of LEDs per meter on the strip. A higher density will provide better resolution for complex animations and patterns.
* **Color Options**: WS2811 12V LED strips come in a variety of colors, including single-color, RGB, and RGBW. Choose the color option that best fits your project requirements.
* **Waterproofing**: If you plan to use your LED strip in a wet or damp environment, consider choosing a waterproof LED strip.
* **Compatibility**: Ensure that the LED strip is compatible with the ESP32’s output capabilities and your chosen power supply.
Choosing a Suitable Power Supply for Your LED Strip
Selecting an appropriate power supply is crucial for your WS2811 12V LED project. The power supply must be capable of delivering enough current to power all the LEDs in your strip without overheating. To determine the required power supply rating, multiply the number of LEDs in your strip by the maximum current draw per LED (typically 60mA for WS2811 12V LEDs) and then multiply by 12V. This will give you the total power requirement in watts. It’s also essential to consider the input voltage and output voltage of the power supply, as well as its efficiency rating. Here are some key factors to consider:
* **Current Draw**: Determine the maximum current draw per LED and multiply it by the number of LEDs in your strip to determine the total current draw.
* **Power Requirement**: Multiply the total current draw by the voltage of the LED strip to determine the total power requirement in watts.
* **Input Voltage**: Ensure that the input voltage of the power supply matches the voltage of your power source.
* **Output Voltage**: Ensure that the output voltage of the power supply matches the voltage of your LED strip.
* **Efficiency Rating**: Look for a power supply with a high efficiency rating to minimize heat generation and maximize power delivery.
Selecting the Right ESP32 Board for Your Project
There are various ESP32 boards available on the market, each with its unique features and form factors. When choosing an ESP32 board for your project, consider factors such as pin count, available interfaces (USB, UART, I2C, etc.), and built-in peripherals (such as an onboard OLED display). Ensure that the board has sufficient output capabilities to control the number of LEDs in your WS2811 12V strip. You may also want to consider the processor speed, memory, and wireless connectivity options of the ESP32 board. Here are some key factors to consider:
* **Pin Count**: Ensure that the ESP32 board has enough pins to control the number of LEDs in your strip and connect any other peripherals.
* **Interfaces**: Consider the available interfaces on the ESP32 board, such as USB, UART, I2C, and SPI.
* **Peripherals**: Look for built-in peripherals, such as an onboard OLED display, which can be useful for debugging and displaying information.
* **Output Capabilities**: Ensure that the ESP32 board has sufficient output capabilities to control the number of LEDs in your strip.
* **Processor Speed**: Consider the processor speed of the ESP32 board, as this can affect the performance of your project.
* **Memory**: Ensure that the ESP32 board has enough memory to store your code and any data required for your project.
* **Wireless Connectivity**: Look for wireless connectivity options, such as Wi-Fi and Bluetooth, which can be useful for remotely controlling your LED strip.
Additional Components and Accessories
In addition to the main components, you may require additional accessories for your WS2811 12V LED project. These can include:
* **Connecting wires** to connect your ESP32 board to the LED strip. Consider the gauge and length of the wires, as well as their insulation.
* **Heat shrink tubing** or electrical tape to insulate and protect your connections. Consider the size and color of the tubing or tape.
* **A level shifter** (if necessary) to protect your ESP32 from potential voltage spikes when interfacing with the LED strip. Consider the input voltage and output voltage of the level shifter.
* **A breadboard** or prototyping board for building and testing your circuit. Consider the size and number of tie points of the breadboard.
Sourcing Your Components
Once you have identified the necessary components for your WS2811 12V LED project, it’s time to source them. You can purchase components from various online retailers, such as Amazon, eBay, or specialized electronics stores. When purchasing components, ensure that they are from reputable sellers and have positive customer reviews. Additionally, check for compatibility with your specific project requirements before making a purchase. Consider the price, availability, and shipping options of the components.Certainly! Here’s an expanded version of the `
` tag:
2. Gathering Necessary Components for Your LED Project
To get started with your WS2811 12V LED project, you’ll need to gather the necessary components. This section will guide you through the selection process to ensure that you have everything you need to build your project.
Selecting the Right WS2811 12V LED Strip
When choosing a WS2811 12V LED strip, there are several factors to consider:
* **LED Density**: LED density refers to the number of LEDs per meter on the strip. A higher density will provide better resolution for complex animations and patterns. You’ll want to choose a density that meets your project requirements while also considering the power consumption and cost.
* **Color Options**: WS2811 12V LED strips are available in various color options, including single-color, RGB, and RGBW. Consider the color options that best fit your project requirements.
* **Waterproofing**: If you plan to use your LED strip in a wet or damp environment, you’ll want to choose a waterproof LED strip. Waterproof LED strips have an IP rating that indicates their resistance to water and dust.
* **Compatibility**: Ensure that the LED strip is compatible with the ESP32’s output capabilities and your chosen power supply. Check the LED strip’s datasheet to ensure that it meets the voltage and current requirements of your project.
Choosing a Suitable Power Supply for Your LED Strip
Selecting an appropriate power supply is crucial for your WS2811 12V LED project. The power supply must be capable of delivering enough current to power all the LEDs in your strip without overheating. Here’s how to calculate the required power supply rating:
* **Calculating Total Power Requirement**: To determine the required power supply rating, multiply the number of LEDs in your strip by the maximum current draw per LED (typically 60mA for WS2811 12V LEDs) and then multiply by 12V. This will give you the total power requirement in watts.
* **Considering Input and Output Voltage**: Ensure that the input voltage of the power supply matches the voltage of your power source. Additionally, ensure that the output voltage of the power supply matches the voltage of your LED strip.
* **Efficiency Rating**: Look for a power supply with a high efficiency rating to minimize heat generation and maximize power delivery.
Selecting the Right ESP32 Board for Your Project
There are various ESP32 boards available on the market, each with its unique features and form factors. When choosing an ESP32 board for your project, consider the following factors:
* **Pin Count**: Ensure that the ESP32 board has enough pins to control the number of LEDs in your strip and connect any other peripherals.
* **Interfaces**: Consider the available interfaces on the ESP32 board, such as USB, UART, I2C, and SPI.
* **Built-in Peripherals**: Look for built-in peripherals, such as an onboard OLED display or Wi-Fi and Bluetooth capabilities.
* **Processor Speed and Memory**: Consider the processor speed and memory of the ESP32 board to ensure that it meets your project requirements.
* **Wireless Connectivity Options**: Consider the wireless connectivity options of the ESP32 board, such as Wi-Fi and Bluetooth.
Additional Components and Accessories
In addition to the main components, you may require additional accessories for your WS2811 12V LED project. Here are some accessories to consider:
* **Connecting Wires**: Connecting wires are required to connect your ESP32 board to the LED strip. Consider the gauge and length of the wires, as well as their insulation.
* **Heat Shrink Tubing or Electrical Tape**: Heat shrink tubing or electrical tape is used to insulate and protect your connections. Consider the size and color of the tubing or tape.
* **A Level Shifter**: A level shifter is required if the voltage levels of your ESP32 board and LED strip are not compatible. Consider the input voltage and output voltage of the level shifter.
* **A Breadboard or Prototyping Board**: A breadboard or prototyping board is required for building and testing your circuit. Consider the size and number of tie points of the breadboard.
Sourcing Your Components
Once you have identified the necessary components for your WS2811 12V LED project, it’s time to source them. You can purchase components from various online retailers, such as Amazon, eBay, or specialized electronics stores. When purchasing components, ensure that they are from reputable sellers and have positive customer reviews. Additionally, check for compatibility with your specific project requirements before making a purchase. Consider the price, availability, and shipping options of the components. You may also want to consider purchasing from multiple vendors to ensure that you have backup components if needed.Certainly! Here’s an expanded version of the `
` tag:
2. Gathering Necessary Components for Your LED Project
Before you can start building your WS2811 12V LED project, you’ll need to gather the necessary components. This section will guide you through the process of selecting the right components for your project.
Selecting the Right WS2811 12V LED Strip
When choosing a WS2811 12V LED strip, there are several factors to consider:
* **LED Density**: The LED density, or number of LEDs per meter, is an important consideration for creating complex animations and patterns. A higher density will provide better resolution. Consider the density that meets your project requirements while also considering the power consumption and cost.
* **Color Options**: WS2811 12V LED strips are available in various color options, including single-color, RGB, and RGBW. Consider the color options that best fit your project requirements.
* **Waterproofing**: If you plan to use your LED strip in a wet or damp environment, you’ll want to choose a waterproof LED strip. Waterproof LED strips have an IP rating that indicates their resistance to water and dust.
* **Compatibility**: Ensure that the LED strip is compatible with the ESP32’s output capabilities and your chosen power supply. Check the LED strip’s datasheet to ensure that it meets the voltage and current requirements of your project.
Choosing a Suitable Power Supply for Your LED Strip
Selecting an appropriate power supply is crucial for your WS2811 12V LED project. The power supply must be capable of delivering enough current to power all the LEDs in your strip without overheating. Here’s how to choose the right power supply:
* **Calculating Total Power Requirement**: To determine the required power supply rating, multiply the number of LEDs in your strip by the maximum current draw per LED (typically 60mA for WS2811 12V LEDs) and then multiply by 12V. This will give you the total power requirement in watts.
* **Considering Input and Output Voltage**: Ensure that the input voltage of the power supply matches the voltage of your power source. Additionally, ensure that the output voltage of the power supply matches the voltage of your LED strip.
* **Efficiency Rating**: Look for a power supply with a high efficiency rating to minimize heat generation and maximize power delivery.
Selecting the Right ESP32 Board for Your Project
There are various ESP32 boards available on the market, each with its unique features and form factors. When choosing an ESP32 board for your project, consider the following factors:
* **Pin Count**: Ensure that the ESP32 board has enough pins to control the number of LEDs in your strip and connect any other peripherals.
* **Interfaces**: Consider the available interfaces on the ESP32 board, such as USB, UART, I2C, and SPI.
* **Built-in Peripherals**: Look for built-in peripherals, such as an onboard OLED display or Wi-Fi and Bluetooth capabilities.
* **Processor Speed and Memory**: Consider the processor speed and memory of the ESP32 board to ensure that it meets your project requirements.
* **Wireless Connectivity Options**: Consider the wireless connectivity options of the ESP32 board, such as Wi-Fi and Bluetooth.
Additional Components and Accessories
In addition to the main components, you may require additional accessories for your WS2811 12V LED project. Here are some accessories to consider:
* **Connecting Wires**: Connecting wires are required to connect your ESP32 board to the LED strip. Consider the gauge and length of the wires, as well as their insulation.
* **Heat Shrink Tubing or Electrical Tape**: Heat shrink tubing or electrical tape is used to insulate and protect your connections. Consider the size and color of the tubing or tape.
* **A Level Shifter**: A level shifter is required if the voltage levels of your ESP32 board and LED strip are not compatible. Consider the input voltage and output voltage of the level shifter.
* **A Breadboard or Prototyping Board**: A breadboard or prototyping board is required for building and testing your circuit. Consider the size and number of tie points of the breadboard.
Sourcing Your Components
Once you have identified the necessary components for your WS2811 12V LED project, it’s time to source them. You can purchase components from various online retailers, such as Amazon, eBay, or specialized electronics stores. Here are some tips to keep in mind when sourcing your components:
* **Research**: Research different sellers and brands to find the best quality components at the best price.
* **Check Reviews**: Read customer reviews to ensure that the components you’re purchasing are reliable and perform as expected.
* **Check Compatibility**: Ensure that the components you’re purchasing are compatible with your specific project requirements.
* **Consider Shipping Times and Costs**: Factor in shipping times and costs when making your purchase decisions. Consider purchasing from sellers that offer expedited shipping if you need your components quickly.
* **Buy Extra Components**: Consider purchasing extra components, such as LED strips and ESP32 boards, in case you encounter any issues during the build process. This will save you time and money in the long run.Sure, here’s an expanded version of the `
` tag:
2. Gathering Necessary Components for Your LED Project
To build your WS2811 12V LED project, you’ll need to gather several components. Here, we’ll discuss the main components you’ll need to source, as well as some additional accessories that can be helpful for your project.
Selecting the Right WS2811 12V LED Strip
When choosing a WS2811 12V LED strip, there are several factors to consider:
* **LED density**: The LED density, or number of LEDs per meter, is an important consideration for creating complex animations and patterns. A higher density will provide better resolution. However, keep in mind that a higher density strip will also require more power and may be more expensive.
* **Color options**: WS2811 12V LED strips are available in a variety of colors, including single color, RGB, and RGBW. Choose the color option that best fits your project requirements.
* **Waterproofing**: If you plan to use your LED strip in a wet or damp environment, you’ll need to choose a waterproof LED strip. Waterproofing options range from IP65 to IP68, with IP68 offering the highest level of protection.
* **Compatibility**: Ensure that the LED strip is compatible with the ESP32’s output capabilities and your chosen power supply. Check the LED strip’s datasheet for the maximum voltage and current requirements.
Choosing a Suitable Power Supply for Your LED Strip
Selecting an appropriate power supply is crucial for your WS2811 12V LED project. The power supply must be capable of delivering enough current to power all the LEDs in your strip without overheating. Here are some factors to consider:
* **Total power requirement**: To determine the required power supply rating, multiply the number of LEDs in your strip by the maximum current draw per LED (typically 60mA for WS2811 12V LEDs) and then multiply by 12V. This will give you the total power requirement in watts.
* **Input voltage**: Ensure that the input voltage of the power supply matches the voltage of your power source.
* **Output voltage**: Ensure that the output voltage of the power supply matches the voltage of your LED strip.
* **Efficiency rating**: Look for a power supply with a high efficiency rating to minimize energy waste and reduce heat output.
Selecting the Right ESP32 Board for Your Project
There are various ESP32 boards available on the market, each with its unique features and form factors. When choosing an ESP32 board for your project, consider the following factors:
* **Pin count**: Ensure that the ESP32 board has enough pins to control the number of LEDs in your strip and connect any other peripherals you may need.
* **Available interfaces**: Check that the ESP32 board has the necessary interfaces for your project, such as USB, UART, I2C, and SPI.
* **Built-in peripherals**: Consider whether the ESP32 board has any built-in peripherals that can be useful for your project, such as an onboard OLED display or Bluetooth capabilities.
* **Processor speed**: Choose an ESP32 board with sufficient processing power to handle the complex animations and patterns you want to create.
* **Memory**: Consider the amount of memory available on the ESP32 board, as this will impact the complexity of the animations and patterns you can create.
* **Wireless connectivity options**: Ensure that the ESP32 board supports the wireless connectivity options you need for your project, such as Wi-Fi or Bluetooth.
Additional Components and Accessories
In addition to the main components, you may require additional accessories for your WS2811 12V LED project. These can include:
* **Connecting wires**: You’ll need wires to connect your ESP32 board to the LED strip. Consider the gauge and length of the wires, as well as their insulation. Wires with thicker gauges can handle higher currents and may be necessary for longer LED strips.
* **Heat shrink tubing or electrical tape**: Heat shrink tubing or electrical tape can be used to insulate and protect your connections. Consider the size and color of the tubing or tape.
* **A level shifter**: If your ESP32 board operates at a different voltage than your LED strip, you may need a level shifter to protect your ESP32 from potential voltage spikes. Consider the input voltage and output voltage of the level shifter.
* **A breadboard or prototyping board**: A breadboard or prototyping board can be helpful for building and testing your circuit. Consider the size and number of tie points of the breadboard.
Sourcing Your Components
Once you have identified the necessary components for your WS2811 12V LED project, it’s time to source them. You can purchase components from various online retailers, such as Amazon, eBay, or specialized electronics stores. When purchasing components, ensure that they are from reputable sellers and have positive customer reviews. Additionally, check for compatibility with your specific project requirements before making a purchase. Consider the price, availability, and shipping options of the components. It’s also a good idea to purchase extra components, such as LED strips and ESP32 boards, in case you encounter any issues during the build process.Sure, here is an expanded version of the `
` tag:
2. Gathering Necessary Components for Your LED Project
Before you start building your LED project, you’ll need to gather all the necessary components. Here’s a guide to help you choose the right components for your WS2811 12V LED project.
Selecting the Right WS2811 12V LED Strip
When choosing a WS2811 12V LED strip, there are several factors to consider:
- LED density: The LED density, or number of LEDs per meter, is an important consideration for creating complex animations and patterns. A higher density will provide better resolution. However, keep in mind that a higher density strip will also consume more power and require a more powerful power supply.
- Color options: WS2811 LED strips are available in a variety of color options, including RGB, RGBW, and single color. Consider the color options that will best suit your project requirements.
- Waterproofing: If you plan to use your LED strip outdoors or in a damp environment, you’ll need to choose a waterproof LED strip. Look for a strip with an IP rating of at least IP65, which indicates that it is dust-tight and can withstand low-pressure water jets from any direction.
- Compatibility: Ensure that the LED strip is compatible with the ESP32’s output capabilities and your chosen power supply. Check the specifications of the LED strip to ensure that it can handle the voltage and current requirements of your project.
Choosing a Suitable Power Supply for Your LED Strip
Selecting an appropriate power supply is crucial for your WS2811 12V LED project. The power supply must be capable of delivering enough current to power all the LEDs in your strip without overheating. Here’s how to determine the required power supply rating:
- Calculate the total power requirement in watts by multiplying the number of LEDs in your strip by the maximum current draw per LED (typically 60mA for WS2811 12V LEDs) and then multiplying by 12V.
- Ensure that the power supply has an input voltage that matches the voltage of your power source and an output voltage that matches the voltage of your LED strip.
- Consider the efficiency rating of the power supply, which indicates how much power is lost as heat. Look for a power supply with a high efficiency rating to minimize power loss and reduce heat generation.
Selecting the Right ESP32 Board for Your Project
There are various ESP32 boards available on the market, each with its unique features and form factors. When choosing an ESP32 board for your project, consider the following factors:
- Pin count: Ensure that the board has sufficient output capabilities to control the number of LEDs in your WS2811 12V strip. Check the pinout diagram of the board to ensure that it has enough pins to connect to your LED strip and any other components you plan to use.
- Available interfaces: Consider the available interfaces on the ESP32 board, such as USB, UART, I2C, and SPI. Ensure that the board has the interfaces you need to connect to your LED strip and any other components you plan to use.
- Built-in peripherals: Look for an ESP32 board with built-in peripherals that can be useful for your project, such as an onboard OLED display or Bluetooth capabilities.
- Processor speed and memory: Consider the processor speed and memory of the ESP32 board. Ensure that the board has sufficient processing power and memory to handle the complexity of your project.
- Wireless connectivity options: Consider the wireless connectivity options of the ESP32 board, such as Wi-Fi and Bluetooth. Ensure that the board has the wireless capabilities you need for your project.
Additional Components and Accessories
In addition to the main components, you may require additional accessories for your WS2811 12V LED project. Here are some accessories to consider:
- Connecting wires: You’ll need wires to connect your ESP32 board to the LED strip. Consider the gauge and length of the wires, as well as their insulation. Choose wires that can handle the current requirements of your project and are long enough to connect all the components.
- Heat shrink tubing or electrical tape: Use heat shrink tubing or electrical tape to insulate and protect your connections. Choose the appropriate size and color for your project.
- A level shifter: If the voltage requirements of your LED strip and ESP32 board are not compatible, you may need a level shifter to protect your ESP32 from potential voltage spikes. Consider the input voltage and output voltage of the level shifter to ensure that it is compatible with your project requirements.
- A breadboard or prototyping board: A breadboard or prototyping board can be useful for building and testing your circuit. Choose a breadboard or prototyping board that has enough tie points to connect all the components of your project.
Sourcing Your Components
Once you have identified the necessary components for your WS2811 12V LED project, it’s time to source them. You can purchase components from various online retailers, such as Amazon, eBay, or specialized electronics stores. Here are some tips for sourcing components:
- Ensure that the components are from reputable sellers and have positive customer reviews.
- Check for compatibility with your specific project requirements before making a purchase.
- Consider the price, availability, and shipping options of the components.
Additionally, consider purchasing extra components, such as LED strips and ESP32 boards, in case you encounter any issues during the build process or want to expand your project in the future.
Sure! Here’s an expanded version of the `
` tag:
2. Gathering Necessary Components for Your LED Project
Before you can start building your LED project, you need to gather all the necessary components. Here are some things to consider when selecting the right components for your project.
Selecting the Right WS2811 12V LED Strip
The WS2811 LED strip is a popular choice for LED projects, thanks to its individually addressable RGB LEDs. When choosing a WS2811 12V LED strip, consider the following factors:
* **LED density**: The LED density, or number of LEDs per meter, is an important consideration for creating complex animations and patterns. A higher density will provide better resolution. Typical LED densities for WS2811 LED strips range from 30 to 144 LEDs per meter.
* **Color options**: WS2811 LED strips are available in a variety of color options, including RGB, RGBW, and single-color. Choose the color option that best suits your project needs.
* **Waterproofing requirements**: If you plan to use your LED strip outdoors or in a damp environment, consider purchasing a waterproof LED strip. Waterproof LED strips are coated with a silicone or epoxy material that protects the LEDs and circuit board from water damage.
* **Compatibility**: Make sure the LED strip is compatible with your chosen power supply and ESP32 board. Check the LED strip’s specifications to ensure that it can handle the voltage and current requirements of your project.
Choosing a Suitable Power Supply for Your LED Strip
Selecting an appropriate power supply is crucial for your WS2811 12V LED project. The power supply must be capable of delivering enough current to power all the LEDs in your strip without overheating. Here are some things to consider when selecting a power supply:
* **Power requirement**: To determine the required power supply rating, multiply the number of LEDs in your strip by the maximum current draw per LED (typically 60mA for WS2811 12V LEDs) and then multiply by 12V. This will give you the total power requirement in watts.
* **Input voltage**: Make sure the power supply’s input voltage matches the voltage of your power source.
* **Output voltage**: Make sure the power supply’s output voltage matches the voltage of your LED strip.
* **Efficiency rating**: Look for a power supply with a high efficiency rating to minimize energy loss and heat generation.
Selecting the Right ESP32 Board for Your Project
The ESP32 board is a popular choice for controlling WS2811 LED strips, thanks to its built-in Wi-Fi capabilities and powerful microcontroller. When choosing an ESP32 board, consider the following factors:
* **Pin count**: Make sure the ESP32 board has enough pins to control the number of LEDs in your strip and any other peripherals you plan to use.
* **Interfaces**: Check that the ESP32 board has the interfaces you need for your project, such as USB, UART, I2C, or SPI.
* **Built-in peripherals**: Some ESP32 boards come with built-in peripherals, such as an OLED display or an SD card slot. Consider whether these features are necessary for your project.
* **Processor speed and memory**: Check the processor speed and memory of the ESP32 board to ensure that it can handle the complexity of your project.
* **Wireless connectivity options**: Make sure the ESP32 board has the wireless connectivity options you need for your project, such as Wi-Fi or Bluetooth.
Additional Components and Accessories
In addition to the main components, you may require additional accessories for your WS2811 12V LED project. Here are some things to consider:
* **Connecting wires**: You will need connecting wires to connect your ESP32 board to the LED strip. Consider the gauge and length of the wires, as well as their insulation.
* **Heat shrink tubing or electrical tape**: Heat shrink tubing or electrical tape can be used to insulate and protect your connections.
* **Level shifter**: If the voltage of your LED strip is different from the voltage of your ESP32 board, you may need a level shifter to protect your ESP32 from potential voltage spikes.
* **Breadboard or prototyping board**: A breadboard or prototyping board can be useful for building and testing your circuit before finalizing the design.
Sourcing Your Components
Once you have identified the necessary components for your WS2811 12V LED project, it’s time to source them. Here are some things to consider when purchasing components:
* **Reputable sellers**: Make sure you purchase components from reputable sellers with positive customer reviews.
* **Compatibility**: Check for compatibility with your specific project requirements before making a purchase.
* **Price, availability, and shipping options**: Consider the price, availability, and shipping options of the components when making your purchasing decision.Sure, here’s an expanded version of the `
` tag:
2. Gathering Necessary Components for Your LED Project
Assembling the necessary components for your LED project is an essential step towards creating a successful and visually stunning display. It’s important to choose high-quality components that are compatible with each other and capable of delivering the performance you need. In this section, we’ll discuss the main components you’ll need for your WS2811 12V LED project and provide some guidance on selecting the right ones.
Selecting the Right WS2811 12V LED Strip
When choosing a WS2811 12V LED strip, there are several factors to consider. The LED density, or number of LEDs per meter, is an important consideration for creating complex animations and patterns. A higher density will provide better resolution, but it will also consume more power and generate more heat. You’ll need to balance the LED density with your power supply and cooling capabilities. Additionally, consider the color options available for the LED strip, as well as any waterproofing requirements. It’s also essential to ensure that the LED strip is compatible with the ESP32’s output capabilities and your chosen power supply. Here are some additional considerations:
* **LED type**: WS2811 are digital LEDs that can be individually controlled to create animations and patterns. They are available in different colors and configurations, including RGB, RGBW, and single-color.
* **LED density**: The LED density is measured in LEDs per meter. A higher density will provide better resolution but will consume more power and generate more heat. Common densities are 30, 60, and 144 LEDs per meter.
* **Color options**: WS2811 LED strips are available in a variety of color options, including RGB, RGBW, and single-color. Consider the color scheme of your project when choosing the LED strip.
* **Waterproofing**: If you plan to use your LED strip outdoors or in a damp environment, you’ll need to choose a waterproof LED strip. Waterproof LED strips are rated according to their IP (Ingress Protection) rating, which indicates their resistance to dust and water.
* **Compatibility**: Ensure that the LED strip is compatible with the ESP32’s output capabilities and your chosen power supply. Check the LED strip’s datasheet for voltage and current requirements.
Choosing a Suitable Power Supply for Your LED Strip
Selecting an appropriate power supply is crucial for your WS2811 12V LED project. The power supply must be capable of delivering enough current to power all the LEDs in your strip without overheating. To determine the required power supply rating, multiply the number of LEDs in your strip by the maximum current draw per LED (typically 60mA for WS2811 12V LEDs) and then multiply by 12V. This will give you the total power requirement in watts. It’s also essential to consider the input voltage and output voltage of the power supply, as well as its efficiency rating. Here are some additional considerations:
* **Input voltage**: Ensure that the input voltage of the power supply matches the voltage of your power source. Common input voltages are 100-240VAC and 12VDC.
* **Output voltage**: Ensure that the output voltage of the power supply matches the voltage of your LED strip. WS2811 LED strips are typically 12V, but they can also be 5V or 24V.
* **Maximum current rating**: Ensure that the power supply can deliver enough current to power all the LEDs in your strip without overheating. Check the power supply’s maximum current rating and compare it to the total current draw of your LED strip.
* **Efficiency rating**: Look for a power supply with a high efficiency rating to minimize energy waste and heat generation. Efficiency ratings are typically expressed as a percentage.
Selecting the Right ESP32 Board for Your Project
There are various ESP32 boards available on the market, each with its unique features and form factors. When choosing an ESP32 board for your project, consider factors such as pin count, available interfaces (USB, UART, I2C, etc.), and built-in peripherals (such as an onboard OLED display). Ensure that the board has sufficient output capabilities to control the number of LEDs in your WS2811 12V strip. You may also want to consider the processor speed, memory, and wireless connectivity options of the ESP32 board. Here are some additional considerations:
* **Pin count**: Ensure that the ESP32 board has sufficient pins to control all the LEDs in your strip and connect any other components you need, such as sensors or displays.
* **Interfaces**: Ensure that the ESP32 board has the interfaces you need to connect to your LED strip and other components. Common interfaces include USB, UART, I2C, and SPI.
* **Built-in peripherals**: Consider whether the ESP32 board has any built-in peripherals that can simplify your project, such as an onboard OLED display or a built-in Wi-Fi module.
* **Processor speed and memory**: Ensure that the ESP32 board has sufficient processing power and memory to run your project’s code and handle any real-time processing requirements.
* **Wireless connectivity options**: Consider whether you need Wi-Fi, Bluetooth, or other wireless connectivity options for your project.
Additional Components and Accessories
In addition to the main components, you may require additional accessories for your WS2811 12V LED project. Here are some accessories to consider:
* **Connecting wires**: You’ll need connecting wires to connect your ESP32 board to the LED strip. Consider the gauge and length of the wires, as well as their insulation. You may also want to consider using pre-terminated wires to simplify the connection process.
* **Heat shrink tubing or electrical tape**: Heat shrink tubing or electrical tape can be used to insulate and protect your connections. Consider the size and color of the tubing or tape to ensure it matches your project’s aesthetic.
* **A level shifter**: If your ESP32 board operates at a different voltage level than your LED strip, you may need a level shifter to protect your ESP32 from potential voltage spikes. Consider the input voltage and output voltage of the level shifter to ensure it’s compatible with your components.
* **A breadboard or prototyping board**: A breadboard or prototyping board can be helpful for building and testing your circuit before you finalize the design. Consider the size and number of tie points of the breadboard to ensure it’s suitable for your project.
Sourcing Your Components
Once you have identified the necessary components for your WS2811 12V LED project, it’s time to source them. You can purchase components from various online retailers, such as Amazon, eBay, or specialized electronics stores. When purchasing components, ensure that they are from reputable sellers and have positive customer reviews. Additionally, check for compatibility with your specific project requirements before making a purchase. Consider the price, availability, and shipping options of the components. You may also want to consider purchasing some backup components, such as extra LED strips or ESP32 boards, in case you encounter any issues during the build process.Sure! Here is an expanded version of the `
` tag with additional relevant, descriptive, persuasive, and concise `
` paragraphs:
3. Step-by-Step Guide: Connecting and Programming WS2811 12V LED Segments with ESP32
If you’re looking to create a stunning light display, look no further than WS2811 12V LED segments. These versatile and energy-efficient lights can be easily programmed to create a variety of animations and effects, and they pair perfectly with the ESP32 microcontroller. In this step-by-step guide, we’ll walk you through the process of connecting and programming your WS2811 12V LED segments with an ESP32 board for a brighter and more dynamic light display.
Step 1: Prepare Your Components
Before you start connecting your components, ensure that you have all the necessary parts. Gather your WS2811 12V LED strip, ESP32 board, power supply, and any additional accessories (such as connecting wires, heat shrink tubing, and a breadboard). It’s important to make sure that you have everything you need before you begin, to avoid any delays or frustration down the line.
Step 2: Connect the LED Strip to the Power Supply
Connect the WS2811 12V LED strip to your power supply. Typically, LED strips have three connections: VCC (power), GND (ground), and DI (data in). Connect the VCC wire to the positive terminal of your power supply, the GND wire to the negative terminal, and set the DI wire aside for now. It’s important to ensure that the voltage of your power supply matches the voltage rating of your LED strip (12V in this case) to avoid damaging the components.
Note: Before connecting the power supply, make sure that it is turned off to avoid any accidental shorts or damage to the components.
Step 3: Connect the LED Strip to the ESP32 Board
Connect the DI wire of your LED strip to the appropriate pin on your ESP32 board. For most WS2811 12V LED projects, you can connect the DI wire to GPIO pin 23 on the ESP32 board. Additionally, connect the GND wire of your LED strip to a GND pin on the ESP32 board. It’s a good practice to use a breadboard to connect the components temporarily before soldering them together for a permanent connection. This allows you to easily test and troubleshoot your circuit before making it permanent.
Step 4: Power Up Your Circuit
Before powering up your circuit, double-check all connections to ensure that they are secure and correct. Once you have confirmed that everything is connected correctly, plug in your power supply and turn it on. You should see the LEDs on your strip light up, indicating that power is being delivered to the strip. Be careful not to short the connections while powering up the circuit to avoid damaging the components.
Step 5: Programming the ESP32 Board
To program the ESP32 board, you will need to install the Arduino IDE (Integrated Development Environment) and the ESP32 board package. Once you have set up the Arduino IDE, you can write and upload code to the ESP32 board to control the WS2811 12V LED strip. There are various libraries available for controlling WS2811 LEDs with the ESP32, such as the FastLED library. This library provides a range of functions for creating animations and effects with the LED strip.
Tip: Make sure to select the correct board and port in the Arduino IDE before uploading the code to the ESP32 board. Additionally, be sure to test your code on a small section of the LED strip before running it on the entire strip to avoid any potential issues.
Step 6: Testing Your LED Project
After uploading your code to the ESP32 board, test your LED project to ensure that it is functioning correctly. You can modify the code to create different animations and effects, or integrate your LED project with other smart devices using the ESP32’s built-in wireless connectivity. Use a multimeter to measure the current draw of your LED project to ensure that it is within the safe operating limits of your power supply.
Step 7: Troubleshooting and Optimization
If you encounter any issues with your WS2811 12V LED project, consult the troubleshooting section of the relevant library documentation or seek help from online forums and communities. Additionally, you can optimize your project by adjusting the power supply, LED density, or code to achieve the desired brightness and performance. For example, you can use Pulse Width Modulation (PWM) to adjust the brightness of the LEDs, or use a higher-capacity power supply to drive more LEDs. You can also experiment with different code libraries and animation patterns to further customize your LED project.
Tip: When optimizing your LED project, always prioritize safety and ensure that your components are operating within their safe operating limits.
By following these steps, you can create a stunning and dynamic WS2811 12V LED light display that is sure to impress. Whether you’re using it for decoration, functional lighting, or art installations, the possibilities are endless with this versatile and energy-efficient technology.
Sure, here’s an expanded version of the `
` tag with additional relevant, descriptive, persuasive, and concise `
` paragraphs:
3. Step-by-Step Guide: Connecting and Programming WS2811 12V LED Segments with ESP32
If you’re looking to create a stunning light display, using WS2811 12V LED segments with an ESP32 board is an excellent choice. In this step-by-step guide, we’ll walk you through the process of connecting and programming your WS2811 12V LED segments with an ESP32 board, to help you create brighter and more dynamic light displays.
Step 1: Prepare Your Components
Before you start connecting your components, it’s essential to ensure that you have all the necessary parts. Here’s a list of the components you’ll need:
* WS2811 12V LED strip
* ESP32 board
* Power supply
* Connecting wires
* Heat shrink tubing
* Breadboard (optional)
Make sure you have all the required components before you start, to avoid any frustration or delays in your project.
Step 2: Connect the LED Strip to the Power Supply
Connect the WS2811 12V LED strip to your power supply. Typically, LED strips have three connections: VCC (power), GND (ground), and DI (data in). Connect the VCC wire to the positive terminal of your power supply, the GND wire to the negative terminal, and set the DI wire aside for now.
Note: Ensure that the voltage of your power supply matches the voltage rating of your LED strip (12V in this case) to avoid damaging the components.
Step 3: Connect the LED Strip to the ESP32 Board
Connect the DI wire of your LED strip to the appropriate pin on your ESP32 board. For most WS2811 12V LED projects, you can connect the DI wire to GPIO pin 23 on the ESP32 board. Additionally, connect the GND wire of your LED strip to a GND pin on the ESP32 board.
Tip: It’s a good practice to use a breadboard to connect the components temporarily before soldering them together for a permanent connection. This will help you test your circuit and make any necessary adjustments before committing to a permanent solution.
Step 4: Power Up Your Circuit
Before powering up your circuit, double-check all connections to ensure that they are secure and correct. Once you have confirmed that everything is connected correctly, plug in your power supply and turn it on. You should see the LEDs on your strip light up, indicating that power is being delivered to the strip.
Warning: Be careful not to short the connections while powering up the circuit to avoid damaging the components.
Step 5: Programming the ESP32 Board
To program the ESP32 board, you will need to install the Arduino IDE (Integrated Development Environment) and the ESP32 board package. Once you have set up the Arduino IDE, you can write and upload code to the ESP32 board to control the WS2811 12V LED strip.
There are various libraries available for controlling WS2811 LEDs with the ESP32, such as the FastLED library. This library provides a range of functions for creating animations and effects with the LED strip.
Tip: Make sure to select the correct board and port in the Arduino IDE before uploading the code to the ESP32 board. This will ensure that your code is uploaded to the correct board, and that you can communicate with the board through the serial monitor.
Step 6: Testing Your LED Project
After uploading your code to the ESP32 board, test your LED project to ensure that it is functioning correctly. You can modify the code to create different animations and effects, or integrate your LED project with other smart devices using the ESP32’s built-in wireless connectivity.
Tip: Use a multimeter to measure the current draw of your LED project to ensure that it is within the safe operating limits of your power supply. Exceeding the current rating of your power supply could cause damage to your components, or even start a fire.
Step 7: Troubleshooting and Optimization
If you encounter any issues with your WS2811 12V LED project, consult the troubleshooting section of the relevant library documentation or seek help from online forums and communities. Additionally, you can optimize your project by adjusting the power supply, LED density, or code to achieve the desired brightness and performance.
For example, you can use Pulse Width Modulation (PWM) to adjust the brightness of the LEDs, or use a higher-capacity power supply to drive more LEDs. You can also experiment with different code libraries and animation patterns to further customize your LED project.
Tip: When optimizing your LED project, always prioritize safety and ensure that your components are operating within their safe operating limits. Additionally, be sure to test your project thoroughly before deploying it in a public space or leaving it unattended.
By following these steps, you’ll be able to create a stunning and dynamic light display using WS2811 12V LED segments and an ESP32 board. With a little creativity and experimentation, you can create a truly unique and eye-catching display that will impress your friends and family.
Here’s an expanded version of the `
` tag with additional relevant, descriptive, persuasive, and concise `
` paragraphs:
3. Step-by-Step Guide: Connecting and Programming WS2811 12V LED Segments with ESP32
In this section, we will guide you through the process of connecting and programming WS2811 12V LED strips with an ESP32 board to create brighter and more dynamic light displays. Follow these steps carefully to ensure a successful and safe setup.
Step 1: Prepare Your Components
Before you start connecting your components, make sure you have all the necessary parts. Here’s a list of what you’ll need:
* WS2811 12V LED strip
* ESP32 board
* Power supply (12V DC)
* Connecting wires
* Heat shrink tubing
* Breadboard (optional)
Gather all of your materials and make sure they are within reach before proceeding to the next step.
Step 2: Connect the LED Strip to the Power Supply
Connect the WS2811 12V LED strip to your power supply. LED strips typically have three connections: VCC (power), GND (ground), and DI (data in). Connect the VCC wire to the positive terminal of your power supply, the GND wire to the negative terminal, and set the DI wire aside for now.
Note: It is crucial to ensure that the voltage of your power supply matches the voltage rating of your LED strip (12V in this case) to avoid damaging the components. Also, make sure to connect the wires securely to prevent any loose connections or shorts.
Step 3: Connect the LED Strip to the ESP32 Board
Connect the DI wire of your LED strip to the appropriate pin on your ESP32 board. For most WS2811 12V LED projects, you can connect the DI wire to GPIO pin 23 on the ESP32 board. Additionally, connect the GND wire of your LED strip to a GND pin on the ESP32 board.
Tip: Using a breadboard can make it easier to connect the components temporarily before soldering them together for a permanent connection. This allows you to test your circuit and make any necessary adjustments before committing to a final setup.
Step 4: Power Up Your Circuit
Before powering up your circuit, double-check all connections to ensure that they are secure and correct. Once you have confirmed that everything is connected correctly, plug in your power supply and turn it on. You should see the LEDs on your strip light up, indicating that power is being delivered to the strip.
Warning: Be careful not to short the connections while powering up the circuit to avoid damaging the components. Also, make sure to handle the power supply with care, as it can become hot during operation.
Step 5: Programming the ESP32 Board
To program the ESP32 board, you will need to install the Arduino IDE (Integrated Development Environment) and the ESP32 board package. Once you have set up the Arduino IDE, you can write and upload code to the ESP32 board to control the WS2811 12V LED strip.
There are various libraries available for controlling WS2811 LEDs with the ESP32, such as the FastLED library. This library provides a range of functions for creating animations and effects with the LED strip.
Tip: Make sure to select the correct board and port in the Arduino IDE before uploading the code to the ESP32 board. This will ensure that the code is uploaded correctly and that the board is communicating properly with your computer.
Step 6: Testing Your LED Project
After uploading your code to the ESP32 board, test your LED project to ensure that it is functioning correctly. You can modify the code to create different animations and effects, or integrate your LED project with other smart devices using the ESP32’s built-in wireless connectivity.
Tip: Use a multimeter to measure the current draw of your LED project to ensure that it is within the safe operating limits of your power supply. Exceeding the current rating of your power supply can cause damage to your components and create a fire hazard.
Step 7: Troubleshooting and Optimization
If you encounter any issues with your WS2811 12V LED project, consult the troubleshooting section of the relevant library documentation or seek help from online forums and communities. Additionally, you can optimize your project by adjusting the power supply, LED density, or code to achieve the desired brightness and performance.
For example, you can use Pulse Width Modulation (PWM) to adjust the brightness of the LEDs, or use a higher-capacity power supply to drive more LEDs. You can also experiment with different code libraries and animation patterns to further customize your LED project.
Tip: When optimizing your LED project, always prioritize safety and ensure that your components are operating within their safe operating limits. Also, make sure to test your circuit thoroughly before deploying it in a permanent installation.
By following these steps, you can create a stunning and dynamic light display using WS2811 12V LED strips and an ESP32 board. With a little creativity and experimentation, you can create a truly unique and eye-catching display that is sure to impress.
Sure! Here is an expanded version of the `
` tag with additional relevant, descriptive, persuasive, and concise `
` paragraphs:
3. Step-by-Step Guide: Connecting and Programming WS2811 12V LED Segments with ESP32
In this section, we will guide you through the process of connecting and programming WS2811 12V LED segments with an ESP32 board. This step-by-step guide will help you create a dazzling light display for your projects.
Step 1: Prepare Your Components
Before you start connecting your components, ensure that you have all the necessary parts. Gather your WS2811 12V LED strip, ESP32 board, power supply, and any additional accessories such as connecting wires, heat shrink tubing, and a breadboard.
Make sure that the LED strip is in good condition and that the pins are straight. Also, double-check that your power supply matches the voltage rating of your LED strip (12V in this case) to avoid damaging the components.
Step 2: Connect the LED Strip to the Power Supply
Connect the WS2811 12V LED strip to your power supply. Typically, LED strips have three connections: VCC (power), GND (ground), and DI (data in).
Connect the VCC wire to the positive terminal of your power supply, the GND wire to the negative terminal, and set the DI wire aside for now.
It’s important to note that the polarity of the connections matters. Make sure that you connect the positive wire to the positive terminal and the negative wire to the negative terminal.
Step 3: Connect the LED Strip to the ESP32 Board
Connect the DI wire of your LED strip to the appropriate pin on your ESP32 board. For most WS2811 12V LED projects, you can connect the DI wire to GPIO pin 23 on the ESP32 board.
Additionally, connect the GND wire of your LED strip to a GND pin on the ESP32 board. This will ensure that the LED strip and the ESP32 board are both grounded and that the data signal is transmitted correctly.
It’s a good practice to use a breadboard to connect the components temporarily before soldering them together for a permanent connection. This allows you to test the circuit and make any necessary adjustments before committing to a final setup.
Step 4: Power Up Your Circuit
Before powering up your circuit, double-check all connections to ensure that they are secure and correct. Once you have confirmed that everything is connected correctly, plug in your power supply and turn it on.
You should see the LEDs on your strip light up, indicating that power is being delivered to the strip.
Warning: Be careful not to short the connections while powering up the circuit to avoid damaging the components.
Step 5: Programming the ESP32 Board
To program the ESP32 board, you will need to install the Arduino IDE (Integrated Development Environment) and the ESP32 board package.
Once you have set up the Arduino IDE, you can write and upload code to the ESP32 board to control the WS2811 12V LED strip.
There are various libraries available for controlling WS2811 LEDs with the ESP32, such as the FastLED library. This library provides a range of functions for creating animations and effects with the LED strip.
Make sure to select the correct board and port in the Arduino IDE before uploading the code to the ESP32 board.
Step 6: Testing Your LED Project
After uploading your code to the ESP32 board, test your LED project to ensure that it is functioning correctly. You can modify the code to create different animations and effects, or integrate your LED project with other smart devices using the ESP32’s built-in wireless connectivity.
Use a multimeter to measure the current draw of your LED project to ensure that it is within the safe operating limits of your power supply.
Step 7: Troubleshooting and Optimization
If you encounter any issues with your WS2811 12V LED project, consult the troubleshooting section of the relevant library documentation or seek help from online forums and communities.
Additionally, you can optimize your project by adjusting the power supply, LED density, or code to achieve the desired brightness and performance.
For example, you can use Pulse Width Modulation (PWM) to adjust the brightness of the LEDs, or use a higher-capacity power supply to drive more LEDs. You can also experiment with different code libraries and animation patterns to further customize your LED project.
When optimizing your LED project, always prioritize safety and ensure that your components are operating within their safe operating limits.
By following these steps, you can create a stunning light display for your projects using WS2811 12V LED segments and an ESP32 board.
Here is an expanded version of the `
` tag with additional relevant, descriptive, persuasive, and concise `
` paragraphs:
3. Step-by-Step Guide: Connecting and Programming WS2811 12V LED Segments with ESP32
In this section, we will guide you through the process of connecting and programming WS2811 12V LED segments with an ESP32 board. This step-by-step guide will help you create a stunning light display for your projects.
Step 1: Prepare Your Components
Before you start connecting your components, make sure you have all the necessary parts. Gather your WS2811 12V LED strip, ESP32 board, power supply, and any additional accessories such as connecting wires, heat shrink tubing, and a breadboard.
It’s important to ensure that you have the correct voltage rating for your LED strip. In this case, we’re using a 12V LED strip, so make sure your power supply matches this voltage rating.
Step 2: Connect the LED Strip to the Power Supply
Connect the WS2811 12V LED strip to your power supply. Typically, LED strips have three connections: VCC (power), GND (ground), and DI (data in).
Connect the VCC wire to the positive terminal of your power supply, and the GND wire to the negative terminal. Set the DI wire aside for now, as we will connect it to the ESP32 board in the next step.
Note: Ensure that the voltage of your power supply matches the voltage rating of your LED strip (12V in this case) to avoid damaging the components.
Step 3: Connect the LED Strip to the ESP32 Board
Connect the DI wire of your LED strip to the appropriate pin on your ESP32 board. For most WS2811 12V LED projects, you can connect the DI wire to GPIO pin 23 on the ESP32 board. Additionally, connect the GND wire of your LED strip to a GND pin on the ESP32 board.
It’s a good practice to use a breadboard to connect the components temporarily before soldering them together for a permanent connection. This allows you to test the circuit and make any necessary adjustments before committing to a final setup.
Tip: Make sure to connect the DI wire to the correct pin on the ESP32 board, as this will determine how the LED strip is controlled.
Step 4: Power Up Your Circuit
Before powering up your circuit, double-check all connections to ensure that they are secure and correct. Once you have confirmed that everything is connected correctly, plug in your power supply and turn it on.
You should see the LEDs on your strip light up, indicating that power is being delivered to the strip.
Warning: Be careful not to short the connections while powering up the circuit to avoid damaging the components.
Step 5: Programming the ESP32 Board
To program the ESP32 board, you will need to install the Arduino IDE (Integrated Development Environment) and the ESP32 board package. Once you have set up the Arduino IDE, you can write and upload code to the ESP32 board to control the WS2811 12V LED strip.
There are various libraries available for controlling WS2811 LEDs with the ESP32, such as the FastLED library. This library provides a range of functions for creating animations and effects with the LED strip.
Tip: Make sure to select the correct board and port in the Arduino IDE before uploading the code to the ESP32 board. This will ensure that your code is uploaded correctly and that the ESP32 board is communicating with your computer.
Step 6: Testing Your LED Project
After uploading your code to the ESP32 board, test your LED project to ensure that it is functioning correctly. You can modify the code to create different animations and effects, or integrate your LED project with other smart devices using the ESP32’s built-in wireless connectivity.
Tip: Use a multimeter to measure the current draw of your LED project to ensure that it is within the safe operating limits of your power supply. If the current draw is too high, you may need to adjust the power supply or LED density to prevent overheating and damage to the components.
Step 7: Troubleshooting and Optimization
If you encounter any issues with your WS2811 12V LED project, consult the troubleshooting section of the relevant library documentation or seek help from online forums and communities. Additionally, you can optimize your project by adjusting the power supply, LED density, or code to achieve the desired brightness and performance.
For example, you can use Pulse Width Modulation (PWM) to adjust the brightness of the LEDs, or use a higher-capacity power supply to drive more LEDs. You can also experiment with different code libraries and animation patterns to further customize your LED project.
Tip: When optimizing your LED project, always prioritize safety and ensure that your components are operating within their safe operating limits. Overloading the components can result in overheating, short circuits, and other dangerous conditions.
By following these steps, you can create a stunning light display for your projects using WS2811 12V LED segments and an ESP32 board. With a little creativity and experimentation, you can create custom animations and effects that will impress your friends and family.
Here is an expanded version of the `
` tag with additional relevant, descriptive, persuasive, and concise `
` paragraphs:
3. Step-by-Step Guide: Connecting and Programming WS2811 12V LED Segments with ESP32
In this section, we will provide a detailed step-by-step guide to help you connect and program your WS2811 12V LED strip with an ESP32 board. By following these instructions, you will be able to create stunning light displays for your projects.
Step 1: Prepare Your Components
Before you start connecting your components, make sure you have all the necessary parts. You will need a WS2811 12V LED strip, an ESP32 board, a power supply, and any additional accessories such as connecting wires, heat shrink tubing, and a breadboard.
It’s important to ensure that you have the correct voltage rating for your LED strip. In this case, we are using a 12V LED strip, so make sure your power supply matches this voltage rating.
Step 2: Connect the LED Strip to the Power Supply
Connect the WS2811 12V LED strip to your power supply. Typically, LED strips have three connections: VCC (power), GND (ground), and DI (data in). Connect the VCC wire to the positive terminal of your power supply, the GND wire to the negative terminal, and set the DI wire aside for now.
Note: Ensure that the voltage of your power supply matches the voltage rating of your LED strip (12V in this case) to avoid damaging the components.
Step 3: Connect the LED Strip to the ESP32 Board
Connect the DI wire of your LED strip to the appropriate pin on your ESP32 board. For most WS2811 12V LED projects, you can connect the DI wire to GPIO pin 23 on the ESP32 board. Additionally, connect the GND wire of your LED strip to a GND pin on the ESP32 board.
Tip: It’s a good practice to use a breadboard to connect the components temporarily before soldering them together for a permanent connection. This allows you to test the circuit and make any necessary adjustments before committing to a final setup.
Step 4: Power Up Your Circuit
Before powering up your circuit, double-check all connections to ensure that they are secure and correct. Once you have confirmed that everything is connected correctly, plug in your power supply and turn it on. You should see the LEDs on your strip light up, indicating that power is being delivered to the strip.
Warning: Be careful not to short the connections while powering up the circuit to avoid damaging the components.
Step 5: Programming the ESP32 Board
To program the ESP32 board, you will need to install the Arduino IDE (Integrated Development Environment) and the ESP32 board package. The Arduino IDE is a free, open-source software that allows you to write and upload code to your ESP32 board. Once you have set up the Arduino IDE, you can write and upload code to the ESP32 board to control the WS2811 12V LED strip.
There are various libraries available for controlling WS2811 LEDs with the ESP32, such as the FastLED library. This library provides a range of functions for creating animations and effects with the LED strip.
Tip: Make sure to select the correct board and port in the Arduino IDE before uploading the code to the ESP32 board. This will ensure that your code is uploaded correctly and that the ESP32 board is communicating with your computer.
Step 6: Testing Your LED Project
After uploading your code to the ESP32 board, test your LED project to ensure that it is functioning correctly. You can modify the code to create different animations and effects, or integrate your LED project with other smart devices using the ESP32’s built-in wireless connectivity.
Tip: Use a multimeter to measure the current draw of your LED project to ensure that it is within the safe operating limits of your power supply. This will help prevent any damage to your components and ensure that your LED strip is operating at optimal performance.
Step 7: Troubleshooting and Optimization
If you encounter any issues with your WS2811 12V LED project, consult the troubleshooting section of the relevant library documentation or seek help from online forums and communities. Additionally, you can optimize your project by adjusting the power supply, LED density, or code to achieve the desired brightness and performance.
For example, you can use Pulse Width Modulation (PWM) to adjust the brightness of the LEDs, or use a higher-capacity power supply to drive more LEDs. You can also experiment with different code libraries and animation patterns to further customize your LED project.
Tip: When optimizing your LED project, always prioritize safety and ensure that your components are operating within their safe operating limits. Overloading your LED strip can cause it to overheat and potentially damage the components.
Here is an expanded version of the `
` tag with additional relevant, descriptive, persuasive, and concise `
` paragraphs:
3. Step-by-Step Guide: Connecting and Programming WS2811 12V LED Segments with ESP32
In this section, we will guide you through the process of connecting and programming your WS2811 12V LED strip with an ESP32 board. By following these steps, you will be able to create stunning light displays for your projects.
Step 1: Prepare Your Components
Before you start connecting your components, make sure you have all the necessary parts. You will need a WS2811 12V LED strip, an ESP32 board, a power supply, and any additional accessories such as connecting wires, heat shrink tubing, and a breadboard.
It’s important to ensure that you have the correct voltage rating for your LED strip. In this case, we are using a 12V LED strip, so make sure your power supply matches this voltage rating.
Step 2: Connect the LED Strip to the Power Supply
Connect the WS2811 12V LED strip to your power supply. Typically, LED strips have three connections: VCC (power), GND (ground), and DI (data in). Connect the VCC wire to the positive terminal of your power supply, the GND wire to the negative terminal, and set the DI wire aside for now.
Note: Ensure that the voltage of your power supply matches the voltage rating of your LED strip (12V in this case) to avoid damaging the components.
Step 3: Connect the LED Strip to the ESP32 Board
Connect the DI wire of your LED strip to the appropriate pin on your ESP32 board. For most WS2811 12V LED projects, you can connect the DI wire to GPIO pin 23 on the ESP32 board. Additionally, connect the GND wire of your LED strip to a GND pin on the ESP32 board.
Tip: It’s a good practice to use a breadboard to connect the components temporarily before soldering them together for a permanent connection. This allows you to test the circuit and make any necessary adjustments before committing to a final setup.
Step 4: Power Up Your Circuit
Before powering up your circuit, double-check all connections to ensure that they are secure and correct. Once you have confirmed that everything is connected correctly, plug in your power supply and turn it on. You should see the LEDs on your strip light up, indicating that power is being delivered to the strip.
Warning: Be careful not to short the connections while powering up the circuit to avoid damaging the components.
Step 5: Programming the ESP32 Board
To program the ESP32 board, you will need to install the Arduino IDE (Integrated Development Environment) and the ESP32 board package. The Arduino IDE is a free and open-source software that allows you to write and upload code to your ESP32 board. Once you have set up the Arduino IDE, you can write and upload code to the ESP32 board to control the WS2811 12V LED strip.
There are various libraries available for controlling WS2811 LEDs with the ESP32, such as the FastLED library. The FastLED library provides a range of functions for creating animations and effects with the LED strip.
Tip: Make sure to select the correct board and port in the Arduino IDE before uploading the code to the ESP32 board. This will ensure that your code is uploaded correctly and that the ESP32 board is communicating with your computer.
Step 6: Testing Your LED Project
After uploading your code to the ESP32 board, test your LED project to ensure that it is functioning correctly. You can modify the code to create different animations and effects, or integrate your LED project with other smart devices using the ESP32’s built-in wireless connectivity.
Tip: Use a multimeter to measure the current draw of your LED project to ensure that it is within the safe operating limits of your power supply. This will help prevent any damage to your components and ensure that your LED strip is operating at optimal performance.
Step 7: Troubleshooting and Optimization
If you encounter any issues with your WS2811 12V LED project, consult the troubleshooting section of the relevant library documentation or seek help from online forums and communities. Additionally, you can optimize your project by adjusting the power supply, LED density, or code to achieve the desired brightness and performance.
For example, you can use Pulse Width Modulation (PWM) to adjust the brightness of the LEDs, or use a higher-capacity power supply to drive more LEDs. You can also experiment with different code libraries and animation patterns to further customize your LED project.
Tip: When optimizing your LED project, always prioritize safety and ensure that your components are operating within their safe operating limits. Overloading your LED strip can cause it to overheat and potentially damage the components.
Sure, here’s an expanded version of the `
` tag:
4. Tips and Troubleshooting for Achieving Optimal Brightness with WS2811 12V LED Segments and ESP32
To get the most out of your WS2811 12V LED segments, it’s essential to configure them correctly and troubleshoot any issues that may arise. By following these tips and troubleshooting steps, you can achieve optimal brightness and ensure that your LED display looks its best. Here are some tips for getting started:
Tip 1: Choose the Right Power Supply
The power supply is a critical component of any LED display, as it provides the necessary power to light up the LEDs. When using WS2811 12V LED segments with an ESP32 board, it’s crucial to select a power supply that can deliver enough current to power all the LEDs without overheating or causing voltage drops. Look for a power supply that provides consistent power and can handle the total current draw of your LED strip. As a general rule of thumb, you should aim for a power supply that can deliver at least 20% more current than your LED strip requires.
- Relevant Entity: Power supply current rating
- Keywords: power supply, current rating, WS2811, LED segments, ESP32
- SEO Meta Description: Learn how to choose the right power supply for your WS2811 12V LED segments and ESP32 board to achieve optimal brightness and avoid voltage drops.
Tip 2: Adjust LED Density
LED density refers to the number of LEDs per meter on your strip. A higher LED density will result in a brighter overall display, as more LEDs are illuminated in a given area. However, a higher LED density may also require a more powerful power supply and additional processing power from your ESP32 board. Consider adjusting the LED density to strike a balance between brightness and power requirements. For example, you can use a higher LED density for smaller displays and a lower density for larger displays to achieve consistent brightness.
- Relevant Entity: LED density
- Keywords: LED density, brightness, power requirements, WS2811, ESP32
- SEO Meta Description: Discover how adjusting LED density can improve the brightness and power efficiency of your WS2811 12V LED segments and ESP32 board.
Tip 3: Optimize Your Code
Optimizing your code can help you achieve better performance and brightness from your WS2811 12V LED segments. Ensure that you are using an efficient library for controlling the LEDs, such as the FastLED library. Additionally, consider implementing techniques such as frame buffering or using a lower refresh rate to reduce the processing load on your ESP32 board and improve overall brightness. You can also experiment with different brightness levels and color settings to find the optimal combination for your display.
- Relevant Entity: Code optimization
- Keywords: code optimization, FastLED library, frame buffering, refresh rate, brightness levels, color settings
- SEO Meta Description: Learn how to optimize your code for better performance and brightness with WS2811 12V LED segments and ESP32 board.
Troubleshooting Tip 1: Voltage Drops
Voltage drops can occur when the power supply is unable to deliver enough current to the LED strip, resulting in reduced brightness or flickering. To troubleshoot voltage drops, check your power supply’s current rating and ensure that it is sufficient for your LED strip. Additionally, consider using thicker wiring or adding additional power injection points to maintain consistent voltage along the length of the strip. You can also use a voltage meter to measure the voltage at different points along the strip and identify any areas where the voltage drops significantly.
- Relevant Entity: Power injection points
- Keywords: voltage drops, power injection points, current rating, wiring, voltage meter
- SEO Meta Description: Learn how to troubleshoot voltage drops with WS2811 12V LED segments and ESP32 board, including power injection points and voltage meters.
Troubleshooting Tip 2: LED Failures
If some of your LEDs are not lighting up or are displaying incorrect colors, it may be due to a faulty connection or a damaged LED. Check your connections to ensure that they are secure and correct. If the issue persists, you may need to replace the faulty LED or consult the LED strip’s documentation for further troubleshooting steps. It’s also worth checking the ESP32 board for any issues, such as a damaged pin or a software bug.
- Relevant Entity: Faulty connections
- Keywords: LED failures, faulty connections, damaged LED, documentation, ESP32 board
- SEO Meta Description: Learn how to troubleshoot LED failures with WS2811 12V LED segments and ESP32 board, including checking connections and documentation.
Troubleshooting Tip 3: Overheating
Overheating can occur when the LED strip or power supply is not adequately cooled, resulting in reduced performance and potential damage to the components. To prevent overheating, ensure that your power supply is rated for the appropriate power output and that your LED strip has sufficient cooling, such as heat sinks or fans. Additionally, consider reducing the maximum brightness or duty cycle of your LED strip to reduce heat generation. It’s also a good idea to monitor the temperature of your components and take action if they become too hot.
- Relevant Entity: Cooling methods
- Keywords: overheating, cooling methods, power output, heat sinks, fans, duty cycle
- SEO Meta Description: Learn how to prevent overheating with WS2811 12V LED segments and ESP32 board, including cooling methods and temperature monitoring.
Conclusion
By following these tips and troubleshooting steps, you can achieve optimal brightness and ensure that your WS2811 12V LED segments and ESP32 board are working together seamlessly. Remember to select the right power supply, adjust LED density, optimize your code, and address any issues that arise. With a little bit of effort, you can create stunning LED displays that are sure to impress.
- Relevant Entity: Optimal brightness
- Keywords: LED displays, seamless integration, troubleshooting steps, optimal brightness
- SEO Meta Description: Learn how to achieve optimal brightness and create stunning LED displays with WS2811 12V LED segments and ESP32 board.
Sure, here’s an expanded version of the `
` tag:
4. Tips and Troubleshooting for Achieving Optimal Brightness with WS2811 12V LED Segments and ESP32
To get the most out of your WS2811 12V LED segments, it’s essential to configure them correctly and troubleshoot any issues that may arise. By following these tips and troubleshooting steps, you can achieve optimal brightness and ensure that your LED display looks its best. In this section, we’ll cover some of the most important tips and troubleshooting steps for achieving optimal brightness with WS2811 12V LED segments and ESP32.
Tip 1: Choose the Right Power Supply
The power supply is a critical component of any LED display, as it provides the necessary power to light up the LEDs. When using WS2811 12V LED segments with an ESP32 board, it’s crucial to select a power supply that can deliver enough current to power all the LEDs without overheating or causing voltage drops. Look for a power supply that provides consistent power and can handle the total current draw of your LED strip. As a general rule of thumb, you should aim for a power supply that can deliver at least 20% more current than your LED strip requires. This will ensure that your power supply can handle any fluctuations in current demand and prevent voltage drops that can reduce brightness.
Relevant Entity: Power supply current rating
Tip 2: Adjust LED Density
LED density refers to the number of LEDs per meter on your strip. A higher LED density will result in a brighter overall display, as more LEDs are illuminated in a given area. However, a higher LED density may also require a more powerful power supply and additional processing power from your ESP32 board. To strike a balance between brightness and power requirements, consider adjusting the LED density to suit your display needs. For example, if you’re creating a smaller display, you can use a higher LED density to achieve brighter lights without overloading your power supply or ESP32 board. On the other hand, if you’re creating a larger display, you may need to use a lower LED density to keep power requirements and processing demands within reasonable limits.
Relevant Entity: LED density
Tip 3: Optimize Your Code
Optimizing your code can help you achieve better performance and brightness from your WS2811 12V LED segments. Ensure that you are using an efficient library for controlling the LEDs, such as the FastLED library. Additionally, consider implementing techniques such as frame buffering or using a lower refresh rate to reduce the processing load on your ESP32 board and improve overall brightness. You can also experiment with different brightness levels and color settings to find the optimal combination for your display. Remember that code optimization is an ongoing process, and you should regularly review and update your code to ensure optimal performance.
Relevant Entity: Code optimization
Troubleshooting Tip 1: Voltage Drops
Voltage drops can occur when the power supply is unable to deliver enough current to the LED strip, resulting in reduced brightness or flickering. To troubleshoot voltage drops, check your power supply’s current rating and ensure that it is sufficient for your LED strip. Additionally, consider using thicker wiring or adding additional power injection points to maintain consistent voltage along the length of the strip. You can also use a voltage meter to measure the voltage at different points along the strip and identify any areas where the voltage drops significantly. By addressing voltage drops, you can ensure that your LED strip receives consistent power and maintains optimal brightness.
Relevant Entity: Power injection points
Troubleshooting Tip 2: LED Failures
If some of your LEDs are not lighting up or are displaying incorrect colors, it may be due to a faulty connection or a damaged LED. Check your connections to ensure that they are secure and correct. If the issue persists, you may need to replace the faulty LED or consult the LED strip’s documentation for further troubleshooting steps. It’s also worth checking the ESP32 board for any issues, such as a damaged pin or a software bug. By addressing LED failures, you can ensure that all LEDs on your strip are functioning correctly and contributing to the overall brightness of your display.
Relevant Entity: Faulty connections
Troubleshooting Tip 3: Overheating
Overheating can occur when the LED strip or power supply is not adequately cooled, resulting in reduced performance and potential damage to the components. To prevent overheating, ensure that your power supply is rated for the appropriate power output and that your LED strip has sufficient cooling, such as heat sinks or fans. Additionally, consider reducing the maximum brightness or duty cycle of your LED strip to reduce heat generation. It’s also a good idea to monitor the temperature of your components and take action if they become too hot. By addressing overheating, you can ensure that your LED strip and power supply are operating within safe temperature limits and maintaining optimal performance.
Relevant Entity: Cooling methods
Conclusion
By following these tips and troubleshooting steps, you can achieve optimal brightness and ensure that your WS2811 12V LED segments and ESP32 board are working together seamlessly. Remember to select the right power supply, adjust LED density, optimize your code, and address any issues that arise. With a little bit of effort, you can create stunning LED displays that are sure to impress.
Here’s an expanded version of the `
` tag:
4. Tips and Troubleshooting for Achieving Optimal Brightness with WS2811 12V LED Segments and ESP32
To get the most out of your WS2811 12V LED segments, it’s essential to configure them correctly and troubleshoot any issues that may arise. By following these tips and troubleshooting steps, you can achieve optimal brightness and ensure that your LED display looks its best. In this section, we’ll cover some of the most important tips and troubleshooting steps for achieving optimal brightness with WS2811 12V LED segments and ESP32.
Tip 1: Choose the Right Power Supply
The power supply is a critical component of any LED display, as it provides the necessary power to light up the LEDs. When using WS2811 12V LED segments with an ESP32 board, it’s crucial to select a power supply that can deliver enough current to power all the LEDs without overheating or causing voltage drops. Look for a power supply that provides consistent power and can handle the total current draw of your LED strip. As a general rule of thumb, you should aim for a power supply that can deliver at least 20% more current than your LED strip requires. This will ensure that your power supply can handle any fluctuations in current demand and prevent voltage drops that can reduce brightness.
Relevant Entity: Power supply current rating
- Keywords: power supply, current rating, voltage drops, consistent power
- Description: Choosing the right power supply is essential for achieving optimal brightness with WS2811 12V LED segments. Learn how to select a power supply that can deliver enough current and prevent voltage drops.
Tip 2: Adjust LED Density
LED density refers to the number of LEDs per meter on your strip. A higher LED density will result in a brighter overall display, as more LEDs are illuminated in a given area. However, a higher LED density may also require a more powerful power supply and additional processing power from your ESP32 board. Consider adjusting the LED density to strike a balance between brightness and power requirements. For example, you can use a higher LED density for smaller displays and a lower density for larger displays to achieve consistent brightness.
Relevant Entity: LED density
- Keywords: LED density, brightness, power requirements, processing power
- Description: Adjusting LED density is an effective way to achieve optimal brightness with WS2811 12V LED segments. Learn how to balance brightness and power requirements to achieve consistent performance.
Tip 3: Optimize Your Code
Optimizing your code can help you achieve better performance and brightness from your WS2811 12V LED segments. Ensure that you are using an efficient library for controlling the LEDs, such as the FastLED library. Additionally, consider implementing techniques such as frame buffering or using a lower refresh rate to reduce the processing load on your ESP32 board and improve overall brightness. You can also experiment with different brightness levels and color settings to find the optimal combination for your display.
Relevant Entity: Code optimization
- Keywords: code optimization, FastLED library, frame buffering, refresh rate
- Description: Optimizing your code can help you achieve better performance and brightness with WS2811 12V LED segments. Learn how to use efficient libraries and implement techniques to reduce processing load and improve brightness.
Troubleshooting Tip 1: Voltage Drops
Voltage drops can occur when the power supply is unable to deliver enough current to the LED strip, resulting in reduced brightness or flickering. To troubleshoot voltage drops, check your power supply’s current rating and ensure that it is sufficient for your LED strip. Additionally, consider using thicker wiring or adding additional power injection points to maintain consistent voltage along the length of the strip. You can also use a voltage meter to measure the voltage at different points along the strip and identify any areas where the voltage drops significantly.
Relevant Entity: Power injection points
- Keywords: voltage drops, power supply, current rating, thick wiring, power injection points
- Description: Voltage drops can reduce brightness and cause flickering in your LED display. Learn how to troubleshoot voltage drops and maintain consistent voltage along the length of your strip.
Troubleshooting Tip 2: LED Failures
If some of your LEDs are not lighting up or are displaying incorrect colors, it may be due to a faulty connection or a damaged LED. Check your connections to ensure that they are secure and correct. If the issue persists, you may need to replace the faulty LED or consult the LED strip’s documentation for further troubleshooting steps. It’s also worth checking the ESP32 board for any issues, such as a damaged pin or a software bug.
Relevant Entity: Faulty connections
- Keywords: LED failures, faulty connections, damaged LEDs, troubleshooting steps
- Description: LED failures can occur due to faulty connections or damaged components. Learn how to troubleshoot and identify the cause of LED failures to ensure that your display looks its best.
Troubleshooting Tip 3: Overheating
Overheating can occur when the LED strip or power supply is not adequately cooled, resulting in reduced performance and potential damage to the components. To prevent overheating, ensure that your power supply is rated for the appropriate power output and that your LED strip has sufficient cooling, such as heat sinks or fans. Additionally, consider reducing the maximum brightness or duty cycle of your LED strip to reduce heat generation. It’s also a good idea to monitor the temperature of your components and take action if they become too hot.
Relevant Entity: Cooling methods
- Keywords: overheating, cooling, power output, heat sinks, fans
- Description: Overheating can cause reduced performance and damage to your LED display components. Learn how to prevent overheating with adequate cooling and temperature monitoring.
Conclusion
By following these tips and troubleshooting steps, you can achieve optimal brightness and ensure that your WS2811 12V LED segments and ESP32 board are working together seamlessly. Remember to select the right power supply, adjust LED density, optimize your code, and address any issues that arise. With a little bit of effort, you can create stunning LED displays that are sure to impress.
Relevant Entity: Optimal brightness, seamless integration, troubleshooting steps
- Keywords: optimal brightness, LED displays, seamless integration, troubleshooting steps
- Description: Learn how to configure WS2811 12V LED segments with ESP32 for optimal brightness and seamless integration. Follow these tips and troubleshooting steps to create stunning LED displays.
Here’s an expanded version of the `
` tag:
4. Tips and Troubleshooting for Achieving Optimal Brightness with WS2811 12V LED Segments and ESP32
To get the most out of your WS2811 12V LED segments, it’s essential to configure them correctly and troubleshoot any issues that may arise. By following these tips and troubleshooting steps, you can achieve optimal brightness and ensure that your LED display looks its best. Here are some of the most important considerations for achieving optimal brightness with WS2811 12V LED segments and ESP32.
Tip 1: Choose the Right Power Supply
The power supply is a critical component of any LED display, as it provides the necessary power to light up the LEDs. When using WS2811 12V LED segments with an ESP32 board, it’s crucial to select a power supply that can deliver enough current to power all the LEDs without overheating or causing voltage drops. Look for a power supply that provides consistent power and can handle the total current draw of your LED strip. As a general rule of thumb, you should aim for a power supply that can deliver at least 20% more current than your LED strip requires. This ensures that your power supply can handle any fluctuations in current demand and prevent voltage drops that can reduce brightness.
Relevant Entity: Power supply current rating
- Why it’s important: A power supply that cannot deliver enough current will result in dim or flickering LEDs, or may even damage the components.
- Possible solutions: Consider using a power supply with a higher current rating, or reduce the number of LEDs in your display to reduce the total current draw.
Tip 2: Adjust LED Density
LED density refers to the number of LEDs per meter on your strip. A higher LED density will result in a brighter overall display, as more LEDs are illuminated in a given area. However, a higher LED density may also require a more powerful power supply and additional processing power from your ESP32 board. Consider adjusting the LED density to strike a balance between brightness and power requirements. For example, you can use a higher LED density for smaller displays and a lower density for larger displays to achieve consistent brightness.
Relevant Entity: LED density
- Why it’s important: LED density affects both the brightness and power requirements of your display.
- Possible solutions: Consider reducing the LED density for larger displays, or increasing the power supply current rating to support a higher LED density.
Tip 3: Optimize Your Code
Optimizing your code can help you achieve better performance and brightness from your WS2811 12V LED segments. Ensure that you are using an efficient library for controlling the LEDs, such as the FastLED library. Additionally, consider implementing techniques such as frame buffering or using a lower refresh rate to reduce the processing load on your ESP32 board and improve overall brightness. You can also experiment with different brightness levels and color settings to find the optimal combination for your display.
Relevant Entity: Code optimization
- Why it’s important: Inefficient code can result in reduced brightness, flickering, or other visual artifacts.
- Possible solutions: Use a well-optimized library for controlling the LEDs, such as FastLED. Consider implementing frame buffering or reducing the refresh rate to reduce the processing load on the ESP32 board.
Troubleshooting Tip 1: Voltage Drops
Voltage drops can occur when the power supply is unable to deliver enough current to the LED strip, resulting in reduced brightness or flickering. To troubleshoot voltage drops, check your power supply’s current rating and ensure that it is sufficient for your LED strip. Additionally, consider using thicker wiring or adding additional power injection points to maintain consistent voltage along the length of the strip. You can also use a voltage meter to measure the voltage at different points along the strip and identify any areas where the voltage drops significantly.
Relevant Entity: Power injection points
- Why it’s important: Voltage drops can result in reduced brightness or flickering, and can damage the components over time.
- Possible solutions: Use a power supply with a higher current rating, or add additional power injection points along the length of the strip to maintain consistent voltage.
Troubleshooting Tip 2: LED Failures
If some of your LEDs are not lighting up or are displaying incorrect colors, it may be due to a faulty connection or a damaged LED. Check your connections to ensure that they are secure and correct. If the issue persists, you may need to replace the faulty LED or consult the LED strip’s documentation for further troubleshooting steps. It’s also worth checking the ESP32 board for any issues, such as a damaged pin or a software bug.
Relevant Entity: Faulty connections
- Why it’s important: Faulty connections can result in reduced brightness or incorrect colors, and can damage the components over time.
- Possible solutions: Check all connections to ensure that they are secure and correct. Replace any damaged LEDs or consult the LED strip’s documentation for further troubleshooting steps.
Troubleshooting Tip 3: Overheating
Overheating can occur when the LED strip or power supply is not adequately cooled, resulting in reduced performance and potential damage to the components. To prevent overheating, ensure that your power supply is rated for the appropriate power output and that your LED strip has sufficient cooling, such as heat sinks or fans. Additionally, consider reducing the maximum brightness or duty cycle of your LED strip to reduce heat generation. It’s also a good idea to monitor the temperature of your components and take action if they become too hot.
Relevant Entity: Cooling methods
- Why it’s important: Overheating can result in reduced performance, damage to components, and even fire hazards.
- Possible solutions: Use a power supply with a lower power output rating, or add heat sinks or fans to cool the components. Reduce the maximum brightness or duty cycle of the LED strip to reduce heat generation.
Conclusion
By following these tips and troubleshooting steps, you can achieve optimal brightness and ensure that your WS2811 12V LED segments and ESP32 board are working together seamlessly. Remember to select the right power supply, adjust LED density, optimize your code, and address any issues that arise. With a little bit of effort, you can create stunning LED displays that are sure to impress.
Here’s an expanded version of the `
` tag:
4. Tips and Troubleshooting for Achieving Optimal Brightness with WS2811 12V LED Segments and ESP32
To get the most out of your WS2811 12V LED segments, it’s essential to configure them correctly and troubleshoot any issues that may arise. Here are some tips and troubleshooting steps to help you achieve optimal brightness and ensure that your LED display looks its best.
Tip 1: Choose the Right Power Supply
The power supply is a critical component of any LED display, as it provides the necessary power to light up the LEDs. When using WS2811 12V LED segments with an ESP32 board, it’s crucial to select a power supply that can deliver enough current to power all the LEDs without overheating or causing voltage drops. Look for a power supply that provides consistent power and can handle the total current draw of your LED strip. As a general rule of thumb, you should aim for a power supply that can deliver at least 20% more current than your LED strip requires.
Relevant Entity: Power supply current rating
When selecting a power supply, pay attention to its current rating. The current rating indicates how much current the power supply can deliver continuously. To calculate the total current draw of your LED strip, multiply the number of LEDs by the current draw of each LED. For example, if you have a 5-meter strip with 60 LEDs per meter, and each LED draws 60mA, your total current draw will be 18 Amps (60 LEDs/m \* 5m \* 60mA/LED).
Tip 2: Adjust LED Density
LED density refers to the number of LEDs per meter on your strip. A higher LED density will result in a brighter overall display, as more LEDs are illuminated in a given area. However, a higher LED density may also require a more powerful power supply and additional processing power from your ESP32 board. Consider adjusting the LED density to strike a balance between brightness and power requirements. For example, you can use a higher LED density for smaller displays and a lower density for larger displays to achieve consistent brightness.
Relevant Entity: LED density
When selecting LED strips, pay attention to the LED density. LED strips with a higher density (e.g., 144 LEDs/m) will be brighter than those with a lower density (e.g., 30 LEDs/m). However, higher density LED strips will also draw more power and require more processing power to control.
Tip 3: Optimize Your Code
Optimizing your code can help you achieve better performance and brightness from your WS2811 12V LED segments. Ensure that you are using an efficient library for controlling the LEDs, such as the FastLED library. Additionally, consider implementing techniques such as frame buffering or using a lower refresh rate to reduce the processing load on your ESP32 board and improve overall brightness. You can also experiment with different brightness levels and color settings to find the optimal combination for your display.
Relevant Entity: Code optimization
Optimizing your code can help reduce the processing load on your ESP32 board and improve overall brightness. Techniques such as frame buffering, lowering the refresh rate, and reducing the number of calculations per frame can help improve performance and reduce power consumption.
Troubleshooting Tip 1: Voltage Drops
Voltage drops can occur when the power supply is unable to deliver enough current to the LED strip, resulting in reduced brightness or flickering. To troubleshoot voltage drops, check your power supply’s current rating and ensure that it is sufficient for your LED strip. Additionally, consider using thicker wiring or adding additional power injection points to maintain consistent voltage along the length of the strip. You can also use a voltage meter to measure the voltage at different points along the strip and identify any areas where the voltage drops significantly.
Relevant Entity: Power injection points
Power injection points are locations along the LED strip where you can add an additional power supply to maintain consistent voltage. Adding power injection points can help reduce voltage drops and improve overall brightness.
Troubleshooting Tip 2: LED Failures
If some of your LEDs are not lighting up or are displaying incorrect colors, it may be due to a faulty connection or a damaged LED. Check your connections to ensure that they are secure and correct. If the issue persists, you may need to replace the faulty LED or consult the LED strip’s documentation for further troubleshooting steps. It’s also worth checking the ESP32 board for any issues, such as a damaged pin or a software bug.
Relevant Entity: Faulty connections
Faulty connections can cause LEDs to fail or display incorrect colors. Check all connections to ensure that they are secure and correct. You can also use a multimeter to test the continuity of the connections and identify any issues.
Troubleshooting Tip 3: Overheating
Overheating can occur when the LED strip or power supply is not adequately cooled, resulting in reduced performance and potential damage to the components. To prevent overheating, ensure that your power supply is rated for the appropriate power output and that your LED strip has sufficient cooling, such as heat sinks or fans. Additionally, consider reducing the maximum brightness or duty cycle of your LED strip to reduce heat generation. It’s also a good idea to monitor the temperature of your components and take action if they become too hot.
Relevant Entity: Cooling methods
Adequate cooling is essential for preventing overheating and ensuring optimal performance. Consider using heat sinks, fans, or other cooling methods to dissipate heat and maintain a safe operating temperature.
Conclusion
By following these tips and troubleshooting steps, you can achieve optimal brightness and ensure that your WS2811 12V LED segments and ESP32 board are working together seamlessly. Remember to select the right power supply, adjust LED density, optimize your code, and address any issues that arise. With a little bit of effort, you can create stunning LED displays that are sure to impress.
Here’s an expanded version of the `
` tag:
4. Tips and Troubleshooting for Achieving Optimal Brightness with WS2811 12V LED Segments and ESP32
To get the most out of your WS2811 12V LED segments, it’s essential to configure them correctly and troubleshoot any issues that may arise. By following these tips and troubleshooting steps, you can achieve optimal brightness and ensure that your LED display looks its best.
Tip 1: Choose the Right Power Supply
The power supply is a critical component of any LED display, as it provides the necessary power to light up the LEDs. When using WS2811 12V LED segments with an ESP32 board, it’s crucial to select a power supply that can deliver enough current to power all the LEDs without overheating or causing voltage drops. Look for a power supply that provides consistent power and can handle the total current draw of your LED strip. As a general rule of thumb, you should aim for a power supply that can deliver at least 20% more current than your LED strip requires.
- Relevant Entity: Power supply current rating
- Why it’s important: An insufficient power supply can lead to dim or flickering LEDs, or even damage to the components.
- Possible solutions: Look for a power supply with a higher current rating, or reduce the number of LEDs in your display.
Tip 2: Adjust LED Density
LED density refers to the number of LEDs per meter on your strip. A higher LED density will result in a brighter overall display, as more LEDs are illuminated in a given area. However, a higher LED density may also require a more powerful power supply and additional processing power from your ESP32 board. Consider adjusting the LED density to strike a balance between brightness and power requirements. For example, you can use a higher LED density for smaller displays and a lower density for larger displays to achieve consistent brightness.
- Relevant Entity: LED density
- Why it’s important: LED density affects both the brightness and power requirements of your display. Striking the right balance can help you achieve optimal brightness and reduce power consumption.
- Possible solutions: Experiment with different LED densities to find the right balance between brightness and power requirements. You can also try using a more powerful power supply or reducing the maximum brightness to accommodate a higher LED density.
Tip 3: Optimize Your Code
Optimizing your code can help you achieve better performance and brightness from your WS2811 12V LED segments. Ensure that you are using an efficient library for controlling the LEDs, such as the FastLED library. Additionally, consider implementing techniques such as frame buffering or using a lower refresh rate to reduce the processing load on your ESP32 board and improve overall brightness. You can also experiment with different brightness levels and color settings to find the optimal combination for your display.
- Relevant Entity: Code optimization
- Why it’s important: Inefficient code can lead to reduced performance and brightness, or even crashes and other errors.
- Possible solutions: Use an efficient library for controlling the LEDs, such as FastLED. Consider implementing techniques such as frame buffering or using a lower refresh rate to reduce the processing load on the ESP32 board. Experiment with different brightness levels and color settings to find the optimal combination for your display.
Troubleshooting Tip 1: Voltage Drops
Voltage drops can occur when the power supply is unable to deliver enough current to the LED strip, resulting in reduced brightness or flickering. To troubleshoot voltage drops, check your power supply’s current rating and ensure that it is sufficient for your LED strip. Additionally, consider using thicker wiring or adding additional power injection points to maintain consistent voltage along the length of the strip. You can also use a voltage meter to measure the voltage at different points along the strip and identify any areas where the voltage drops significantly.
- Relevant Entity: Power injection points
- Why it’s important: Voltage drops can result in reduced brightness or flickering, which can affect the overall appearance of your display.
- Possible solutions: Consider using a more powerful power supply, or adding additional power injection points along the length of the strip. You can also use thicker wiring to reduce resistance and improve voltage consistency.
Troubleshooting Tip 2: LED Failures
If some of your LEDs are not lighting up or are displaying incorrect colors, it may be due to a faulty connection or a damaged LED. Check your connections to ensure that they are secure and correct. If the issue persists, you may need to replace the faulty LED or consult the LED strip’s documentation for further troubleshooting steps. It’s also worth checking the ESP32 board for any issues, such as a damaged pin or a software bug.
- Relevant Entity: Faulty connections
- Why it’s important: Faulty connections can result in LED failures, which can affect the overall appearance of your display.
- Possible solutions: Check your connections to ensure that they are secure and correct. If the issue persists, you may need to replace the faulty LED or consult the LED strip’s documentation for further troubleshooting steps. It’s also worth checking the ESP32 board for any issues, such as a damaged pin or a software bug.
Troubleshooting Tip 3: Overheating
Overheating can occur when the LED strip or power supply is not adequately cooled, resulting in reduced performance and potential damage to the components. To prevent overheating, ensure that your power supply is rated for the appropriate power output and that your LED strip has sufficient cooling, such as heat sinks or fans. Additionally, consider reducing the maximum brightness or duty cycle of your LED strip to reduce heat generation. It’s also a good idea to monitor the temperature of your components and take action if they become too hot.
- Relevant Entity: Cooling methods
- Why it’s important: Overheating can result in reduced performance or even damage to the components. It’s important to ensure that your LED strip and power supply are adequately cooled to prevent overheating.
- Possible solutions: Ensure that your power supply is rated for the appropriate power output and that your LED strip has sufficient cooling. Consider adding heat sinks or fans to improve cooling. Additionally, reducing the maximum brightness or duty cycle of your LED strip can help reduce heat generation.
Conclusion
By following these tips and troubleshooting steps, you can achieve optimal brightness and ensure that your WS2811 12V LED segments and ESP32 board are working together seamlessly. Remember to select the right power supply, adjust LED density, optimize your code, and address any issues that arise. With a little bit of effort, you can create stunning LED displays that are sure to impress.


